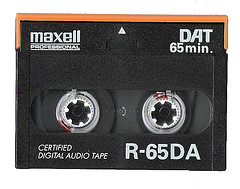
- Image by the Frankfurt School via Flickr
Some time ago, we wrote a quick post on the subject of digitizing your cassettes. We’re once again back on the digitization trail, adding more old tapes to our digital music collection and freeing up storage space and have more thoughts.
There are simple economics in this conversion. If you were to repurchase an album on CD or through an online music store, you’d pay at least $10 for it. If you have 10 albums, that is $100. Might as well invest the money in a good system to convert them, which will work for much more than 10. If you are a real audiophile, you may have hundreds of LPs or Audio Cassettes. Decide if any are not worth converting, or are worth investing in a new copy.
Make sure you have a decent sound card and a good quality record or cassette player. Also invest in cleaners. You want to capture the best quality for your digital copy. Get a head cleaner for your cassette player, and record cleaners and a good stylus for your record player.
For a middle of the road solution, you may wish to go with something from Ion Audio. This company has made a name for itself for its PC converters…record players, VCRS, and tape decks with built in digital converters that hook into your computer via a USB connection. They even have one with an iPod connection now. There are several other companies of varying quality.
Our software of choice for audio capture remains the open-source program Audacity, available for most operating systems. The Audacity wiki outlines the steps to convert from analog sources.
The basic steps for turning a cassette or record(LP) album into a multi-track CD or a series of digital music files are as follows:
- Connect the output of your analog player into the line input of your sound capture device, ie sound card, etc. If you have an integrated unit, plug the USB port into the computer. It will act like a sound card.
- Start recording in Audacity and record the entire album into the system.
- Save it in a temporary file. We learned that you should backup the file before you play with it the hard way.
- Highlight each song and select “Project -> Add Label at Selection” and type in a name for that track.
- Once you have separated the tracks, select “File -> Export Multiple” to export each selection as a separate file. Select your output format and output.
- We recommend you create two copies. One in the digital music format of your choice, and another that you burn as a standard CD as an archival copy. If you plan on chucking the tape, you want this for redundancy. You can also use a lossless file format on a DVD for your archival copy, such as FLAC. The goal is for the archival copy to have the best possible quality.
- Audacity allows you to enter metadata while exporting files. We recommend you do this. Metadata includes such thing as Album name, track name, artist, etc. This is essential in proper digital playback. Audacity only offers the basic categories. You may wish to use another program to add more tags to your files later(More on this in a future post).
- Add it to your music player or program and enjoy.
What do you think? Is this worth the effort, or should we just shell out for new albums? Bear in mind that playing a tape into a computer can be done while concentrating on something. Track marking and metadata does take some work, but it is negligible compared to the wonder of rediscovering your favorite lost albums.

![Reblog this post [with Zemanta]](http://img.zemanta.com/reblog_e.png?x-id=673a23d4-db6d-4e64-aa7a-0df3dce274ba)