
Gadget Wisdom

3 Responses

Keychron C3 Pro Review: A Budget Mechanical Keyboard That Still Makes Sense


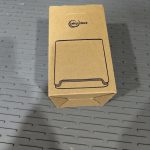
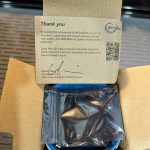
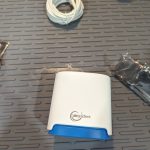
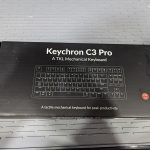
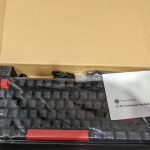
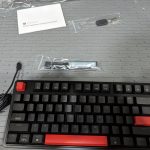
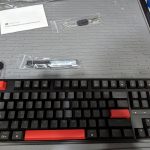
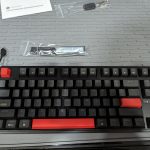
I have a problem. I keep buying mechanical keyboards. I only have one set of hands, and I don’t type with my feet, so why do I keep buying new ones? Partially because I’m hard on my keyboards. I gave up on non-mechanical keyboards years ago, but I didn’t buy really expensive ones. I bought a moderately priced one. And I keep looking for new options in that, and chasing the perfect typing experience. The pictures you see are the Keychron C3 Pro Keyboard. This particular model, initially an Amazon exclusive, retails for more, but I was able to get it for $29.99 on sale, which made it worth a try. I’m typing this post on it right now.

Quick Answer: Is the Keychron C3 Pro Worth It?

The Keychron C3 Pro is worth considering if you want an inexpensive mechanical keyboard that feels better than the price suggests and gives you useful enthusiast features like QMK/VIA support. The original non-hotswap version is still fine as a budget board, but the newer RGB hotswap version is the better choice if the price difference is small.

Version Best For Tradeoff
Original Keychron C3 Pro Cheap entry into mechanical keyboards Switches are not hotswappable
RGB hotswap C3 Pro Better long-term tinkering and switch swaps Costs a little more
RGB hotswap C3 Pro 8K Upgrade on the RGB Hotswap Costs only a few dollars more than the hotswap version
Higher-end Keychron boards More features, layouts, and materials More expensive than the C3 Pro

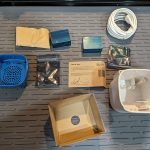
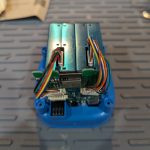
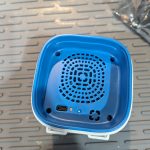
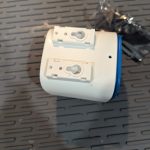
The keyboard comes in two switch varieties, red and brown. It offers a red backlight. The keycaps are replaceable, but the switches are not. Keychron makes plenty of keyboards that allow you to swap the switches as well. It is well-built for a budget keyboard, and neither version is overly loud, something people tend to comment on with these keyboards. It has many of the features a more expensive keyboard would.

I have historically bought budget mechanical keyboards, there are too many color switches, and more types coming every day. The feature that interests me particularly is something called QMK/VIA. The feature allows reprogramming the mapping of the keyboard. Never use your Scroll Lock key? Turn it into a Mute button for Zoom. Build macros into the keyboard instead of software. Certainly an interesting thing to play with. Add a few custom keycaps to remember what the key is…you can repurpose keys you barely use.

If you are interested in quieter typing, see my guide to building a silent keyboard on a budget.

There are upgraded models from Keychron, and competing models from other companies, but for the price and features, I doubt they can beat it…especially if you get it at $30.

Update: April 2024 – Keychron is now offering the C3 Pro in an RGB hot swappable variation for only $10 more than the regular price of the variation they originally released.

Update: 2026 – Keychron has introduced an updated model of the C3 Pro with 8K polling. If you are a gamer, you probably care about that, although a polling improvement is negligibly noticeable even for gamers. The 8K version does have additional case foam which may improve the sound, and Cherry PBT keycaps over OEM ABS Keycaps…so despite being at the lower end of their lineup, several premium improvements.

Published on January 26, 2024
Full Post
2 Responses

Review: AirGradient Open Air Outdoor Air Quality Kit

In my previous post, Finding The Right Outdoor Air Quality Monitor, I laid out my decision making process for purchasing the AirGradient Open Air outdoor air quality monitor kit.

Much to my surprise, right after I ordered the kit, which included 2 PMS5003T particulate sensors, and added an SGP40 NOx and VOC sensor, they stopped selling the kit I purchased. The new version bundles the SGP40 and instead of a second PMS5003T, a SenseAir S8 NDIR CO2 sensor.

The interesting thing about having an S8 and an SGP40 outside is that they are not measuring what you want them to measure per se. The CO2 sensor isn’t sensitive enough to measure exact CO2 in the atmosphere, better suited for inside, but like inside, elevated CO2 levels indicate other things.

So, to the device…I was able to easily assemble it in only a few minutes. Then came the software. By default, AirGradient loads it up with their own software that hooks up to their own dashboard. I loaded ESPHome on instead. Fortunately, multiple enthusiasts had configuration files for ESPHome, so it was set up in record time and reporting data, and mounted outside. With the air vents on the bottom, instead of my version, on the side, it should hopefully be resistant to the weather.

This was an incredibly simple build, supports customizable firmware, and was integrated into my Home Assistant and WeeWX installation just as quickly. I am already planning to purchase additional units for future projects.


Published on January 23, 2024
Full Post
0 Responses

WeeWX Version 5.0 Released- Should You Upgrade Now?

WeeWX released version 5 of its Weather Station software. While there were a lot of foundational improvements, as usually indicated by a major version change, there is little here in terms of showstopping features. Which is fine, this is a stable project, showstopping features are not what is expected. But a lot of essential updates and refactoring. A few highlights:

  • Minimum Python version is now 3.6. Considering the previous minimum hit end of life in January of 2020, this is sort of a necessity. Python 3.6 hit end of life at the end of 2021. Python is currently at 3.12, which was released in October of 2023 and will not hit end of life until 2028. But in my experience, if you don’t have a reason to drop support for an older version, is there a reason just because it isn’t supported any longer? It can be a slow gradual process. For me, WeeWX supporting 3.0 meant I didn’t have to install multiple versions of Python.
  • A new utility, weectl, replaces all the individual utilities.
  • Package installs now use systemd…Systemd has been a staple on Linux systems for over a year.
  • Several Enhancements for Derived Types, including a fix to an issue related to an Air Quality Index calculating extension

A worthy update which should improve the performance and stability of your weather tracking system.  While an upgrade is not immediately necessary, it would be worthwhile to update your installation of WeeWX to version 5.0 in the next few months.

Published on January 15, 2024
Full Post
0 Responses

What To Know When Considering Switching To A Smart Lock

In a previous post, I discussed digital locks. Digital locks are locks that can be opened with a keypad over a key, and are either electronic or mechanical. There are other types of non-keyed locks. Increasingly, the market is filled with smart locks. Smart locks are ones that can be operated remotely and cover a broad range of options. This consists of a few different options:

  • Complete replacement – this removes the entire lock mechanism and replaces it with the completely new mechanism. There are both deadbolt and knob replacement options here.
  • Retrofit deadbolt – This replaces the thumb turn of your deadbolt. The exterior appearance of the door, and the locking mechanism remain the same
  • Renter Options – These options attach on top of the thumb turn of deadbolts to allow for easy removal.

There are a few different interface options as well. And some have combinations of these

  • Key – Just because it is a smartlock doesn’t mean it can’t have a physical key as well
  • Keypad – Not only do some models offer built in keypads, some offer it as a separate unit you can attach to the doorframe, leaving no built in lock interface
  • Fingerprint – Biometric sensors
  • Bluetooth – These locks usually allow you to open/close with your phone only, or have a gateway/hub that allows you to do so over a network connection. These hubs, as well as the phone app to control the lock over bluetooth  are usually proprietary to the manufacturer.
  • Zigbee/Z-Wave – Zigbee and Z-Wave are two established home automation wireless protocols. They both require a hub/gateway. But unlike Bluetooth, there are a variety of devices with support for one or both of these protocols.
  • Matter over Thread – This is the new hot home automation standard, but the first lock supporting it was only released at CES 2024, so stay tuned. Like Zigbee and Z-Wave, it would require a hub/gateway.
  • Wi-Fi – Wi-Fi smart devices are problematic, because wi-fi can be rather battery intensive and smart locks are usually battery powered. The other negative for Wi-Fi is proprietary software.

You might note that a recurring issue for bluetooth and Wi-Fi locks, which you might initially prefer because you don’t have to add a gateway or a hub to connect it to your existing devices. The problem is support. You are relying on those manufacturers and their app. It could be argued you are relying on them anyway, because they made the device, but the biggest risk of smart devices in general is, if they rely wholly on a manufacturer app or a manufacturer cloud service, that it will eventually be discontinued, making your device useless. The local control options have issues of their own. Some manufacturers don’t implement the Zigbee or Z-Wave protocol consistently, which could create some issues depending on your hub/gateway’s support. We will write a bit about these protocols and gateways in future.


Published on January 11, 2024
Full Post
0 Responses

What Do Air Quality Monitors Measure?

In a previous post, I discussed my plans for buying an outdoor quality sensor. But, I didn’t explain what air quality actually entails. It isn’t just one thing. There are a lot of factors involved.  The US Environmental Protection Agency sets an air quality index for five major air pollutants:

  • ground-level ozone – created by chemical reactions between oxides of nitrogen (NOx) and volatile organic compounds (VOC). Ozone is most likely to reach unhealthy levels on hot sunny days in urban environments, but can still reach high levels during colder months. Ozone can also be transported long distances by wind.
  • particle pollution –  This most commonly includes PM2.5 and PM10. The 2.5 and the 10 indicates the size of of particulates and the measurement is of the concentration in the air
  • carbon monoxide – The most common source of CO outdoors would be cars, trucks and other vehicles or machinery that burn fossil fuels. Indoors, gas appliances, furnaces, and chmineys.
  • sulfur dioxide – The most common source of SO2 is burning of fossil fuels by power plants and other industrial facilities, as well as some heavy equipment.
  • nitrogen dioxide – NO2 forms when fossil fuels such as coal, oil, natural gas or diesel are burned at high temperatures. Again, cars are the most common one here.

These are all a concern indoors as well to some degree, but there are additional items that are a focus indoors:

  • carbon dioxide – CO2 is produced both naturally and through human activities, such as burning gasoline, coal, oil, and wood. People exhale CO2 which contributes to CO2 levels in the air. Why is this important indoors? It is often measured to quickly but indirectly assess approximately how much outdoor air is entering a room in relation to the number of occupants. During the pandemic, as a measurement of air circulation, using this as a way to determine how well ventilated a space is. When I was in one older building with a group of people, the bulding had a protocol that, if the levels grew too high, they would open windows to get it down.
  • formaldehyde – HCHO is found in some building materials, including composite wood, insulation, glues, paints and finishes, preservatives, pesticides, cigarette smoke, etc…
  • volatile organic compounds – emitted as gases from certain solids or liquids and are emitted by thousands of products such as paint, solvents, aerosol sprays, cleansers and disinfectants, air fresheners, automotive products, hobby supplies, dry-cleaned clothing, pesticides, copiers, etc.

Scary stuff. Most indoor air quality sensors contain a TVOC sensor, a PM2.5 sensor, and a CO2 or eCO2 sensor.

  • TVOC – because there are so many VOCs, it’s impossible to monitor them all. TVOC is a measurement used to measure the overall amount of VOCs in a space. It is not uniformly defined.
  • PM2.5 – As mentioned before, this is the size of the particulates. Anything PM10 or less is inhalable. Fine particulates are PM2.5 or less. Therefore, the PM10 reading contains the PM2.5 particulates as well. Combustion of gasoline, oil, diesel fuel or wood produces most of the PM2.5 pollution in the air, and PM10 also includes dust from construction sites, landfills and agriculture, wildfires and brush/waste burning, industrial sources, wind-blown dust from open lands, pollen and fragments of bacteria.
  • CO2 vs eCO2 – Estimated CO2 is a derived number based on the TVOC reading of a sensor. . If there are substantial concentrations of other VOCs present, the eCO2 reading would be higher than the actual CO2 level.

If you remember from that previous post, my on-order outdoor sensor has dual PMS5003T sensors, which measure PM2.5 and PM10, an SGP41 for VOC and NOx measurements, and I could opt to add a NDIR CO2 sensor. In fact, after I ordered, they switched from dual particulate sensors to 1 Particulate and one CO2 sensor for their outdoor kit. While elevated CO2 levels are usually used to derive indoor air circulation and quality, they can also be used outdoors to indicate other harmful gases that are often emitted with CO2 like SO2, NO and NO2 as they are often emitted with them.  Similarly, VOC is more commonly measured on indoor sensors, but can also appear outdoors near chemical factories, gas stations, natural gas leakages, and burning of garbage.

Air Quality is derived from the concentration of these items in the air and usually displayed as a number on the Air Quality Index. Different countries have different scales and formulas for calculating this. The US EPA’s scale is 0-500 and uses color coded ‘traffic light’ system to indicate good versus bad air.

  • 0-50 is Good(Green)
  • 51-100 is Moderate (Yellow)
  • 101-150 is Unhealthy for Sensitive Groups (Orange)
  • 151-200 is Unhealthy (Red)
  • 201-300 is Very Unhealthy (Purple)
  • Above 300 is Hazardous (Maroon)


Published on January 9, 2024
Full Post
1 Response

Throw Away The Key- Should You Be Switching to a Digital Lock?

In my exploration of home automation, locks and cameras are always the most concerning when it comes to privacy and security. With all the hacks and exploits you hear about, trusting a third-party with the keys to your house can be a scary thing. Having control of your security is important. Every time I’ve compromised on control in the name of convenience, I’ve regretted it.

So, rather than starting with Smart Locks, I’m starting with the concept of digital locks in general. I’ll get to smart locks in a subsequent post.

What are Digital Locks?

The term can be somewhat confusing, because a digital lock is not necessarily electronic, it can be mechanical. It refers to a lock that is opened using a combination keypad over a key.  Some people still prefer a mechanical digital lock. Why?

  • Electronic deadbolts are usually battery powered…what happens when the battery dies?
  • They often contain a motor to turn the bolt, and this part can wear out or otherwise over time meaning more frequent replacement.
  • Mechanical Options are also popular with Observant Jews as they would refrain from using electronic devices on Saturdays and holidays.

A digital lock replaces something you have…a key, with something you know…a code, although many of these locks still offer a key override. But this is nothing new. For years, one of the entries to my building has been through a garage, with a keypad on the outside to open it. More and more people are moving to locks that don’t require a traditional key for at least one entry into their home. In my follow-up where I get into Smart Lock technology, these do not just include built-in keypads, but using your phone to unlock, fingerprint, etc.

Digital locks have also become increasingly popular for short term rentals, such as AirBnB, as providing a code is easier than key exchange, and changing the code is a trivial matter. The Smart digital locks allow remote changing of the code and the others allow changing at the unit itself.

Are Digital Locks Safer than Keyed Locks?

The traditional keyed lock itself is inherently risky in itself. An expert lock-picker can pick a lock rather quickly. It is possible the absence of a key may actually be more secure, because there is nothing to pick.

But all this doesn’t mean you can’t bypass a digital lock in the same way most people bypass keyed locks, it just means you can’t do it with a pick. In most cases, the biggest security of a lock, is not the key. Most criminals are more likely to use brute force to break in over picking the lock. So, a key question in any lock purchase is hard it is to brute force it. For example, Consumer Reports tests their door locks with a 100 pound steel battering ram, and test both with and without a reinforced box strike plate. Their recommendation, by the way is to invest in reinforcing against a brute force attack as well as a hardened lock that is not easy to drill or otherwise break.

Again, that doesn’t mean a determined individual can’t get in. Security is often about making things harder, not impossible.


Published on January 7, 2024
Full Post
2 Responses

Finding the Right Outdoor Air Quality Monitor

In 2023, there were wildfires in Canada which blanketed the Northeastern United States with smoke. This marked a change in what parts of North America had to deal with this problem. This marked an overall increase in interest in air quality sensors.  I had looked into air quality sensors over the last few years, and there are a lot of options for indoor air quality sensors, but not quite so many for outdoor. Will talk a bit more about indoor air quality and how air quality is evaluated in a separate post.

My requirements were not achieved easily by most of the commercial options I explored. After failing to find one I liked, I built my own outdoor air quality sensor. It failed. So I rebuilt it…and it failed again…this time due to condensation somehow getting into the assembly. You can’t fully enclose the sensor because it needs air to flow over it, so there is this risk. So, after wasting two perfectly good sensors, I decided to fall back to something made by someone else as clearly I’m not that level of builder.

Requirements

  • Local access to the data as opposed to having to get data from my own network from a remote API. I feed everything into Weewx, so anything with local data can be fed that way.
  • User replaceable parts
  • More than just a PM2.5 sensor.


The Other Options

That initially took me to the Purpleair line of products. Purpleair offers a several sensors plus a community of enthusiasts and their devices can be polled directly. At the time I last looked, they had what they now call the Classic…which did not her user replaceable sensors…being as the PM5003 sensors they use only have a few years of lifespan, it meant replacing the entire unit at that point. Their new Flex and Zen models allow replacement of the sensors without having to replace the whole unit, but you have to get parts from them. And the unit is are just under $300 each.

I looked at Ecowitt as well. Ecowitt sensors are sold under several names in multiple countries. They have 3 air quality sensors, only one is rated for outdoor use, and is battery operated. I tried it, but on battery it has an update time of ten minutes…which created a variety of problems in my receiver missing the update. The indoor ones allow for USB power which increases the frequency of updates.

What I Picked

I explored a few additional choices and finally found something to try. A company in Thaland called AirGradient. AirGradient is an open-source platform with a strong community behind it. They launched their first outdoor design in December of 2022.

Pros

  • They design long lasting air quality monitors that are open source and open hardware…perfect for my philosophy on the matter.
  • The prices are reasonable, and if you don’t like them, you could in theory build it yourself.
  • They provide kits to various organizations.

Cons

  • 1-3 Weeks to Ship, and 2-3 weeks once shipped to most destinations

Their outdoor unit can be purchased as a DIY kit with all the parts or as a preassembled and tested unit. It consists of:

  • Dual PMS5003T air quality sensors. The T variation includes temperature and humidity sensors.
  • Based on an ESP32 C3 chip, which means you can install Esphome…the software platform I used for my homebrew sensors
  • A sensor slot for a third sensor, they offer a TVOC/NOx board for this, an SGP40
  • While the two PMS5003T sensors are for redundancy, one could be replaced by an CO2 sensor which they sell.

The fully assembled version includes either the SGP40 or the SGP40 plus a NDIR CO2 sensor included, as well as full testing of the unit with a report.

So, I’ve ordered one of these kits for $95 with all the parts. If it works, I may order more of their products. But, even if I never order from them again, I can get PMS5003 replacement sensors from a variety of vendors and keep the one I have going indefinitely. But, if it is as advertised, I feel another weeks long order coming on.

Their indoor sensor is equally impressive, and even includes an RGB LED system to act as an air quality ‘traffic light’, but will talk about that in future.


Published on January 2, 2024
Full Post
0 Responses

In Massachusetts, An Overloaded Grid Stops The March Of Solar Energy

You’ve run the numbers on your new solar project. You expect a great ROI on your solar panels. But then, when you go to get the permits, you are told that the grid can only support an installation half the size of what you had scoped out, and, now, the numbers no longer make sense.  The Boston Globe recently reported that this is the reality for many in the state.

Massachusetts has long been a national leader in solar adoption, thanks in large part to an innovative incentive program that drove early developments. But now, it’s a different narrative: there’s very little room on the electric grid for new projects to connect.Hundreds of projects, totaling more than 400 megawatts, are being held up while the state and utilities determine how much additional electric infrastructure is needed and where, and who should pay for those upgrades.

Our antiquated grid is not set up to add capacity, not set up for reverse metering, not set up for even monitoring energy usage remotely.  This is quickly becoming a hindrance to the adoption of solar in Massachusetts and beyond.


Published on January 1, 2024
Full Post
Vacation home remote monitoring setup with leak sensors, temperature alerts, cameras, and smart home notifications
0 Responses

Vacation Home Remote Monitoring: Cameras, Sensors, and Alerts

A vacation home creates a very specific kind of anxiety: everything is probably fine, but you are not there to know.

A pipe can freeze. A water heater can leak. The internet can go down. A smoke alarm can scream into an empty room. A guest, cleaner, or contractor can forget to close a door. None of these problems has to be dramatic on day one. The expensive part is finding out too late.

That is where vacation home remote monitoring helps.

The goal is not to turn a second home into a surveillance bunker. The goal is simpler: know when something important changes while you are away, and have enough warning to do something about it.

Quick Answer: What Should You Monitor In a Vacation Home?

The most useful vacation-home monitoring setup usually includes water leak sensors, temperature and humidity sensors, smoke and carbon monoxide alert awareness, door or window sensors, a few carefully placed security cameras, and some way to know if the internet or power has gone out.

The best setup is boring in the right way. It sends alerts early enough that you can call a neighbor, property manager, plumber, electrician, HVAC company, or contractor before a small problem becomes expensive.

Risk Useful Sensor or Device Why It Matters
Freezing pipes Temperature sensor Warns you before plumbing areas get dangerously cold
Water leaks Leak sensor near water heater, sinks, toilets, HVAC, or basement Small leaks can become major damage when nobody is home
Humidity problems Humidity sensor Helps catch damp basements, musty rooms, or storage problems
Break-ins or open doors Door/window sensors and exterior cameras Shows whether someone entered or left something unsecured
Fire or carbon monoxide Smart smoke/CO detector or alarm listener Alerts you when nobody is there to hear the alarm
Power or internet outage Router monitoring, UPS, or connected smart devices Lets you know when the monitoring system itself may be offline

Start With The Problems That Cause Expensive Damage

It is tempting to start with cameras. Cameras are visible, satisfying, and easy to understand. You open an app and see the house. That feels like monitoring.

But the most expensive vacation-home problems are often not cinematic. They are boring.

A slow leak under a sink. A failed furnace during a cold snap. A basement humidity problem. A sump pump that stopped working. A refrigerator or freezer that lost power. A router that went offline, leaving every smart device silently useless.

So I would start with sensors that warn you about damage, not just cameras that show you what already happened.

Water Leak Sensors: The First Thing I Would Install

If I were building a vacation-home monitoring setup from scratch, water leak sensors would be near the top of the list.

Water has a special talent for turning a small failure into a big bill. A leaking water heater, toilet supply line, washing machine hose, refrigerator line, sump area, or HVAC drain can do real damage before anyone visits the house again.

Good places for leak sensors include:

  • under sinks
  • near toilets
  • next to the water heater
  • behind or near a washing machine
  • near HVAC equipment or condensate drains
  • in a basement or crawlspace
  • near a sump pump
  • near a refrigerator with a water line

A leak sensor does not fix the leak. It gives you time. That is the whole point.

If a sensor alerts you while you are away, you can call someone before the water has had a few days to explore the flooring, drywall, cabinets, and your patience.I previously shared some thoughts on my favorite leak sensors.

Temperature Monitoring: The Pipe-Freeze Warning System

Temperature monitoring is one of the most useful vacation-home tools because the problem is easy to understand: if the house gets too cold in the wrong place, pipes can freeze.

The important phrase is in the wrong place.

The thermostat may say the main living area is fine while a basement corner, crawlspace, garage wall, utility room, or pipe chase is much colder. If you only monitor the comfortable part of the house, you may miss the area that actually matters.

Useful places for temperature sensors include:

  • near vulnerable plumbing
  • in a basement
  • in a crawlspace
  • in a utility room
  • near an exterior wall with pipes
  • inside a garage or mechanical area
  • in a wine cellar or storage area

For a deeper look at this part of the setup, see my guide to vacation home temperature monitoring.

Humidity Sensors: Less Dramatic, Still Useful

Humidity is not as exciting as a burst pipe, which is exactly why it can be easy to ignore.

But a damp basement, musty storage area, or poorly ventilated room can cause slow problems: mold, odor, warped materials, damaged stored items, or a general sense that something is wrong every time you walk in.

A humidity sensor is useful because it gives you a trend, not just a panic alert. If humidity is creeping up over time, you may have a drainage issue, HVAC problem, dehumidifier failure, or ventilation problem.

This is especially useful in houses that sit empty for stretches. Nobody is walking in and thinking, “That smells a little off.” The sensor becomes the person who notices.

Smoke And Carbon Monoxide Alerts When Nobody Is Home

A traditional smoke alarm is designed for people inside the house. That is the problem with a vacation home. Nobody may be there to hear it.

There are a few ways to deal with this:

  • install smart smoke and carbon monoxide detectors
  • use an alarm listener that recognizes existing smoke/CO alarms
  • tie smoke/CO alerts into a monitored security system
  • use a broader smart-home setup that can notify you remotely

The right answer depends on how much infrastructure you already have. If you already use a security system, monitored smoke/CO may be part of that. If you are building a lighter DIY setup, smart detectors or alarm listeners may be easier.

The key is that someone gets the alert outside the house.

Please see our guide to smoke and carbon monoxide detectors.

Door And Window Sensors: Not Just For Break-Ins

Door and window sensors are usually sold as security devices, but for a vacation home they are also useful for boring operational mistakes.

Did a cleaner leave a door ajar? Did a contractor come and go? Is a window open before a storm? Did a guest forget to lock up? Did someone enter when nobody was expected?

These are not always dramatic security incidents. Sometimes they are just small mistakes that matter because the house is otherwise empty.

At minimum, I would consider sensors on:

  • main entry doors
  • garage entry doors
  • basement or utility entrances
  • sliding doors
  • windows that are easy to leave open or access

If you rent the property occasionally or have cleaners, guests, contractors, or family members using it, entry history can be useful even when nothing bad happens.

For a deeper look at access alerts, cleaner/contractor visits, and which entry points matter most, see my guide to door and window sensors for a vacation home.

Security Cameras: Useful, But Do Not Overdo The Inside

Cameras are useful, but I would be careful about where they go.

For a vacation home, exterior cameras are usually the better starting point. They can show approaches, doors, driveways, garages, trash areas, utility access, and whether someone is on the property when they should not be.

Good camera locations may include:

  • front door or main entrance
  • driveway
  • garage or side entrance
  • back door or deck entrance
  • trash or utility area
  • walkway or obvious approach path

Indoor cameras are more complicated. They can be useful in a mechanical room, garage, basement, or unoccupied utility space. But in living areas, bedrooms, or rental situations, they can become intrusive very quickly.

The goal is awareness, not making the house feel creepy.

Power And Internet Monitoring: The System That Watches The Watchers

Remote monitoring depends on power and internet. That means you also need some way to know when the monitoring system itself has gone blind.

If every smart device goes offline at once, that may mean the internet is down. It may mean the power is out. It may mean the router crashed. Or it may mean the house is fine but your monitoring system is not.

Useful ways to monitor this include:

  • a router or network monitor that alerts when the connection drops
  • a UPS for the modem/router so brief outages do not take everything offline
  • smart plugs or devices that report offline status
  • a cellular backup option for more serious setups
  • a neighbor or property manager who can physically check if needed

This matters because a remote setup can create false confidence. You are not really monitoring the house if the system can go offline silently.

See out guide to the best UPS for your internet router to keep you online in a power outage.

A Practical Starter Setup For A Vacation Home

A good starter setup does not need to be complicated.

I would rather have a few well-placed sensors than a pile of gadgets nobody pays attention to.

  1. Put leak sensors where water damage starts. Start with the water heater, laundry area, sinks, toilets, HVAC equipment, sump pump, and basement trouble spots.
  2. Add temperature sensors near vulnerable plumbing. The living room temperature is useful, but the pipe area matters more.
  3. Add humidity sensors in basements or storage areas. This helps catch slow problems before they become musty expensive ones.
  4. Use exterior cameras instead of indoor overkill. Watch approaches, doors, driveway, garage, and utility areas.
  5. Add door sensors where mistakes happen. Main doors, garage doors, and sliding doors are usually the first places to monitor.
  6. Monitor internet or power indirectly. If everything disappears from the app, you need to know whether the house lost internet, power, or both.
  7. Have a response plan. Alerts are only useful if someone can act.

Vacation Home Monitoring Only Works If Someone Can Respond

This is the part that smart-home marketing tends to skip.

An alert is not a solution. It is a request for action.

If a leak sensor goes off, who can get inside? If the temperature drops near the pipes, who can check the heat? If the internet goes offline, how will you know whether it is a router problem or a power outage? If a camera shows someone at the door, who is supposed to do anything with that information?

Before adding more gadgets, make a short response list:

  • a neighbor with a key
  • a local property manager
  • a plumber
  • an HVAC company
  • an electrician
  • a cleaner or caretaker
  • a family member who can check the property

The best vacation-home monitoring setup is not the one with the most devices. It is the one that catches the problems you actually worry about and connects those alerts to someone who can do something.

What I Would Monitor First

If I had to prioritize, I would not start with the fanciest camera or the most elaborate smart-home dashboard.

I would start here:

  1. Water leaks, because water damage gets expensive fast.
  2. Temperature near vulnerable pipes, because freezing is predictable but still easy to miss from far away.
  3. Humidity in basements or storage areas, because slow problems are still problems.
  4. Smoke/CO alerting, because alarms are not very helpful if nobody hears them.
  5. Exterior cameras and door sensors, because they help confirm activity around the home.
  6. Power/internet status, because the rest of the system depends on it.

That is not the flashiest setup. It is the one most likely to save you from the problems that make second-home ownership stressful.

Related Guides

Frequently Asked Questions About Vacation Home Remote Monitoring

What is the best way to monitor a vacation home remotely?

The best way to monitor a vacation home remotely is to combine water leak sensors, temperature and humidity sensors, smoke/CO alerting, door sensors, exterior cameras, and a way to know whether power or internet has gone out.

Do I need cameras inside a vacation home?

Not necessarily. Exterior cameras are often more useful and less intrusive. Indoor cameras may make sense in a garage, basement, or mechanical room, but they can feel invasive in living spaces or rental areas.

How can I monitor a vacation home for freezing pipes?

Use temperature sensors near vulnerable plumbing, basements, crawlspaces, utility rooms, or exterior walls with pipes. Do not rely only on the main thermostat if the coldest area is somewhere else.

What sensors should I put in a second home first?

Start with water leak sensors, temperature sensors, humidity sensors, and smoke/CO alerting. Cameras and door sensors are useful, but water and temperature problems often cause the most expensive surprises.

What happens if the internet goes out at my vacation home?

If the internet goes out, many smart-home devices may stop reporting. That is why it helps to monitor router status, use a UPS for network equipment, or have a local person who can check the property if everything goes offline.

Published on December 27, 2023
Full Post
0 Responses

Key Strategies For Maximizing Your Solar Panel ROI

Solar energy is becoming increasingly popular as a renewable and cost-effective source of electricity. With the rising costs of traditional energy sources and the growing concern for the environment, more and more people are turning to solar panels to power their homes and businesses.

But investing in solar panels is a big decision, and it’s important to ensure that you get the most out of your investment. In this article, we’ll discuss key strategies for maximizing your solar panel ROI (return on investment) and how to use a solar panel ROI calculator to make informed decisions.

Why Is Solar Panel ROI Important?

Before we dive into strategies for maximizing your solar panel ROI, let’s first understand why it’s important.

Cost Savings

Solar panels on a rooftop

by Fer Troulik (https://unsplash.com/@fertroulik)

The primary reason for investing in solar panels is to save money on electricity bills. By generating your own electricity, you can reduce or even eliminate your reliance on traditional energy sources, which can save you thousands of dollars over the lifetime of your solar panels.

Return on Investment

Solar panels are a significant investment, and it’s important to know how long it will take for you to recoup that investment. By maximizing your solar panel ROI, you can ensure that you see a return on your investment in a reasonable amount of time.

Environmental Impact

In addition to cost savings, solar panels also have a positive impact on the environment. By using renewable energy, you can reduce your carbon footprint and contribute to a more sustainable future.

Key Strategies for Maximizing Solar Panel ROI

Now that we understand the importance of solar panel ROI, let’s explore some key strategies for maximizing it.

1. Choose the Right Solar Panel System

The first step in maximizing your solar panel ROI is to choose the right system for your needs. There are various types of solar panels available, and it’s important to consider factors such as efficiency, durability, and cost when making your decision.

It’s also essential to consider the size of your system. A larger system may generate more electricity, but it will also come with a higher upfront cost. It’s important to find the right balance between cost and energy production to maximize your ROI.

2. Optimize Your Solar Panel Placement

Solar panel placement

by micheile henderson (https://unsplash.com/@micheile)

The placement of your solar panels can have a significant impact on their efficiency and, therefore, your ROI. It’s important to ensure that your panels are placed in an area that receives ample sunlight throughout the day.

If possible, avoid shading from trees or buildings, as this can reduce the amount of energy your panels can generate. Additionally, consider the angle of your panels to maximize their exposure to the sun.

3. Take Advantage of Incentives and Tax Credits

Many governments and utility companies offer incentives and tax credits for those who invest in solar panels. These can significantly reduce the upfront cost of your system and increase your ROI.

Be sure to research the incentives and tax credits available in your area and take advantage of them when making your solar panel investment.

4. Monitor and Maintain Your System

To ensure that your solar panels are operating at their maximum efficiency, it’s important to monitor and maintain them regularly. This includes cleaning the panels to remove any dirt or debris that may be blocking sunlight and checking for any damage or malfunctions.

By keeping your system in top condition, you can ensure that you are getting the most out of your investment and maximizing your ROI.

Using a Solar Panel ROI Calculator

Solar panel ROI calculator

by Adam McCoid (https://unsplash.com/@adammakesfilm)

A solar panel ROI calculator is a valuable tool for anyone considering investing in solar panels. It allows you to input various factors such as system size, cost, and location to determine your potential ROI.

By using a solar panel ROI calculator, you can make informed decisions about your solar panel investment and ensure that you are getting the best possible return.

Real-World Examples of Solar Panel ROI

Let’s take a look at two real-world examples of solar panel ROI to better understand how it works.

Example 1: Residential Solar Panel System

John and Sarah are homeowners in California, and they are considering investing in a solar panel system for their home. After researching their options, they decide on a 5kW system that will cost them $15,000 upfront.

With the incentives and tax credits available in their area, they are able to reduce the cost to $10,000. They estimate that their system will generate $1,500 in electricity savings per year, resulting in a payback period of approximately 6.7 years.

After the payback period, they will continue to save $1,500 per year, resulting in a significant return on their investment.

Example 2: Commercial Solar Panel System

ABC Corporation is a manufacturing company in Arizona, and they are looking to reduce their energy costs and environmental impact. After researching their options, they decide to invest in a 100kW solar panel system that will cost them $200,000 upfront.

With the incentives and tax credits available in their area, they are able to reduce the cost to $150,000. They estimate that their system will generate $30,000 in electricity savings per year, resulting in a payback period of approximately 5 years.

After the payback period, they will continue to save $30,000 per year, resulting in a significant return on their investment.

Conclusion

Investing in solar panels is a smart decision for both cost savings and environmental impact. By choosing the right system, optimizing its placement, taking advantage of incentives, and using a solar panel ROI calculator, you can maximize your return on investment and reap the benefits of renewable energy for years to come.

Remember to regularly monitor and maintain your system to ensure that it continues to operate at its maximum efficiency. With these strategies in mind, you can confidently make the switch to solar and enjoy the many benefits it has to offer.

Published on December 27, 2023
Full Post

Get New Posts By Email