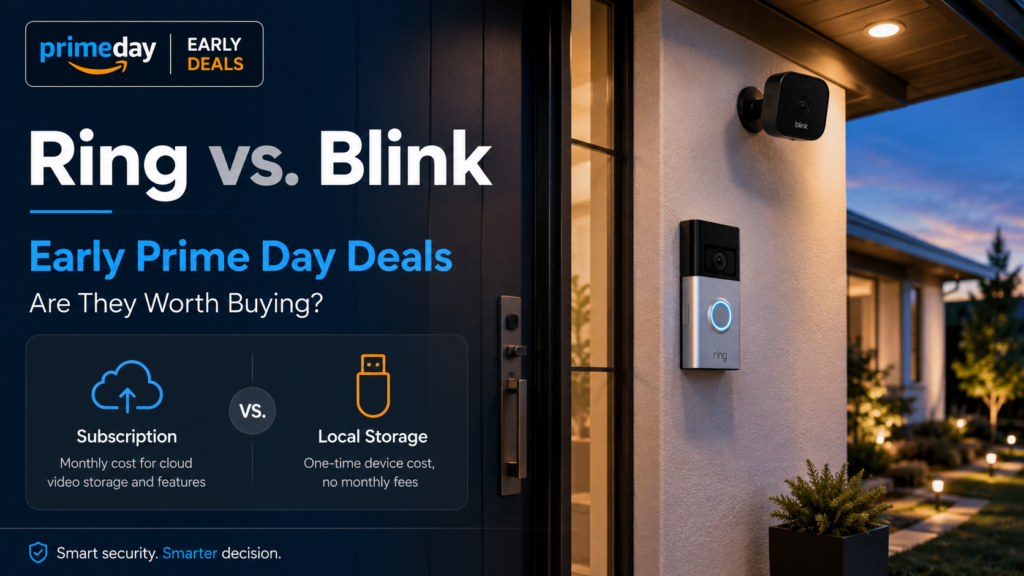
But the better question is not whether a Ring or Blink camera is on sale.
The better question is whether the deal is actually worth buying once you include subscriptions, recording limits, local storage, battery life, and what you want the camera to do.
Prime Day 2026 runs from June 23 through June 26, but early deals are already appearing. If you are looking at a discounted Ring doorbell, Blink Outdoor camera, Blink floodlight camera, or Ring outdoor camera, this is the moment to slow down before clicking buy.
Quick Answer: Are Early Prime Day Ring and Blink Camera Deals Worth It?
Ring and Blink camera deals can be worth it if you want an easy, inexpensive camera system and understand the subscription tradeoffs. Blink is usually the better budget choice if you want some local recording options. Ring is usually better if you already use Ring devices, want a polished app experience, or care more about convenience than avoiding a subscription.
The key difference is recording. Blink has a local-storage path through Sync Module hardware, using USB storage with Sync Module 2 or microSD storage with Sync Module XR. Ring cameras can still be used without a subscription for some basic features, but recorded video history and saved clips generally require a Ring Protect plan.
| Choice | Best For | Main Tradeoff |
|---|---|---|
| Blink | Budget camera setups, simple monitoring, some local storage options | Less polished and more limited than higher-end systems |
| Ring | Easy doorbell/camera setup, polished app, existing Ring households | Recording and many useful features require a subscription |
| Local-first alternatives | People who dislike subscriptions or want more control | More setup, more decisions, less “just works” convenience |
Why Ring and Blink Deals Are Complicated
A discounted smart camera is not just a camera purchase. It is often a system decision.
The camera itself may be cheap. The ongoing plan may not be. That does not automatically make Ring or Blink a bad deal. It does mean the sale price is only part of the math.
Before buying, ask yourself:
- Do I need recorded clips, or only live view?
- Do I want to avoid monthly subscriptions?
- Do I already use Alexa, Ring, or Blink devices?
- Is this for a primary home, vacation home, garage, or rental property?
- Do I need indoor cameras, outdoor cameras, a doorbell, or all of them?
- Do I care about local storage?
- Do I want the easiest setup, or the most control?
Those answers matter more than the sale badge.
Disclosure: This article may contain affiliate links. If you buy through these links, Gadget Wisdom may earn a commission at no extra cost to you.
Blink Cameras: The Budget-Friendly Option
Blink is usually the more budget-friendly Amazon camera brand.
That does not mean Blink is always better. It means Blink tends to make more sense if you want basic cameras at a lower hardware cost and are willing to live with a simpler system.
The biggest advantage is that Blink has a local-storage path. With compatible Blink cameras and the right Sync Module, you can save clips locally to USB or microSD storage instead of relying only on cloud recording. That makes Blink more interesting for people who do not want another monthly subscription.
That said, local storage is not the same thing as a full professional camera system. You are still buying an inexpensive consumer camera setup. The app, features, and responsiveness may not satisfy someone who wants a serious local NVR or advanced smart-home integration.
Blink Deals I Would Check First
If I were looking at early Prime Day Blink deals, I would focus on outdoor cameras, doorbells, and bundles that include the hardware needed for the setup I actually want.
You can see the current Blink camera and doorbell deals on Amazon.
- Blink Outdoor 2K Plus — the first Blink deal I would check if you want a multi-camera outdoor setup.
- Blink Outdoor XR — worth comparing if range or outdoor placement is the main issue.
- Blink Wired Floodlight Camera — a better fit for a driveway, garage, side yard, or exterior area where lighting matters.
- Blink Battery Doorbell — useful if you want a lower-cost doorbell camera and do not want to depend on existing wiring.
- Blink Wired Doorbell — worth comparing if you already have doorbell wiring and want to avoid battery charging.
For Blink, pay close attention to the bundle. A deal that includes the right Sync Module or multiple cameras may be more useful than the lowest-priced single camera.
Ring Cameras: Easy, Polished, And Subscription-Heavy
Ring is the better-known brand, especially for video doorbells.
The Ring app is polished. Setup is easy. The doorbells and cameras are mainstream enough that many people already understand them. If you want a simple consumer security-camera setup and do not mind paying for Ring Protect, Ring can be a very reasonable choice.
The subscription is the catch.
Without a Ring Protect plan, you can still use certain basic features. But if you want recorded video history, saved clips, and many of the features people expect from a security camera, assume the subscription is part of the real cost.
Ring Deals I Would Check First
If I were looking at Ring deals, I would start with the doorbell and outdoor-camera deals. Ring makes the most sense when you want simple setup, an easy app, and you are comfortable with the subscription model.
You can see the current Ring camera and doorbell deals on Amazon.
- Ring Battery Doorbell — the most obvious Ring product to consider if you want a simple doorbell camera.
- Ring Outdoor Camera — useful if you already use Ring and want outdoor coverage in the same app.
- Ring Doorbell deal — compare carefully against the Battery Doorbell and make sure you know which model and bundle you are buying.
If you are starting from zero and want to avoid subscriptions, Ring is a harder sell. If you already use Ring Protect and want another device in the same app, the deals may make more sense.
Ring vs. Blink: Which One Should You Buy?
I would choose based on what you are trying to avoid.
If you are trying to avoid subscriptions, start by looking at Blink or a local-first alternative. Blink is not a perfect no-subscription system, but it at least gives you a local-storage path with the right hardware.
If you are trying to avoid complexity, Ring may be the better choice. Ring is simple, familiar, and polished. The tradeoff is that you should assume the subscription is part of the real cost if recording matters to you.
| Situation | Better Fit | Why |
|---|---|---|
| You want the cheapest multi-camera setup | Blink | Lower hardware cost and useful bundles |
| You want a polished doorbell camera | Ring | Strong app experience and mature ecosystem |
| You want recording without a monthly plan | Blink or local-first alternative | Ring recording depends heavily on Ring Protect |
| You already use Ring Protect | Ring | Adding more Ring devices may be simpler |
| You want a serious local camera system | Neither | Look at PoE cameras, NVRs, or local smart-home setups |
When I Would Skip Ring And Blink
I would skip both Ring and Blink if your main goal is a serious local security-camera setup.
There are other systems that offer more local control, better continuous recording options, higher camera quality, local NVR support, or better integration with platforms like Home Assistant. Those systems are more work. They are also less dependent on a company subscription plan.
That is the tradeoff.
Ring and Blink are easy. Easy has value. But easy often means you are accepting the company’s app, cloud, subscription, and feature limits.
If you want a camera system for a vacation home, rental property, garage, or primary home and you mostly care about quick alerts, Ring or Blink may be fine. If you want long-term local recording and full control, they may be the wrong place to start.
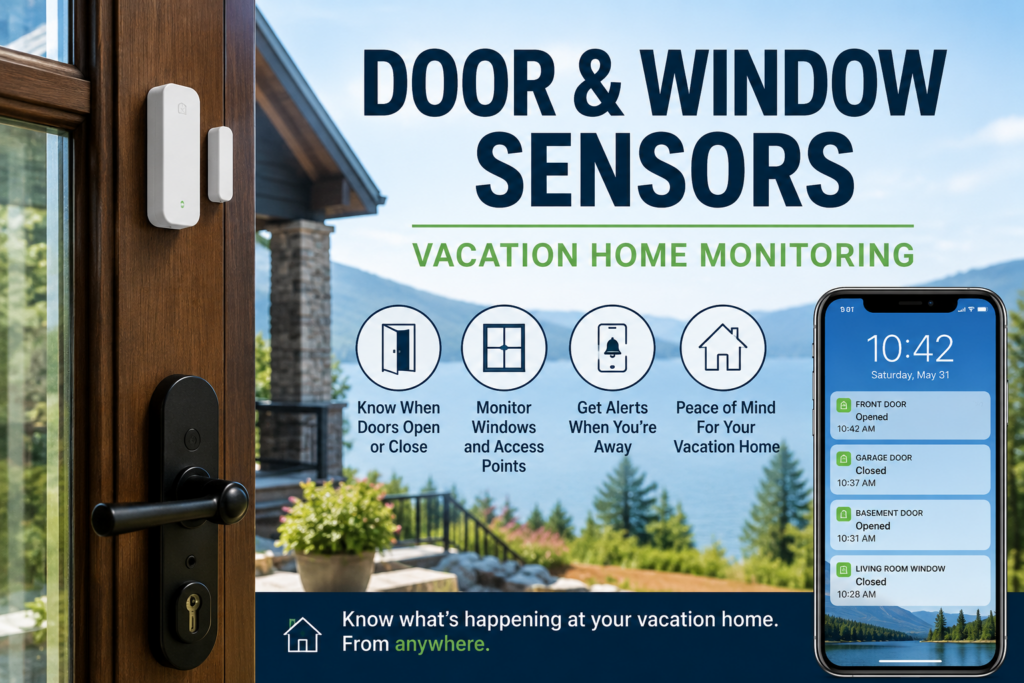
Are These Good For A Vacation Home?
Ring and Blink can both be useful for a vacation home, but I would not treat cameras as the entire monitoring plan.
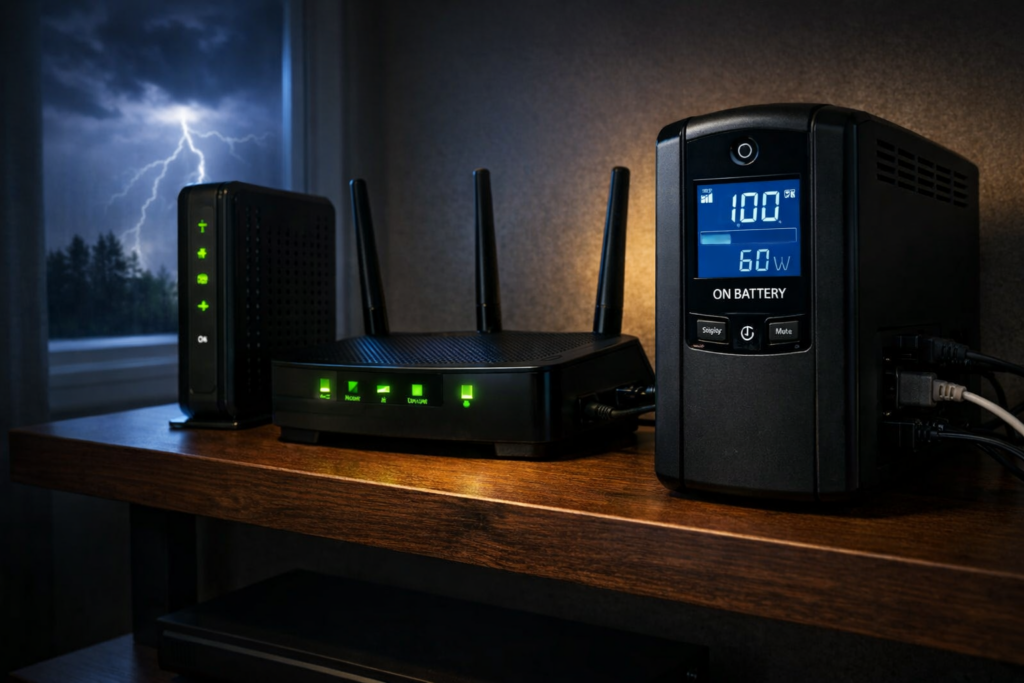
Cameras can show you doors, driveways, garages, decks, or outdoor activity. They do not tell you everything. A camera will not detect a hidden water leak, a freezing pipe, a humidity problem, or whether your router went offline unless you build the rest of the system around it.
If the camera is part of a broader second-home setup, think about:
- router and modem backup power
- water leak sensors
- temperature and humidity sensors
- door and window sensors
- smoke and carbon monoxide alerts
- whether someone can respond if an alert comes in
For the broader setup, see my guide to vacation home remote monitoring.
How To Judge An Early Prime Day Camera Deal
Do not judge the deal only by the percent off.
Before buying, check:
- Is this the current model? Older models can still be good, but the discount should reflect that.
- Is the Sync Module included? This matters for Blink local storage and multi-camera setups.
- How many cameras are in the bundle? Some deals look similar but include different quantities.
- Does it require a subscription for what you want? This is especially important with Ring.
- Is it battery-powered, wired, or plug-in? Battery cameras are easier to place but require battery management.
- Will Wi-Fi reach the camera location? A cheap outdoor camera is not useful if the signal is weak.
- What happens if the internet goes down? Cloud-dependent cameras may lose much of their usefulness.
A good deal is not just a lower price. It is the right hardware for the way you plan to use it.
My Take
If I were buying during the early Prime Day sale, I would look at Blink first for budget outdoor cameras and places where local storage matters.
I would look at Ring first for a simple doorbell camera or a household that already uses Ring Protect and wants everything in one app.
I would not buy either one expecting a professional local camera system. That is not what these are.
These are easy consumer cameras. If the sale price is good and the subscription/storage tradeoff matches what you want, they can be worth buying. If you are only buying because the deal looks big, slow down and do the subscription math first.