Gadget Wisdom

Category: Homelab

0 Responses

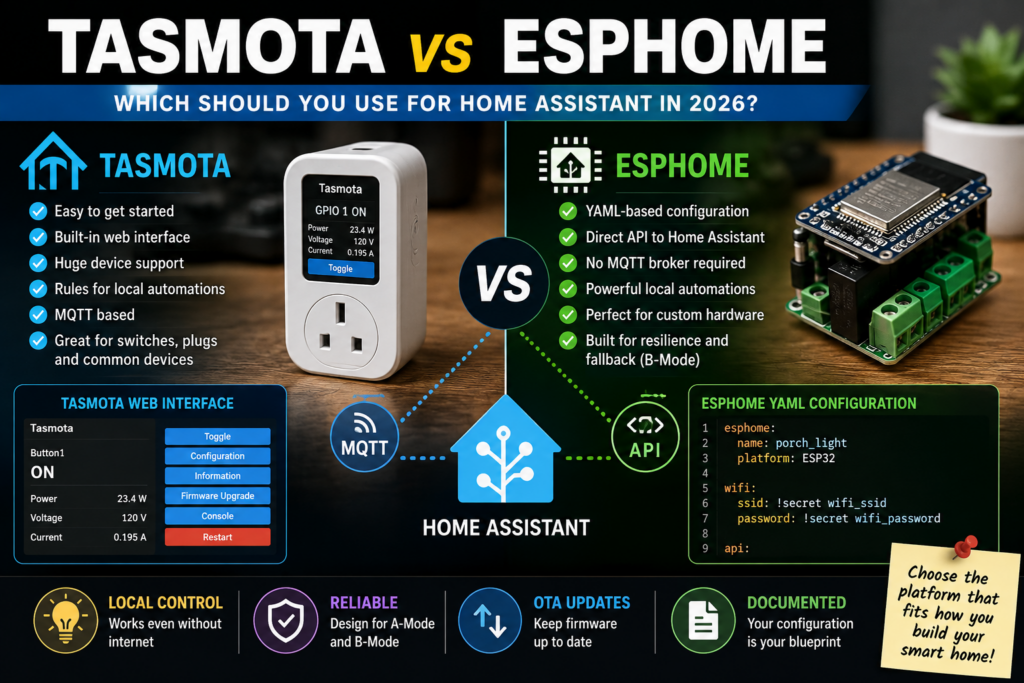
Tasmota vs ESPHome: Why I’m Moving My Smart Home Devices

I have been running smart light switches for a while, and using the Tasmota firmware on them. Let’s be clear, Tasmota is a great piece of software. It’s reliable, open-source, packed with features, and in many cases, works right out of the box.

But over time, I found myself chafing at the limits.

Tasmota, for all its strength, is kind of like a Swiss Army knife. It is not always the most efficient or most effective for your needs. You either need to use its limited syntax, or rely on external systems.

So, recently I’ve been migrating a lot of my lights and plugs over to ESPHome, a platform I was already using for sensors.

Quick Answer: Tasmota vs ESPHome

Tasmota is still a great choice if you want reliable open-source firmware that works quickly, has a web interface, and supports a wide range of devices. ESPHome is better when you want tighter Home Assistant integration, custom YAML configuration, and device-specific logic that runs locally on the device.

Feature Tasmota ESPHome
Best for Quick firmware replacement with lots of built-in features Custom Home Assistant-focused smart home devices
Configuration Web UI, templates, commands, rules YAML files compiled into custom firmware
Local device logic Possible, but more limited Strong for buttons, timers, sensors, and device-specific behavior
Learning curve Easier to start More setup, but more control
My use case Still useful for simple devices Better for my more customized lights, plugs, and sensors

Why I’m Moving to ESPHome

ESPHome is more modular and streamlined than Tasmota. You don’t flash a generic firmware – you compile a custom one. The configuration of the device is set in YAML, a text format, you define exactly what the device needs. What sensors or relays are connected, how buttons behave, what actions they trigger, and more.

  • Want a web interface? That’s a component.
  • Need to calculate sunrise and sunset for dawn/dusk functionality?
  • Need to sync to an NTP time server for that dawn/dusk?
  • Want two ESPHome devices to talk to each other independently?
  • Track bluetooth devices?
  • Communicate over a VPN?

There are components for all of these. I was able to fine-tune the behavior of each smart switch and plug, beyond what I could do in Tasmota. I installed dawn to dusk programs on external lights. I tied a light into a remote motion sensor, also running ESPHome to activate a hallway light. I even built countdown switches that automatically turn off after a set period of time.

Why ESPHome Feels Better For Local Smart Home Control

One of the major advantages of Home Assistant is local control. Both Tasmota and ESPHome allow for some logic on device, but with Tasmota that logic is very limited. You don’t have to rely on Home Assistant or Node Red to create automations.

That said, not all logic belongs on-device. I don’t use ESPHome for high-level automation or multi-device coordination. That’s where Home Assistant or even Node Red still shines. But for device-specific behaviors—like button presses, countdown timers, or dusk/dawn triggers – having that logic on the device itself makes the whole system more resilient. No lag, no missed automations if those systems are offline.

When I’d Still Use Tasmota and When I’d Choose ESPHome

Switching from Tasmota to ESPHome takes time. There’s a learning curve to create the configuration files. But once you get the hang of it, the freedom to define exactly how your smart devices behave is game changing.

If you are looking for something to install on your first switch, Tasmota is still a great place to start. But if you reach the limits of what you can do with it, it might be time to switch over to ESPHome. Some things take effort, but with that effort you can build a smart home where every piece is smart on your terms.

Published on August 20, 2025
Full Post
0 Responses

Vacation Home Temperature Monitoring: Remote Sensors for Peace of Mind

Vacation Home Temperature Monitoring

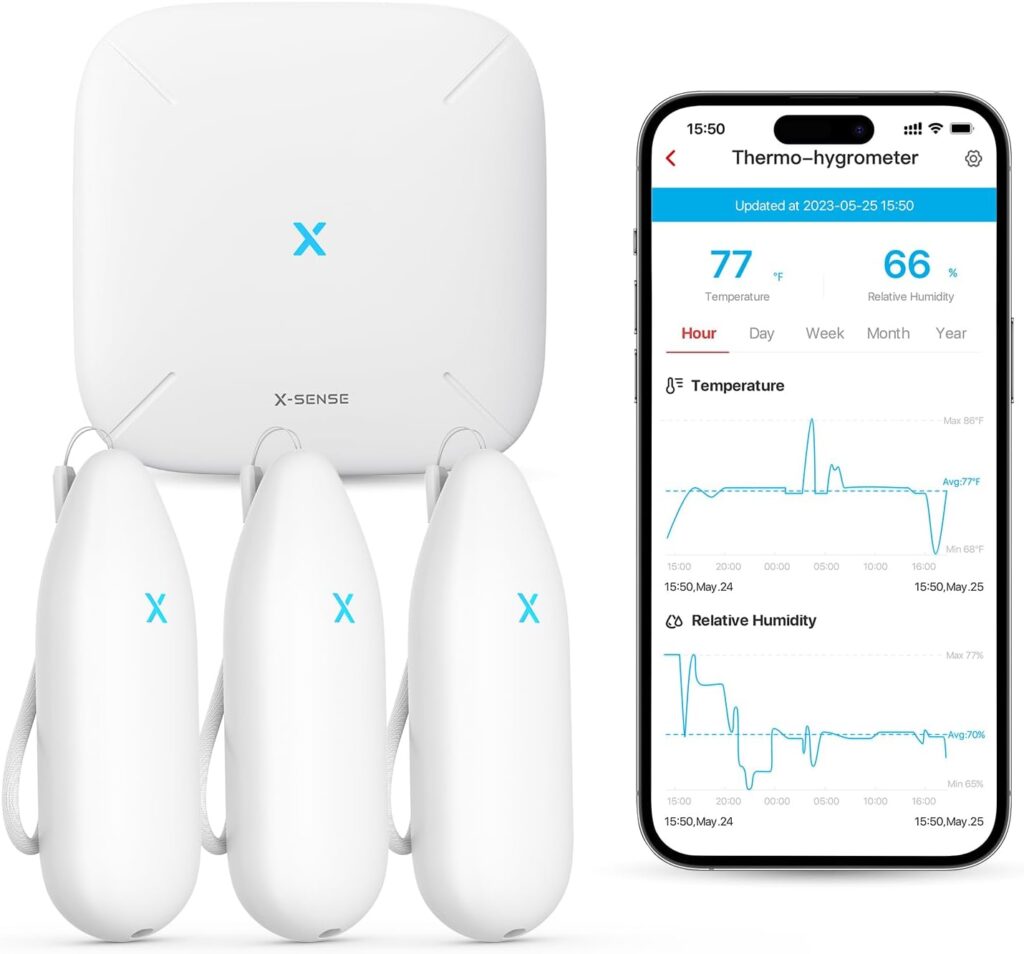
Owning a vacation home or a second home is a wonderful luxury, but managing your home when you are far away comes with its own set of challenges—especially when it comes to maintaining proper environmental conditions. This is where the X-Sense Wi-Fi Hygrometer Thermometer(Model STH54) becomes an invaluable tool.

Quick Answer: How Do You Monitor a Vacation Home Temperature Remotely?

The easiest way to monitor a vacation home temperature remotely is to use a Wi-Fi temperature and humidity sensor with phone alerts. Place sensors near plumbing, basements, wine storage, utility rooms, or other areas where freezing, overheating, or humidity problems could cause damage while you are away.

Monitoring Area Why It Matters What To Watch
Near plumbing Freezing pipes can burst and cause major water damage Low-temperature alerts near vulnerable pipes
Basement or crawlspace Humidity and temperature swings can signal trouble Humidity spikes, freezing risk, damp conditions
Wine cellar Wine is sensitive to heat and humidity changes Temperature and humidity range alerts
Utility room Heating or HVAC problems may show up here first Unexpected temperature drops or overheating
Main living area Confirms the home is staying within a safe range General temperature and humidity trends

With its ability to monitor both temperature and humidity, this smart device allows you to keep an eye on your property remotely, offering peace of mind and helping you avoid costly issues. Here’s how I use this vacation home temperature monitoring solution to protect my distant home.

Monitoring a Wine Cellar From Away

One of the first places I installed the X-Sense Wi-Fi Hygrometer was in my wine cellar. Proper storage conditions are critical for preserving the quality of wine, and even slight fluctuations in temperature or humidity can have a significant impact.

Using the hygrometer, I’m able to track real-time temperature and humidity levels from my phone, no matter where I am. The app’s customizable alarms notify me immediately if conditions deviate from my set parameters, ensuring my wine is always stored in ideal conditions.

Watching for Freezing Pipes Before They Burst

Another strategic placement for the sensor was near plumbing. In colder climates, pipes are at risk of freezing and bursting when temperatures drop too low, and when gone for months there is no need to keep the house fully heated. Even though I drain my pipes and turn off the main, I want to be sure that these areas of the house don’t drop too low. By positioning the X-Sense hygrometer near vulnerable areas, I can monitor temperatures remotely and receive alerts if they approach freezing. This gives me time to act, whether it’s adjusting the home’s heating system(also remotely) or contacting someone nearby to check on the property.

Setting Up Wi-Fi Temperature Sensors

Setting up the X-Sense Wi-Fi Hygrometer was surprisingly simple. After unboxing the device, I downloaded the companion app and connected the base station to my home’s Wi-Fi network.  Then I was able to pair each of the three sensors with the base station and place them. Within minutes, I was able to view data, set alarm thresholds, and start monitoring my property. The intuitive app makes it easy to adjust settings and view historical data, providing a comprehensive view of environmental conditions over time.

Why Remote Temperature Alerts Matter

With the X-Sense Wi-Fi Hygrometer, being far away from my second home has become significantly less stressful.
Knowing that I’ll be notified of any potential issues gives me peace of mind, whether I’m hundreds of miles away or just down the road. It’s a small investment that has already paid off by helping me maintain optimal conditions for my property and prevent potential disasters.

If you’re looking for a reliable, easy-to-use solution to monitor temperature and humidity at your vacation home, the X-Sense Wi-Fi Hygrometer is a tool worth considering. I have found it to be an indispensable tool for vacation home temperature monitoring.

If you are building a broader monitoring setup, you may also want to read my guide to securing a vacation home with remote monitoring.

Published on January 16, 2025
Full Post
0 Responses

How To Try Out ClassicPress- A Throwback WordPress Alternative

I choose to self-host my site on a VPS. But I know that isn’t for everyone. If you can install WordPress on a shared host, ClassicPress installs the same way. For that reason, many people shared hosting services have a one-click ClassicPress install alongside their WordPress one-click install.

ClassicPress has less of an admin tax than WordPress…the way WordPress used to be. An administration tax is the time you spend administering a site over actually creating content for it. WordPress and ClassicPress both have some of this…but as WordPress moves farther and farther away from its roots, you end up having to update things to work well with the latest. This means that while right now, most WordPress plugins work with ClassicPress…that might increasingly not be the case….at least not without a small amount of work.

For my own plugins, I intend to test them against both systems for the foreseeable future. But as WordPress drifts further away from its roots, and therefore from ClassicPress, people writing plugins that can work without the block editor dependencies becomes increasingly important.

If you already have a WordPress Site, you can install the ClassicPress migration plugin. You can install ClassicPress by following the other options here.

Published on December 24, 2024
Full Post
0 Responses

As WordPress Leader Rants, Time To Reach For a Classic With ClassicPress

On my personal website, I do occasionally talk about the future of WordPress and my issues in developing plugins for my own use. But I also maintain the Gadget Wisdom infrastructure. So, recently, I wrote about switching my personal site to ClassicPress. I’m going to continue to write about that there, but wanted to cover a little of this here, in a different context.

Recent drama at WordPress finds a lot of people exploring exits from the community. WordPress drama is not a new thing. There were many times during the transition from WordPress 4.9 to 5.0 I considered leaving. But having built many things on top of a platform, I opted to remain.

More recently, I switched this site over to ClassicPress as well, a fork of WordPress. ClassicPress has a simple plugin to migrate WordPress instances…it will even let you revert back if need be. So, while the drama over on the WordPress side may continue, I get to keep the platform without the elements that frustrate me. There are concerns about ClassicPress as well. WordPress powers a significant percentage of identifiable websites. Forks of projects do not always survive, but there are many examples where they do.

ClassicPress is a fork of WordPress that removes the block editor…WordPress’s big change in Version 5. It retains a traditional editor, which many people prefer, and continues to iterate in that direction. As a result, it is leaner and somewhat more performative. It is WordPress as it used to be…but also with improvements…but in a completely different direction than WordPress while maintaining compatibility. The only problem is that the project doesn’t get the attention it could, especially now that people are questioning the governance of WordPress. But it is WordPress…like it used to be…before it went hard in another direction.


Published on December 24, 2024
Full Post
0 Responses

There Is No Place Like Homelab- Why You Need One In Your Life

When I started writing about technology, I don’t think the term homelab existed. I only started hearing it more recently. But like many things, I apparently had one before the term existed. Homelab usually refers to a computer or computers used within your home to experiment. People self-host applications in their homelabs, they build network attached storage, they host and serve their media files. Some people use it to experiment with technologies they might need to or wish to use professionally.

The communities of hobbyists and tech enthusiasts have changed a lot over those years. I still remember when buying a single megabyte of RAM was a big deal, or having a whole 40MB of hard drive space. There is so much out there to experiment with and I’ve been running a homelab without even realizing that’s what I could call it.

A homelab can be as simple as an old retired computer you run a server on. Or it could be a custom built system for purpose. I’ve had both. And I’ve repurposed numerous times before the end of computer hardware’s life cycle.

I’ve written a lot about topics that fall under that previously…self-hosting, storage, media, etc. So, thinking about this under the banner of homelab gives me the chance to talk about this idea of running your own applications on either your home server, or server space you rent outside your house, and the infrastructure I’ve created to do just that. And there is always a new application or new need to experiment with.

A quick warning though. If you experiment in your own home, you do have to be aware that…should you share that home with someone else, that your experiments may affect their quality of life. For example, if you are playing with home automation, they might not appreciate if you cover up the light switches so you can use smart bulbs they can’t control.

That said, let’s get started.

Published on December 4, 2024
Full Post
0 Responses

Sitting At The Docker By The Drive Bay: TrueNAS Scale Switches to Docker – But Why Docker?

As part of my continuing, Building My NAS series, I wrote about choosing TrueNAS as the software powering my homebuilt network attached storage device. One of the features of TrueNAS Scale has been the ability to run various self-hosted cloud applications. In the latest version of TrueNAS, the backend for those applications switches to Docker. Docker is arguably the most popular way to deploy pre-built complete applications. It not only isolates each application into its own container, but it simplifies the process of deploying and configuring them.

While the number of applications offered directly in TrueNAS, the switch to Docker allows for tens of thousands of public docker files to set up many more applications than are officially supported.

After years of installing applications on the servers that host them, I’ve reluctantly embraced Docker as a solution for when specific combinations are needed, such as specific versions of software. Looking at why other people use it, it is the…”it just works” philosophy. You can install an application, reinstall it cleanly, isolate it from other things…simplicity has its advantages.

It makes Docker a great way to quickly switch from third party services to your own. And combined with a system like TrueNAS providing storage solutions, it can create the basis for a complete solution for yourself and your home.

Published on December 1, 2024
Full Post
0 Responses

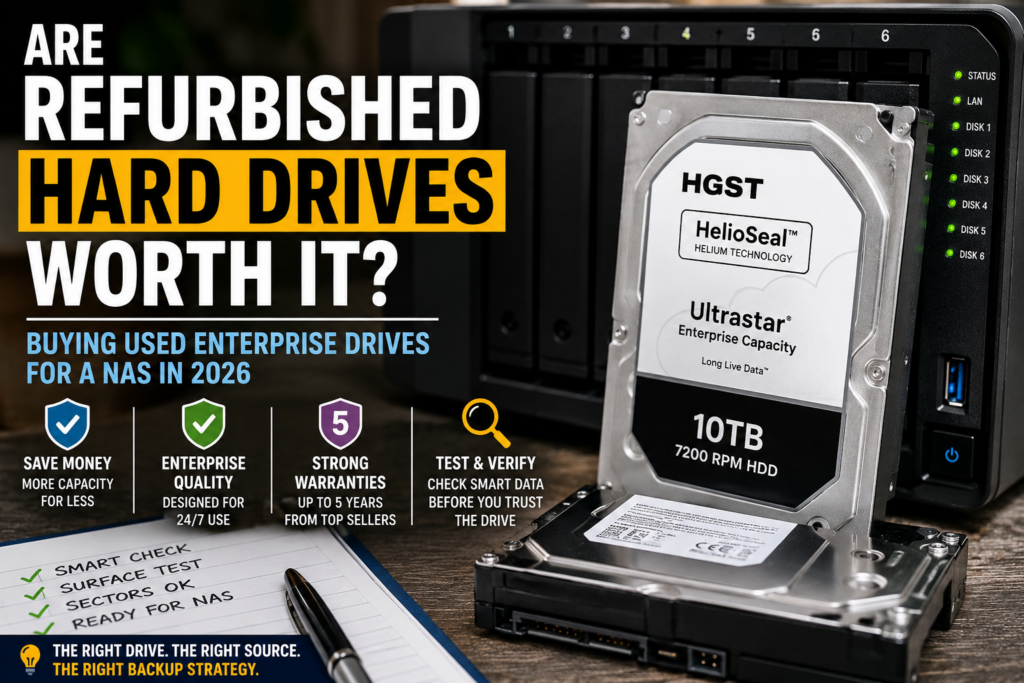
Old Storage, New To You: It’s Time To Consider Buying Refurbished Hard Drives

For the entirety of my time buying drives, going back many years, I’ve bought only new hard drives. For my servers, I’ve tried to buy NAS grade drives. NAS drives, compared to a desktop drive, are rated for more continuous operation and load.

But, my redundant backup strategy can be expensive, so while my NAS is using NAS drives I bought new, I decided for one of my two redundant backup locations, I’d try a pair of refurbished drives. I went with an outlet called Goharddrive. They sell through Amazon, eBay, Newegg, etc. Another called Serverpartdeals seems to have good reviews overall, through multiple sources.

From what my research seems to indicate, these two at least have good reputations for offering items that are not likely to fail quickly, and if they do, they quickly honor their five year warranty. Seagate and Western Digital have cut back the warranty period on some drives to 3 years, but still offer some drives at the 5 year mark. So, these refurbished drives, even if they fail, will be replaced during that period. They are designed for high data use as they were likely pulled out of data centers and other enterprise uses.

There are definitely advantages to these refurbished drives even for a primary function. But the lesson is, you shouldn’t use a refurbished drive without redundancy. But the same applies to new drives. New drives may last less time than a refurbished one, or more. So, the lesson in the end is to make sure that you never rely on a single drive regardless.

Here’s a link to a 10TB hard drive sold by Goharddrive via Amazon. A similar new NAS drive is running over double that. Assuming you get 3-5 years out of it, which is guaranteed, you may be taking a risk, but its an acceptable one. So, it’s perfect for sending my files to from my primary NAS, and will sit at a family member’s home as a backup server. Definitely cheaper than the cloud.


Published on July 21, 2024
Full Post
0 Responses

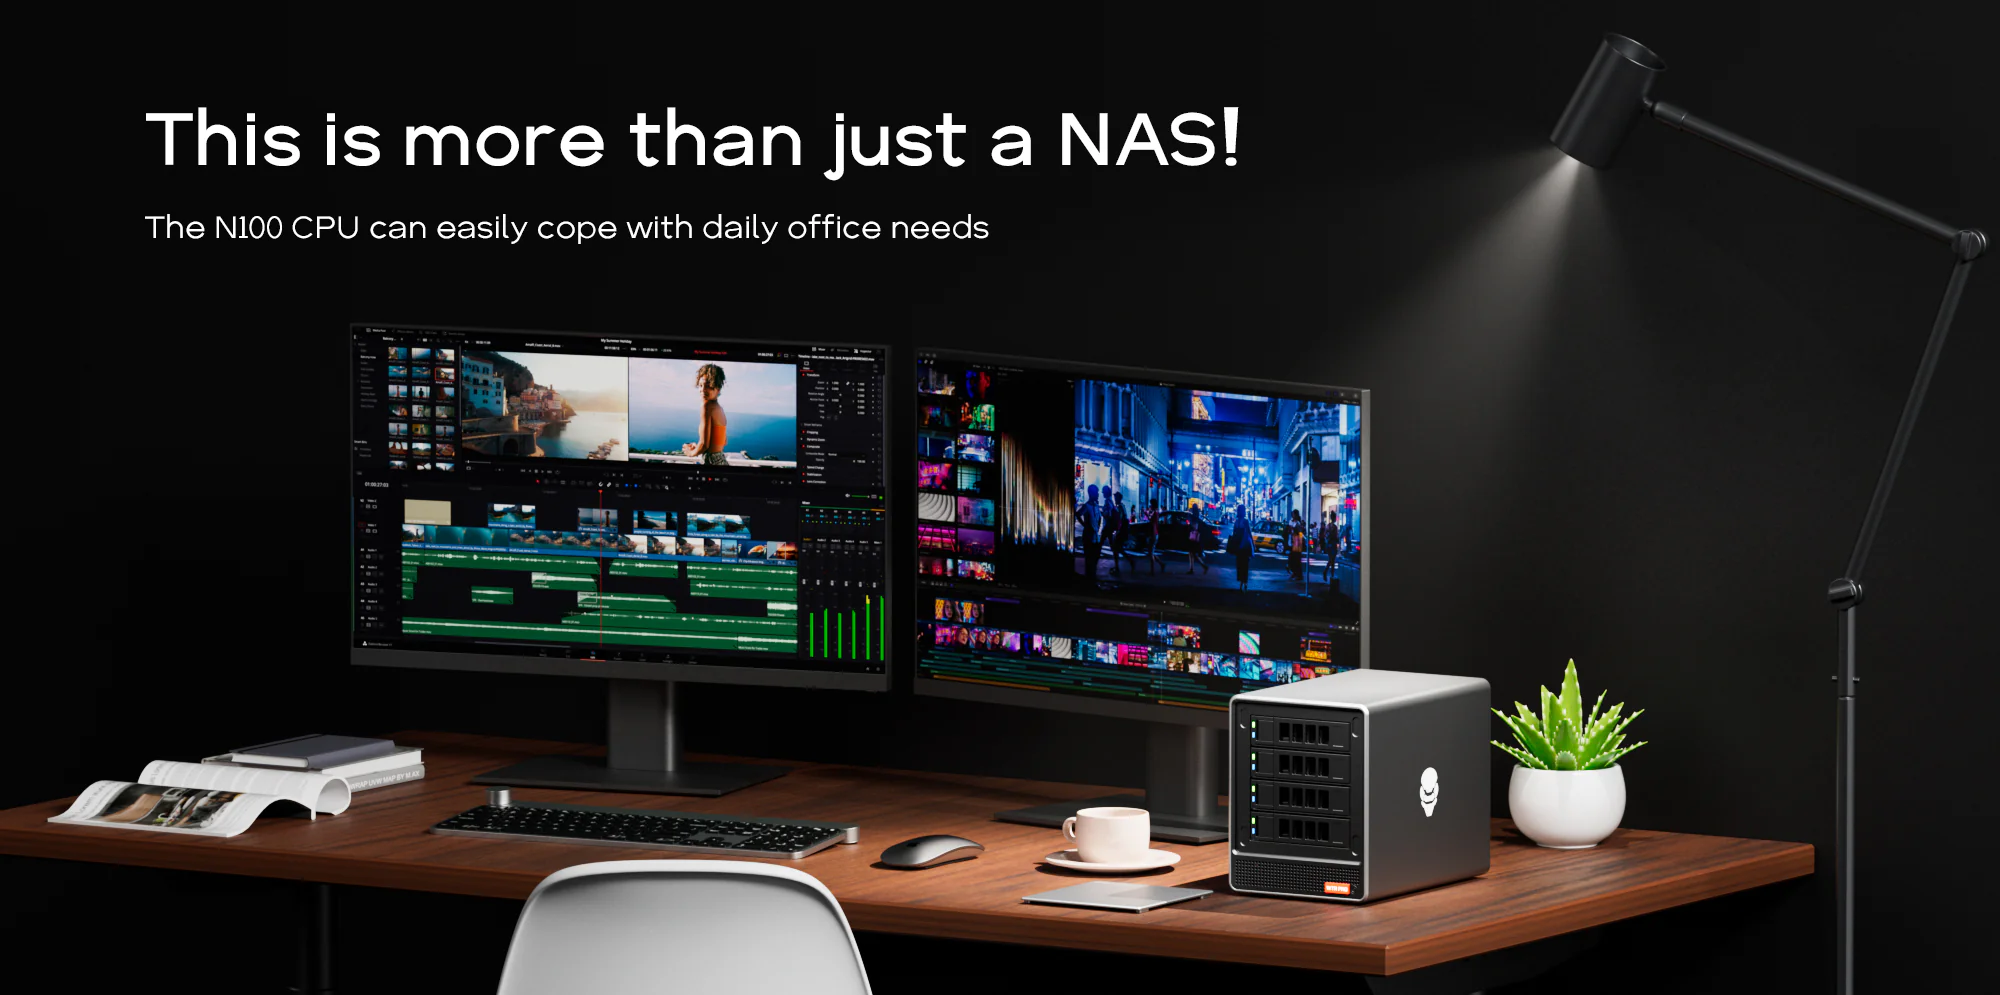
A New 4 Bay Network Attached Storage(NAS) Option: The Aoostar Mini PCs

In a previous post, I had mentioned how tempting the Aoostar Mini PC was if I’d needed a 2 bay NAS. I’d wanted a 4 bay NAS. Of course, the 2 bay would be perfect for a remote backup receiving location, over my primary location, where I would want more redundancy. I’ve already ended up with 2 4 bay NAS options, but I’d looked at Aoostar, and they’d promised a 4 bay version at the time. But now, apparently they have it.

It hasn’t made its way to Amazon, where I often link because I don’t like having to wait for things to be drop shipped from the factory, but it is on the manufacturer’s website. If this had been available a few months ago, this would have probably been my purchase. It has the N100 processor I like as a budget low power processor, a good SATA chipset, decent looking ventilation…supports an NVME slot for the drive, 2.5 gigabit LAN…

It is just a lesson, there is always something new around the corner. You can either wait, or get the best available and not sweat the small stuff.


Published on July 5, 2024
Full Post
0 Responses

This May Be the ODroid You Are Looking For: ODroid H4 Series

In a previous post, I was excited about the arrival of the ODroid H4+. Then I got a bit nervous because of broken SATA connector on the board. For one, the longevity of the product, having never bought anything like this in the ODroid line, and that Ameridroid would make the return difficult. As mentioned, I had no evidence of that, but dealing with returns is stressful at times, and I think I may have imagined the worst based on some of my less pleasant dealings with other companies.

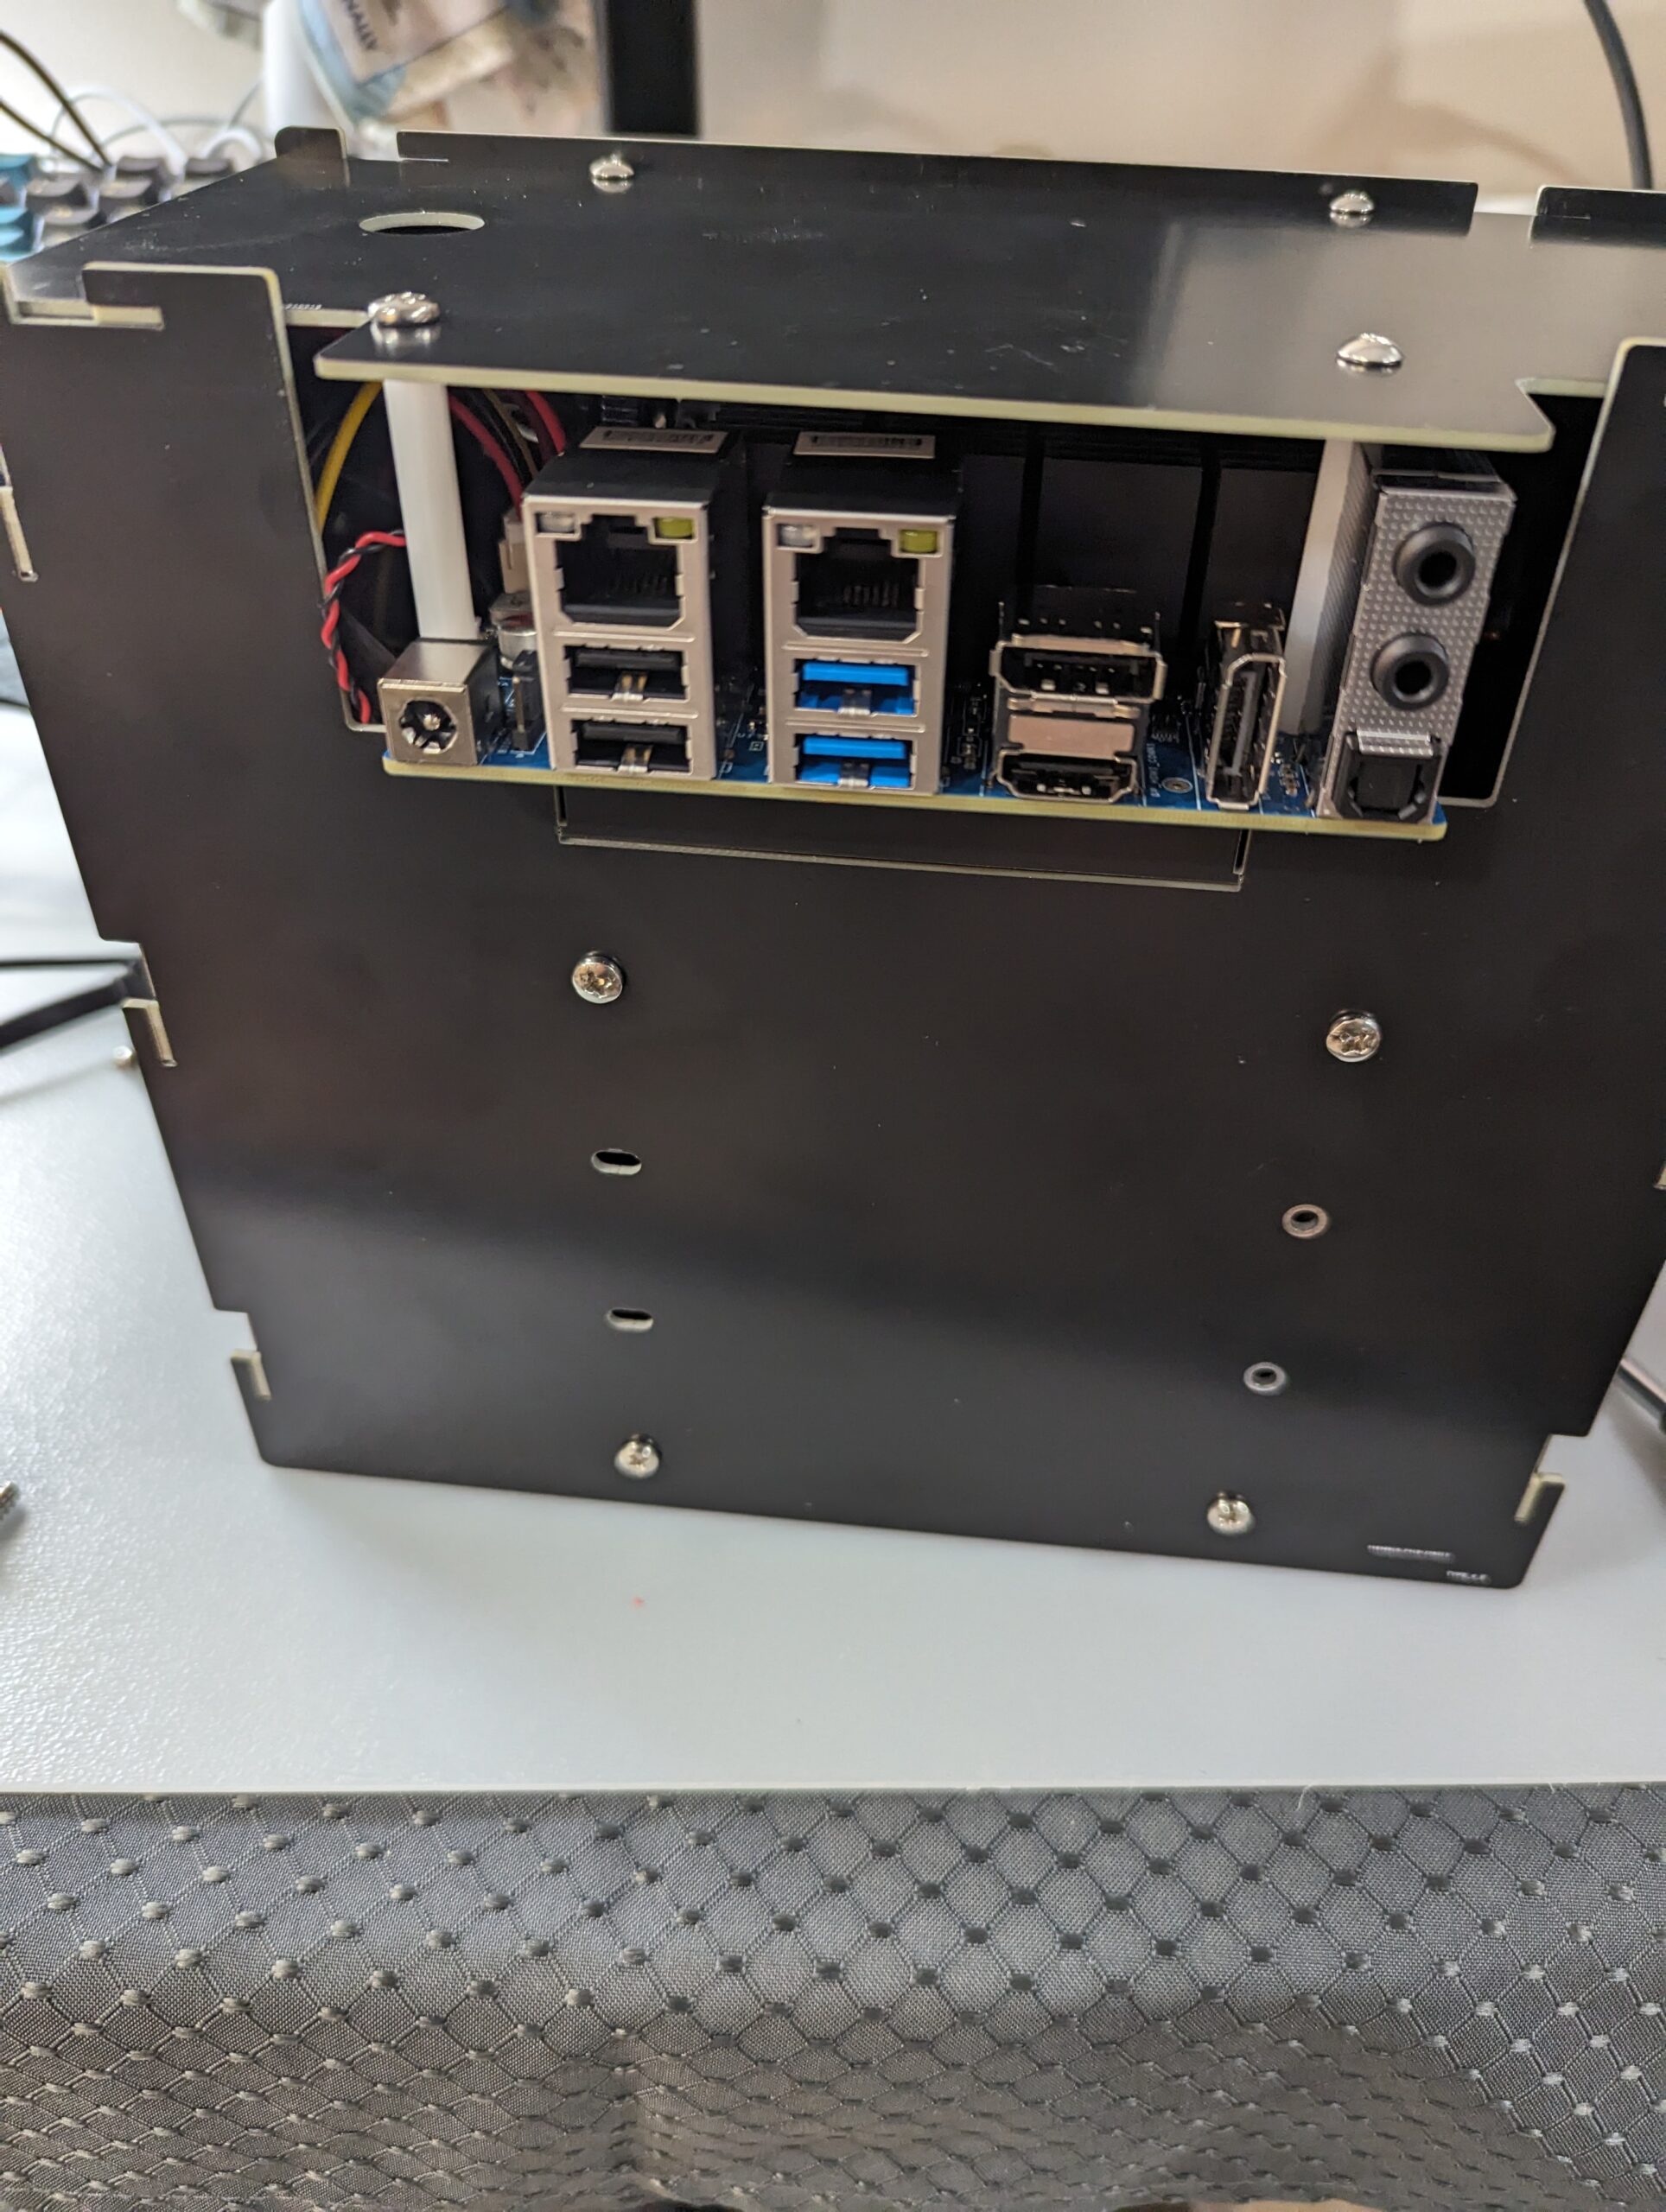
A few conclusions about the ODroid H4+…The Type 4 NAS case and the positioning of the SATA ports puts too much stress on the SATA cables. You need to buy the ODroid cables because I can’t find anyone else who sells the exact same power cables, as power for the drives comes off the board. I opted to switch to this thinner set of bundled cables. There is a right angle version, but I’m not sure, due the positioning of the ports, if you could place this without straining the ports, which after what happened, I’m a bit worried up. But the thinner cabling does seem to strain less.

Thinking about this for the future, I also had gotten a Jonsbo N2 and put a mini ITX board in it. That feels a lot more robust than the ODroid’s metal sheet case, but it also takes up a lot more room.

As I write this, I’m running tests on some drives I bought to place in it, and then I will work on deployment. You can see below how tiny this thing is, but the fact that the hard drives are providing the structural support makes me wonder about its longevity. I would have felt better it there had been some corner brackets. Also, there are no dust shields around the ports, and the bottom is open. So it could accumulate a lot of dust.

The ODroid line is popular, and if you look, all of these cases for the H4 line and its predecessor, the H3 line have this scratchbuilt in a garage feel to them. But, just because something has that look and feel doesn’t mean it is bad. I would recommend this as a server.


ODroid H4+ in a Type 4 Case
Published on June 18, 2024
Full Post
Home NAS server with drive bays and network cables, illustrating TrueNAS vs Unraid vs OpenMediaVault NAS software
1 Response

TrueNAS vs Unraid vs OpenMediaVault: Choosing NAS Software

I have gone through a lot of evolution of computer technology over the years, not only the technology, but my thinking. I remember my first server, which doubled as a NAS. It was a yellow full tower server system and had wheels . Why yellow? It was really inexpensive. But it was also really overbuilt for what I needed. I never filled all the bays and I never used it to its full capacity. And technology changed. I started building smaller, rather than overbuilding. I’ve gone from desktop, to laptop, to small PC, to mini PC, which is an evolution conversation in itself.

When my home built NAS died in the middle of the night some years ago, I ran to the store and bought a commercial NAS, because I was at the point in my life where I didn’t want to deal with another home build. So I went with a NAS and then a dedicated home server next to the NAS. And that was partly because the commercial NAS software was limiting and the manufacturer has stopped updating my model, but also because the hardware in NASes is always behind what you can get if you build it yourself. So, by investing in a NAS case, a motherboard, and using open-source, I can in future swap out the motherboard, upgrade the RAM, etc and continue…provided I keep to the same software platform.The lifespan is much longer.

I could run all my applications on the NAS, especially with the new hardware, but I want something that acts like an appliance…something that only is storage and storage related functions. I don’t want to clutter it with other things, even though it means another system to run server functions. Last time, I installed Linux and configured it. But there is software to make a computer a dedicated appliance, so it eliminated all the work I had to do to get everything working.

Quick Answer: Which NAS Software Should You Choose?

For a homebuilt NAS, the best software depends on what you want the box to do. I chose TrueNAS because I wanted a storage-first appliance with ZFS and a strong focus on data integrity. Unraid is often better if you want flexibility with mixed drive sizes and an easier app/server experience. OpenMediaVault is a good free option if you want something lighter and more traditional without paying for Unraid.

NAS Software Best For Main Tradeoff
TrueNAS Storage-first NAS, ZFS, data integrity, snapshots Less flexible with mismatched drives and can feel more appliance-like
Unraid Mixed drive sizes, easy expansion, apps, home-server flexibility Commercial license and a different storage model than traditional RAID/ZFS
OpenMediaVault Free, lightweight NAS setup on standard Linux May require more tinkering depending on plugins and use case

There are three popular options for NAS software…TrueNAS, Unraid, and OpenMediaVault.

TrueNAS has a commercial and a community version. It comes in the classic Core version, based on FreeBSD and the newer Linux based Scale. I get the impression impression Scale is the future for the project. Scale allows for containers and virtual machines if you want to run your applications on top of it. For the drives, it offers ZFS and the ability to deploy object storage similar to Amazon’s S3. ZFS is an incredibly robust filesystem.

Unraid, by comparison, is also commercially supported, with a license cost of $49 to $249, which includes the software. The most expensive membership at $249 is lifetime, which means updates for life, and the others offer updates for a year with a fee to upgrade after that. Even with no updates, some security patches are still offered for the older versions. The advantage of Unraid is it can manage drives that vary in size, speed, brand, and filesystem…so no RAID technology. Instead, it uses a dedicated parity drive, and offers a cache drive for speed.

Openmediavault is somewhere closer to Unraid in its simplicity, but has no commercial cost. It seems to be in the middle of the option here and can veer toward the Unraid feature set or the TrueNAS ones.

I ended up with TrueNAS, because I wanted the features it offered for data storage.

That choice also fits how I separate my setup: the NAS should mostly be storage, while other services can live on separate server hardware. For the networking side of that build, see my guide to 2.5G vs 10G Ethernet for a home network.

I’ll be talking more about that, but setting it up took more time to restore my data than it did to set it up. It is now handling 100% of the file serving the previous server did. I still have backup and other redundancy functions to configure, but I’m 100% back online.

Published on May 31, 2024
Full Post

Get New Posts By Email