Best Tools For Productive Work On The Road: Spring 2024 Edition

Many of us are travelling more than we used to, but there is no reason we can’t have a great work setup while on the road.

This post serves as a packing list, among other things, for my travel gear. These allow me to be productive from anywhere. It’s a good opportunity to go over what I keep in my bag, and over time, talk more specifically about the items I keep in there and why.

  • A Walmart Onn Android 4K TV puck – Powered by micro-USB, used for streaming in hotel rooms
  • 2 Ainope Right Angle USB-C to USB-C 6 foot cables, braided 60W rating – any USB-C cables might do.
  • 2 Baseus 100W retractable USC-C PD 5A 3.3 foot cable
  • EMEET USB Speakerphone for Live Streaming – Got this on sale, but you can’t get it anymore. Good because it is compact, and a webcam and speakerphone in one. I’m fine in the shortterm, but will look for alternatives to suggest.
  • Charger for a Pinetime Watch – More on the Pinetime in future
  • An Ikea LED USB lamp . – Some hotels do not have a desk light and this takes up almost no space.
  • Generic USB/battery operated LED clock – I use my phone for alarms, but I honestly can’t be bothered to fiddle for it when I’m trying to sleep in a hotel room while experiencing jetlag. This was just the smallest clock with digits I could see without my glasses. About the size of a harmonica. There are dozens of these.
  • 200W GAN USB C Charger Block, 4 USB-C PD ports, 4 USB-A ports – Can power everything with plenty of ports. I have one of these on my desk as well.
  • The 65% K6 Keyboard…I wrote about my Keyboard search previously.
  • Graffiti Fat Wrist Rest for small keyboards – Wrist rest for the keyboard
  • Dierya Kemove X Keyboard Travel Case – To protect my keyboard while traveling.
  • A GL.iNet travel router, right now I have the Slate Plus which was on sale, but there is a budget version available now, the Opal. There are advantages to the Slate Plus over the Opal…but for hotel trips, you can forego them. Having a travel router has a variety of advantages.
  • A portable monitor – I have a few of these of various sizes and capabilities. A 15.6, and a 12. I can mix and match depending on the computer I’m bringing…laptop, mini PC, etc, to form a variety of different configurations. More on that in future. But, this either requires HDMI cabling, sometimes mini-HDMI, sometimes full-HDMI, plus USB power, or USB-C connections.
  • Folding Laptop Stand – They don’t make the one I have anymore, but there are a lot of these. This unfolds, lifting the laptop up so I can place my keyboard below it. This assumes I bring a laptop, and not a mini-PC
  • Trackball – I prefer a trackball to a mouse. My two favorites are:
    • Logi M580 – this is a thumb controlled trackball that fits easily into a bag
    • Kensington Expert Wireless Trackball – Also comes in a wired. This thing looks big because of the provided wrist rest, but is not that much bigger than the Logi M580, which I’ve taken on many trips.


Review: Vivo Livestream Device Shelf Mount

I’ve been working on upgrades to my desk, and tried out the Vivo 16 Inch Above/Behind VESA Monitor Livestream Device Shelf Mount.

The image is a stock image from the manufacturer, not my setup, but this replaced so many things for me. It attaches to a monitor mount in between the bracket and the monitor. Not only is it good as a shelf, but I’m able to attach accessories to it.

I’ve bought two of these, one for each of my monitors. There is a webcam attached with an adjustable ball head, an old tablet that shows an information display, and a light to better light the webcam. As the bezel of monitors becomes thinner, attaching a webcam to the monitor itself is starting to actually hide some of the screen. You can mount a webcam or even a professional camera dead center and still have plenty of room on the shelf to add more small items.

The height you can adjust it to does depend on your monitor. I had to put them at different heights on different monitors due to where the ports were in relation to the mount. You may also have issues if the back of your monitor is curved. Reading reviews on Amazon, some people solved these issues by cutting off some of the bracket to make it shorter. Others had to get longer screws than the ones provided or get standoffs, both of which are fairly common needs for VESA monitor mounts.

Other people used it to hold speakers, as a shelf for their remotes, microphones, etc.

There are competing products, but none of them at a $20 price point.

  • Ulanzi makes a similar top shelf for $43 at time of publish, which includes 3 ballheads…but you can get better ball heads yourself if you need them.
  • HumanCentric offers theirs for $56 at time of publish. They have 3 sizes, a small, medium and extra large, the extra large being the $56 one and roughly the same shelf space as the Vivo. It seems to offer no specific advantage, except it is slightly shorter in length(so maybe you don’t need to cut it if it covers your ports), but hardly worth the price increase for that.


In all the mounting gear I’ve purchased for my desk, the price does seem high for what is essentially a piece of metal with some holes in it. But convenience is worth something. I have a second desk I use elsewhere where I will be using this to replace a cheap boom arm that holds up my webcam.

Musings On The Best Keyboard For Travel

In my previous writing, about using a Mini PC on the Go, I mentioned a 60-65% keyboard as the right size in my opinion for travel. So, what are the different types of keyboards?

  • Full-size
  • Tenkeyless(TKL) – A tenkeyless is the same size as a full-size keyboard, but omits the number pad.
  • 75%  – condenses the function keys
  • 65% – usually retains the arrow keys while condensing the other function keys.
  • 60% – removes the function and navigation keys
  • 40% – the smallest keyboard

I have long since given up on full sized keyboards. All my home keyboards are TKL. This is something of a practical issue. I’m left-handed, and the number pad is on the right side of the keyboard, favoring right handed typists. In the rare cases when you need it, you can try for a keypad such as this inexpensive one from Kisnt, which has Red, Brown, and Blue switch options and PBT keycaps already.

40% is too small. I know people are very passionate about this size once you get used to the combinations to use it. The most economical 40% I found was at the local Microcenter.

For my latest attempt, I opted for a 65% Keychron K6 that was discounted at the time I purchased it and is still reasonable. The K6 is bluetooth and USB-C, but has a hardware rather than a software switch between wireless and wired. Some models of the K6 are hotswappable, meaning you can change the switches.. Compare that to the well reviewed Royal Kludge RK68, which has a software switch. 65% gets you the arrow keys, which I do enjoy having as dedicated functions.

I previously used a 60%, and tried several variations, but missed those arrow keys. However, if I opt to try a 60% again, I might try the Royal Kludge RK61, which is not only hot-swappable, but has QMK/VIA support…which allows you to remap the keys to a configuration of your liking. Since I’m on a Keychron kick of late, they have the K12. The Pro Version has the QMK/VIA support.

By the time you get to 75%, you might as well carry around your tenkeyless on a trip, thus making the 65% percent the perfect compromise between the two.


Thoughts On Using a Mini PC On the Go

Recently, I was reading an article by Brady Snyder of XDA Developers about using a Mini PC on the go. It happened to match up with something I’d been thinking about. However, Brady’s premise involved the use of a battery pack. So…turning a Mini PC into a fully portable computer, instead of my goal…a computer I could set up anywhere. I’m thinking about this a lot right now because I just spent two weeks in a hotel for work, where I’d want more than I’d take on a short trip.

Dual portable monitors are coming down in price, but so are portable USB-C/HDMI single monitors that have good quality, and fit in a bag. I calculated that a USB-C to barrel connector could power everything off a USB-C PD charger. A 60-65% keyboard, portable mouse, and even a second monitor if needed can complete something that fits in a bag.

I stopped using laptops at home ages ago…because staring down at one started to hurt my neck. I could dock my laptop, but I found I rarely used the screen and mostly had it in the dock, so why not save money on the screen and get a better processor?

Over the years, I’ve tried many combinations of mobile setups. Different small keyboards. Different portable monitors. Etc. I’ve already decided on my next experiment, and will be putting out some notes about how different configurations work out. This includes:

  • Improved 60 or 65% keyboard options
  • Different portable monitors
  • Keeping the wiring simple.
  • Converting mini-PCs to USB-C PD using adapters
  • Travel micetrackballs
  • Storage devices

Curious what others thinl.

Take Control Of Your Garage Door With Rage Against the Garage Door Opener

https://user-images.githubusercontent.com/4663918/288449523-9ddf3da2-9eac-4be0-beed-11867dc8d446.png

Rage Against The Garage Door Opener(RATGDO), is a board created by Paul Wieland that gives you local control of a Chamberlain/Liftmaster garage door. It also supports other garage doors with some additional equipment. The ratgdo board is an ESP chip, and inserts itself in between the circuit board in the motor and the safety sensors and the button/control panel on the wall. It then learns to communicate with the components. I ordered this device, which is now frequently back ordered, last year, and finally got to installing it this weekend.

I haven’t spoken to the developer directly, but how did this board, which is a sudden boom side business for him, become so? It starts with Chamberlain announcing they would be blocking access to their API for home automators.

The board offers:

  • Open/Close Functionality
  • real time status of door
  • the ability to partially open or close the door
  • Obstruction sensor status
  • Motion Sensor status

If you can wait for an item on backorder, I recommend this device if you have the right sort of garage door to ensure peace of mind in regard to the status of your door.


Musings On Keycaps- Should you Favor ABS or PBT?

With my recent keyboard commentary, I thought it best to talk about keycaps…Keycaps are the covers for the mechanical switches on a mechanical keyboard. Likely the switches themselves, the keycaps are also the subject of intense debate. And I’m just experimenting with these things myself.

I remember, years ago, I bought this flat rollable keyboard, and within a few weeks, the letters started to rub off. I filed a warranty request, and spoke to the company…whose name I don’t remember at this point, but I remember was based in Texas, and they told me that some people’s natural oils tended to degrade the coating more than others. They sent me one with a newer coating they were working on and it lasted for years.

So, the tendency of letters to rub off, and keys to get shiny is certainly a concern of mine. You can clean the keyboard, but the ability to replace worn out keycaps is also a plus, and with mechanical keyboards, there are no end of options I’m still trying to figure out.

The most common discussed materials are ABS or PBT plastic. ABS is the most common keycap material on all types of keyboards. ABS is the one that tends to get shiny in a shorter period of time. But even within the two categories, there are differing levels of quality. PBT is usually more expensive, but you can get cheap and poor quality, or high quality in either material.

PBT has a bit more texture, to most opinions as well, which many enthusiasts prefer. It is generally thought to have a less jarring sound when typed on, but ABS can have the same property if you get a thicker ABS keycap as opposed to the more common ones.

This is not to mention stylistic questions like:

  • Doubleshot – two color keycaps, often used to mix a solid color on the top with transparency on the sides for backlit keys
  • Backlit keys
  • Side or top printing of the legends
  • Printing…Laser Etched, Dye Sublimation, or Pad Printing as the way to label the keys…or….do you need legens on the keys at all…some people like all blanks
  • Profiles…the shape of the key.

So many choices. In the end, I’m not buying the most expensive PBT, but I have, on the keyboards I use regularly, replaced the keys with PBT because I like the benefits. Even on the inexpensive budget keyboard I just bought, I switched out the keycaps for an inexpensive PBT set on sale. Still feels better than the originals.

My only problem is specialty keys. For example, it seems like no one makes PBT keycaps with the media markings on the function keys. I rarely use the function keys on my keyboard, having them show the traditional media options instead would be useful. I guess I’ll just have to remember which is which.

In case you are just getting started, like me, here are some brands I have experimented with, with a few examples as of publish date that were on sale.

Review: The Keychron C3 Pro Keyboard- A Value Priced Mechanical Keyboard


I have a problem. I keep buying mechanical keyboards. I only have one set of hands, and I don’t type with my feet, so why do I keep buying new ones? Partially because I’m hard on my keyboards. I gave up on non-mechanical keyboards years ago, but I didn’t buy really expensive ones. I bought a moderately priced ones. And I keep looking for new options in that. The pictures you see are the Keychron C3 Pro Keyboard. This particular model, an Amazon exclusive, retails for more, but I was able to get it for $29.99 on sale, which made it worth a try. I’m typing this post on it right now.

The keyboard comes in two switch varieties, red and brown. It offers a red backlight. The keycaps are replaceable, but the switches are not. Keychron makes plenty of keyboards that allow you to swap the switches as well. It is well-built for a budget keyboard, and neither version is overly loud, something people tend to comment on with these keyboards. It has many of the features a more expensive keyboard would.

I’m clearly not a keyboard aficionado, despite my keyboard purchases. I have generally bought budget mechanical keyboards, there are too many color switches I don’t have an opinion on…I don’t know the lingo. The feature that interested me particularly is something called QMK/VIA. The feature allows reprogramming the mapping of the keyboard. Never use your Scroll Lock key? Turn it into a Mute button for Zoom. Build macros into the keyboard instead of software. Certainly an interesting thing to play with. With a few custom keycaps…you can repurpose keys you barely use.

There are upgraded models from Keychron, and competing models from other companies, but for the price and features, I doubt they can beat it…especially if you get it at $30.

Update: April 2024 – Keychron is now offering the C3 Pro in an RGB hot swappable variation for only $10 more than the regular price of the variation they originally released.

What To Know When Considering Switching To A Smart Lock

In a previous post, I discussed digital locks. Digital locks are locks that can be opened with a keypad over a key, and are either electronic or mechanical. There are other types of non-keyed locks. Increasingly, the market is filled with smart locks. Smart locks are ones that can be operated remotely and cover a broad range of options. This consists of a few different options:

  • Complete replacement – this removes the entire lock mechanism and replaces it with the completely new mechanism. There are both deadbolt and knob replacement options here.
  • Retrofit deadbolt – This replaces the thumb turn of your deadbolt. The exterior appearance of the door, and the locking mechanism remain the same
  • Renter Options – These options attach on top of the thumb turn of deadbolts to allow for easy removal.

There are a few different interface options as well. And some have combinations of these

  • Key – Just because it is a smartlock doesn’t mean it can’t have a physical key as well
  • Keypad – Not only do some models offer built in keypads, some offer it as a separate unit you can attach to the doorframe, leaving no built in lock interface
  • Fingerprint – Biometric sensors
  • Bluetooth – These locks usually allow you to open/close with your phone only, or have a gateway/hub that allows you to do so over a network connection. These hubs, as well as the phone app to control the lock over bluetooth  are usually proprietary to the manufacturer.
  • Zigbee/Z-Wave – Zigbee and Z-Wave are two established home automation wireless protocols. They both require a hub/gateway. But unlike Bluetooth, there are a variety of devices with support for one or both of these protocols.
  • Matter over Thread – This is the new hot home automation standard, but the first lock supporting it was only released at CES 2024, so stay tuned. Like Zigbee and Z-Wave, it would require a hub/gateway.
  • Wi-Fi – Wi-Fi smart devices are problematic, because wi-fi can be rather battery intensive and smart locks are usually battery powered. The other negative for Wi-Fi is proprietary software.

You might note that a recurring issue for bluetooth and Wi-Fi locks, which you might initially prefer because you don’t have to add a gateway or a hub to connect it to your existing devices. The problem is support. You are relying on those manufacturers and their app. It could be argued you are relying on them anyway, because they made the device, but the biggest risk of smart devices in general is, if they rely wholly on a manufacturer app or a manufacturer cloud service, that it will eventually be discontinued, making your device useless. The local control options have issues of their own. Some manufacturers don’t implement the Zigbee or Z-Wave protocol consistently, which could create some issues depending on your hub/gateway’s support. We will write a bit about these protocols and gateways in future.


The Disney MagicBand+ as a Piece of Tech

Disney’s introduction of MagicBand technology was a massive change for the theme park. The overall system began development in 2008, with the idea of reducing friction in the park, and the over $1 billion dollar project to integrate technology at Disney parks culminated with a rollout a decade ago in 2013.

I remember the first experience with the MagicBands, and an experience with family members where the Disney staff just couldn’t fix the problems and kept giving old school paper documents. But, most of those sorts of issues were resolved.


Until the

MagicBand+

beginning of 2021, MagicBands were free to all Disney Resort guests….they’d even send you one with your name on it with advance reservations. But, in 2023, we have cell phones that can perform the same function and Disney added NFC support so you could use your phone in lieu. So, MagicBand became more of a collector’s item, or for children or other people without phone. Other guests can receive an RFID-enabled Key to the World card free of charge, and some people just put this in a lanyard in order to get the same utility of scanning as a MagicBand.

So, this brings us to MagicBand+, launched in 2022. It supports bluetooth pairing to your phone, software updates, and a bunch of ‘smart’ features. Disney compares MagicBand+ to MagicBand and to their MagicMobile Service(the phone apps). It’s waterproof, rechargeable, and unique to this device it ‘unlocks enchanting interactions’, in addition to what all of the choices do….unlock your room(if you have one), act as your ticket, check-in for virtual queues and lightning lanes, charge items to your account on file, link photos at rides.

So, I charged the thing up, linked it to the phone app via bluetooth, updated it, wore it for a whole day at Disneyland, and…well, it lit up once for five seconds. So…I was not enchanted. And I was not enchanted for $34.99. Reviews were equally mixed from others at both Disneyland and Disney World. You can’t seem to get original MagicBand anymore. So, the only use for this is so you don’t have to pull your phone out of your pocket to access things.

There are two types of scanners in a Disney park. The built-in ones you just run your hand over, and the mobile ones that ticket takers and others were using for other things, where they actually had to fiddle with it to put it into scan mode…so not much faster.

The MagicBand+ supports NFC, RFID, and BLE(for interactive experiences). It has 5 RGB LEDs as well as vibration ability. So, it is a nice little notification device. So, if you want, you could use an NFC/RFID scanner and use it to trigger events at home. There are some people trying to figure out how to connect to it over BLE and trigger the vibration and lighting system. I hope someone does the work on this, because it would allow me to recoup my investment more fully.

In researching this, the only device outside a theme park that can pair with it is an Amazon echo device, probably because of a partnership with Disney to allow certain experiences. People reported that they could pair the band and it would vibrate and light up in response to notifications. So, whatever custom pairing that requires a Disney app installed on your phone should be reproduceable. Other people reported that once paired, they were able to resend commands they monitored to trigger the device.

If not, there are other options for this that would be less expensive…the home options.

The idea Disney offered was interesting, but after all the money they spent on linking their experiences together, the band didn’t allow them to send me captured ride photos as promised, it didn’t present custom experiences, change screens in the park once it knew who I was…so, as a way of Disney customizing its experience..it was useless. But, now that I own it, I probably will reuse it just for the ability to wave myself into things over fumbling and unlocking my devices.


Taking Control Over Wifi Controlled Outlets

The Itead Sonoff line of products are inexpensive wifi controlled Smart Home devices that use a common chip, the ESP8266, which is popular amongst hobbyists for their own projects.

Continuing my goal of avoiding building my own hardware, I’ve focused on adaptive reuse. In order to use a Sonoff in its default configuration, you need their app, which routes information through their server in China.

I’m not that worried about the Chinese being able to control my humidifier, but I find it completely unnecessary. But, being as it uses a common chip, it can be reprogrammed.

The recommended and guaranteed way to do this is to solder connections onto the board and flash the chip with new firmware. However, one developer has worked to hijack the Sonoff’s over the air firmware update process to add custom firmware. You can find the work on Github along with custom firmware to install.

The custom firmware allows the device to be controlled by HTTP or MQTT control, which can then be tripped manually or by Home Automation software.

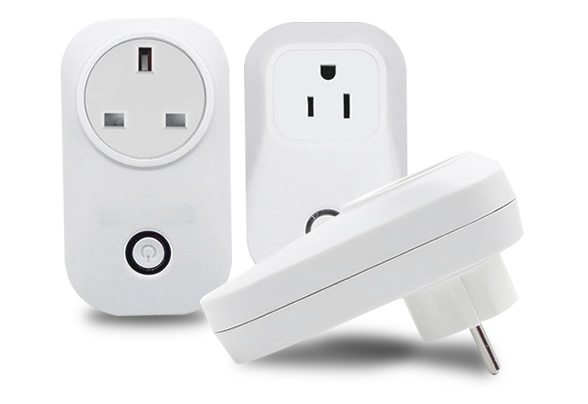
I have been using the Sonoff Socket S20, which is their remote controlled outlet. However, the same hardware is available as a wire-in power control module, as well as switches, temperature sensors, etc.

The control of these sockets has been reliable and without issue.