
Gadget Wisdom

Series: Home Automation Obsession

0 Responses

Home Automation Obsession: Introduction

For the past few weeks, I’ve been in the midst of an ever escalating home automation kick. It started with one repair, and spiraled into a massive upgrade.

But, I feel the need to document it. Partly because of what happened last time. Years ago, I had X10 home automation devices in my home. I had a control mechanism hooked up to a computer.

And then I ripped it out and didn’t look back. But why did I do that? Let’s see.

  1. The computer control mechanism was serial and no one was using serial ports anymore. The newer USB controllers happened to be less than compatible with my operating system, Linux.
  2. X10 used power line signaling as its primary source of control. This meant that any noise on your electric lines…including your washer/dryer, would disrupt signals. Noise could be interpreted as instructions to turn things on and off.
  3. The protocol dates from the 70s and isn’t as robust as it could be.


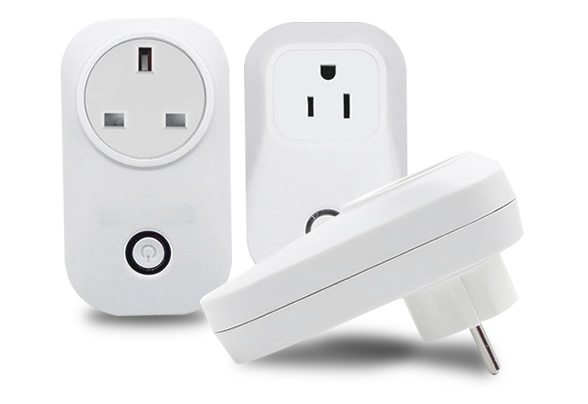
A lot of the stuff I’ve switched to now is Zigbee, Z-Wave, Wi-Fi, or Bluetooth. I assume most people know what Wi-Fi and Bluetooth is, so let’s cover the other two.

Z-Wave dates from 2001, Zigbee from 1998. Z-Wave has greater range than Zigbee, both are mesh networking protocols, offer encryption, and require pairing with a radio in order to function.

The Wink hub, which I use, has both Zigbee and Z-Wave radios. The new Amazon Echo Plus announced this week has a Zigbee radio. Increasingly, people are looking to add these radios into routers, voice assistants, etc, to give those devices the ability to control smart devices.

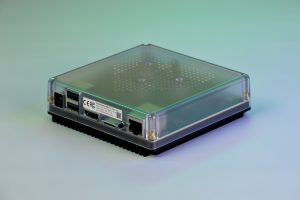
Being as I am afraid of being left behind if a company or standard bites the dust…remembering X10, I’ve connected my Wink setup to a computer based setup and equipped that computer with a bluetooth, z-wave, and zigbee radio of its own. This means I could transfer devices over to it if Wink shuts down, and I can build a Frankenstein-like network of devices that the computer can connect, even if their manufacturers are not interested in doing so.

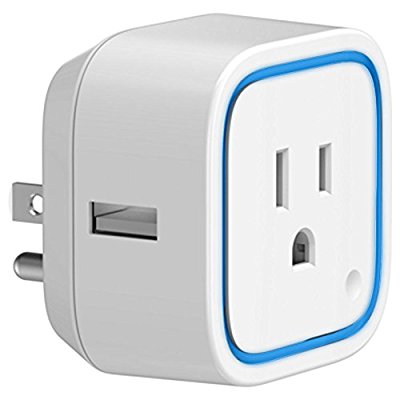
So, for the last few weeks, I’ve been adding integration after integration…before I actually set up any sort of automation. Lowes has been running a clearance sale on Sylvania smart bulbs(I went to three different Lowes and bought what I wanted) and I’ve added more controlled lights.

Amazon boxes have been coming every day bringing new pieces to extend this system, and I’ve been connecting up other connected devices, such as my weather station, weather forecasts, Google traffic data, etc so I can use it to have decisions made.

Even my personal website could theoretically send a signal when something occurs…Imagine my lights flashing when I have a comment or something.

So, a lot to cover.

Published on September 29, 2017
Full Post
0 Responses

Starting with Security and Lighting

The two areas that I see a lot of interest in controlling are security and lighting. With the introduction of the Amazon Echo and its ilk, people want to turn their lights on and off with their voice assistant. It is often the gateway drug into more insanity.

One can start with just screwing in an alternative light bulb.

The other one, the more elusive for me, is security. I’ve never had a traditional security system with monitoring. But I’m increasingly interested in building my own. But it is hard to figure out what that is.

Paying for monitoring is not something I am prepared to do. You are paying a company to notify the police. I can do that. Notifying the police isn’t something I want to be automatic, because over 90 percent of alarm calls by police are false and there are actually fines for false alarms in New York City, where I live, and many other places.

We have one of the best security monitoring devices on us most of the time…the cell phone. If I can be notified by my phone and review the information, then I can make decisions based on that action. I’m going to talk about various notification options as well.

Recently, a family friend had to drive back home because their alarm was tripped. It was a false alarm, but the second that week.

Some of this, I am learning about as I go. So, I welcome anyone correcting me or giving me advice.

Published on October 3, 2017
Full Post
0 Responses

How to Choose the Brain for Your Home: Options for a Home Automation Hub


You can do Home Automation without any sort of hub. I still have one, the Wink hub. I chose it over Smart Things, the biggest competitor, for various reasons, but both have their place.

However, I have been moving to my own homebuilt system. I centered on a project called Home Assistant.

There are alternatives…OpenHAB, which uses Java, but Home Assistant has a good combination of ease of use and flexibility, so I am going to focus on it.

Home Assistant has a very active community of people and developers, which is an advantage. It is a Python based implementation and there is a distribution specifically for the Raspberry Pi making it easy to get started. New releases with new features happen about every two weeks.

I’m running it on an always-on system I already had, rather than a Pi, and I’ve spent a lot of my spare time building in support for items…and I keep adding piece after piece of integration.

Next up, my first integrations.

Published on October 8, 2017
Full Post
1 Response

Adding Temperature Sensing to Your Home Automation System On the Cheap

Problem

I wanted to be able to measure the temperature and humidity in various parts of my apartment, because the heating and cooling isn’t evenly distributed. My plan was to average those numbers and use it as a baseline to tune the heat and cooling, as opposed to the temperature just at the thermostat.

This is a feature of some thermostats, like the Ecobee, where they acknowledge the issue of one location making decisions for the comfort of the entire house.

I don’t want to solder. This is a personal decision. I burnt out too many components trying to learn that in high school. The best options for hobbyists in this area are to build their own, which I may try again someday.  So, I need a prebuilt solution.

Off the Shelf Options

There are a lack of good inexpensive temperature sensors that can be easily integrated into a Home Automation system. The best inexpensive option I found were some Z-Wave sensors made by Xiaomi(they’ll be here in a few weeks from China and I’ll see how that works).

I have, for a few years, had an Acurite 5 in 1 weather station mounted outside. It measures temperature, humidity, wind speed, wind direction, and rainfall. It broadcasts updates every 36 seconds.

It came with a wireless temperature and humidity sensor that updates every 16 seconds.

Implementing a Solution

So, I had one of these, and after I got this working, I bought several more to cover the areas I wanted to. The system is ultimately expandable without limit.

There are two ways to get this data into a computer. One is with the provided Acurite hardware. They make an Internet bridge..which you cannot get data from so easily. They also make USB devices, which you can interface with. I use this to run a weewx installation(more on this later).

But, the option I chose was based on what I had in house. A software defined radio USB dongle left over from my ADS-B project(more on that another time too).

On Github, you can download a project called RTL_433, which is designed to retrieve data from wireless temperature sensors. It also supports a variety of brands and other types of sensors. And, on a positive note, if you find something that operates on the same frequency, you can probably get it included.

The RTL_433 program supports output in JSON, which I can then feed into something to monitor the data and use it. I originally had planned to pre-process it with a script and then send it into Home Assistant.

I have the output from the sensors being converted to MQTT messages. But the messages from RTL_433 are all merged together, coming from the same source.

Someone in the Home Assistant Discord chat room suggested I use Home Assistant itself for pre-processing.

- alias: rtl433_bedroom_convert
 trigger:
 - platform: mqtt
 topic: sensors/rtl_433
 condition:
 condition: template
 value_template: >
 {% if trigger.payload_json.id %}
 {{ trigger.payload_json.id == 494 }}
 {% else %}
 false
 {% endif %}
 action:
 - service: mqtt.publish
 data_template:
 topic: rtl433/bedroom
 payload: '{ "temperature_F" : {{ trigger.payload_json.temperature_F | round(1) }}, "humidity" : {{ trigger.payload_json.humidity }}, "model" : "{{ trigger.payload_json.model }}" }'

This is triggered when a sensor transmission comes in, and the id number is ‘494’, which is the sensor in my bedroom. It converts the payload into its own specific message that can be picked up not only by Home Assistant, but by anything that is monitoring these messages(dashboard anyone?)

You may notice a few things here. The sensors I have do support humidity for example…I’ll be using that as part of my climate control project. I am also rounding the temperature to a single decimal point, where the system supports 2 decimals. I do pass a few other parameters I am not yet using, such as battery on the sensor, which I’ll likely set up a notification on.

Published on October 9, 2017
Full Post
0 Responses

Taking Control Over Wifi Controlled Outlets

The Itead Sonoff line of products are inexpensive wifi controlled Smart Home devices that use a common chip, the ESP8266, which is popular amongst hobbyists for their own projects.

Continuing my goal of avoiding building my own hardware, I’ve focused on adaptive reuse. In order to use a Sonoff in its default configuration, you need their app, which routes information through their server in China.

I’m not that worried about the Chinese being able to control my humidifier, but I find it completely unnecessary. But, being as it uses a common chip, it can be reprogrammed.

The recommended and guaranteed way to do this is to solder connections onto the board and flash the chip with new firmware. However, one developer has worked to hijack the Sonoff’s over the air firmware update process to add custom firmware. You can find the work on Github along with custom firmware to install.

The custom firmware allows the device to be controlled by HTTP or MQTT control, which can then be tripped manually or by Home Automation software.

I have been using the Sonoff Socket S20, which is their remote controlled outlet. However, the same hardware is available as a wire-in power control module, as well as switches, temperature sensors, etc.

The control of these sockets has been reliable and without issue.


Published on October 14, 2017
Full Post
1 Response

Home Automation Obsession: The Home Assistant Green

Years ago, as part of this series, I started to discuss why my preferred home automation platform is Home Assistant. The fact that it merges multiple different platforms together into a seamless whole means you don’t have to pick a side, per se. The most popular platform people run Home Assistant on is a Raspberry Pi. I’ve always had issues, much as I love the Pi, with the fact that it uses a microSD card for storing the operating system and data….as those cards would regularly fail on me.

But, despite the process of installation therefore was, insert microSD card into computer, write to it, and then insert in Pi…that was still a higher level than many people were willing to go. So, the Home Assistant team tried a few different iterations of hardware before they got to one meant for someone who just wants to plug and play. The Home Assistant Green. It is $99 MSRP, and you can add a USB dongle to support Zigbee, Z-Wave, or Thread radios. It has built in storage for the operating system, It does not have built-in wifi though, but your home automation hub is probably more reliable wired.

After you plug it in, you can configure it with a web browser or a mobile app. And since it can be easily upgraded with the latest version of Home Assistant, you’ll continue to get new integrations with various platforms and technology on your network.

Published on December 24, 2023
Full Post