Gadget Wisdom

Category: Smart Home

weather network
0 Responses

From a Garage Door Opener to DIY Weather Network

Many years ago, I started down a path that eventually led to my building and operation my own weather stations. Disney all started with a mouse, but my weather stations all began with a garage door that didn’t work properly.

It Started with a Garage Door Opener

When my garage door opener repeatedly failed, I decided to replace it with a model that had better range. For just a few dollars more, I could get one with smart capabilities. Why not? I thought—it would be nice to know whether I’d left it open. I later dropped that solution for an open alternative maintaining the same functionality.

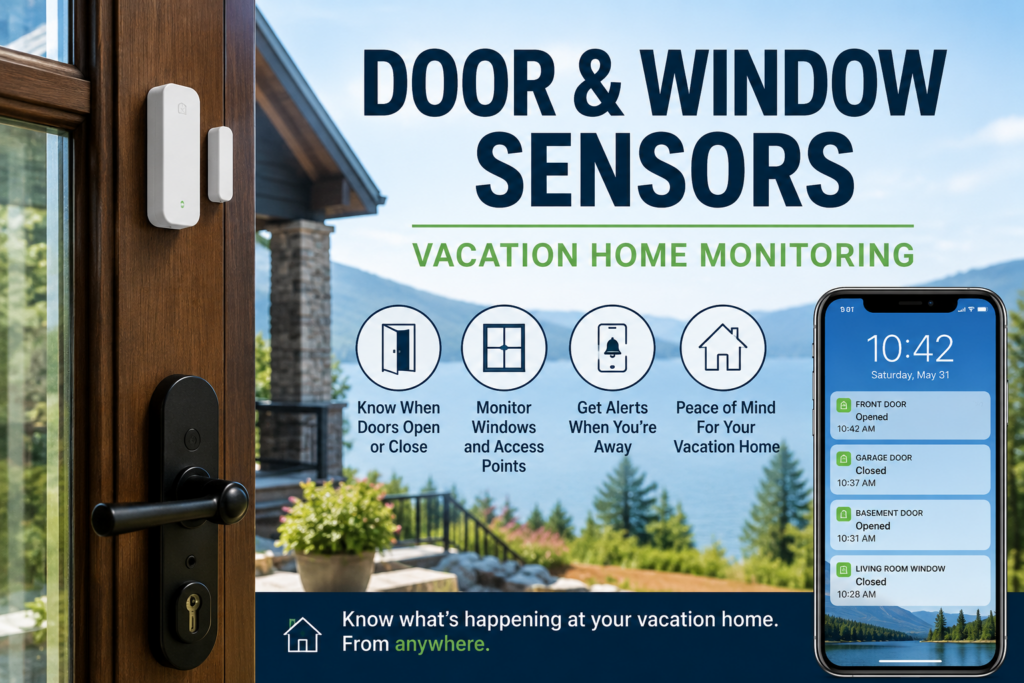
After sharing this information with the other people in the building,  one day, in the winter, I was outside shoveling snow, and got a phone call. The person on the other end of the phone told me they knew I must be home because they got an alert that the garage door had opened and closed. I told them I was outside, and they’d know that if there was a camera. I installed my first IP based camera the following week.

From Cameras to Weather Stations

Not long after, another neighbor—snowbirding in Florida—called me to say they were using the camera to check the weather at home. I joked that if I set up a weather station, they’d get even more accurate information.

Fast-forward, I now run three weather stations in three different counties, all running WeeWx. Every time I show someone what I’ve built, they want one too.

Expanding the Weather Stations

Over the years, I’ve added sensors and refined my stations. Most recently, I standardized all three with AirGradient air quality sensors. I had first installed one during the Canadian wildfires, when smoke spread across the northeastern U.S.

Unfortunately, one sensor started reporting “apocalyptic” levels of dust—clearly wrong. After forcing a restart, it began reporting zero. Another failure. Luckily, I’d bought a spare particulate sensor, since they have only a three-year shelf life.

Moments like this raise two questions for me:

  1. Is it time to upgrade while I’m fixing something anyway?
  2. How do I better monitor these systems so I know when they are failing?

I have this same problem with anything I built. I’ve talked before about Uptime Kuma, which I use to make sure servers are up. However, Uptime Kuma does not deal with sensors not reporting data, or reporting insanely wrong data. I think I need another solution for that.

But in the meantime, what about upgrades? I went to the WeeWx database for ideas on what their default schema stores. I currently track:

  • Temperature
  • Humidity
  • UV
  • Lightning Strikes
  • PM1, PM2.5, and PM10
  • CO2
  • VOC
  • NOx
  • Rain
  • Barometric Pressure

But there are prebuilt fields in WeeWx for:

  • Hail
  • Snow
  • Lead
  • Ozone
  • Sulfur Dioxide
  • Noise
  • Ammonia
  • Nitrogen Dioxide
  • Cloud Cover

There is a line between important statistics and gathering as much data as possible. Some of these, like ozone, are useful for urban air quality. Others, like snow still lack good consumer hardware.

For now, my temporary workaround is an simple snow gauge(a metal pole in the ground), planted outside within view of one of my outdoor cameras.

Reliability and Redundancy Challenges

A faulty sensor isn’t the only problem I’ve run into. I’ve had *Acurite Atlas sensors fail completely*, and those are much harder to repair. This raises more questions:

  • Should I install redundant temperature and humidity sensors for accuracy and reliability?
  • Can I create alerts for insane values (like volcanic dust levels) or for when sensors stop reporting entirely?
  • How do I best design fallback logic without sacrificing accuracy?

I already use Uptime Kuma to monitor whether servers are up, but it doesn’t flag incorrect or missing sensor data. Building alerts for bad sensor values is a different challenge.

What is Next For My Weather Network?

What began with a broken garage door opener has grown into a DIY weather network. As I expand, I face a balancing act: deciding which data is truly valuable, keeping sensors reliable, and planning upgrades smartly.

Every failure teaches me something new—about both the technology and the importance of monitoring the monitors themselves. The fun of DIY weather tracking as a hobby isn’t just in gathering data and using it; it’s in continually improving how that data is collected, validated, and shared

.

Published on September 30, 2025
Full Post
Home Automation Scenes For Smarter Routines
0 Responses

How to Use Home Automation Scenes for Smarter Routines

What Are Home Automation Scenes?

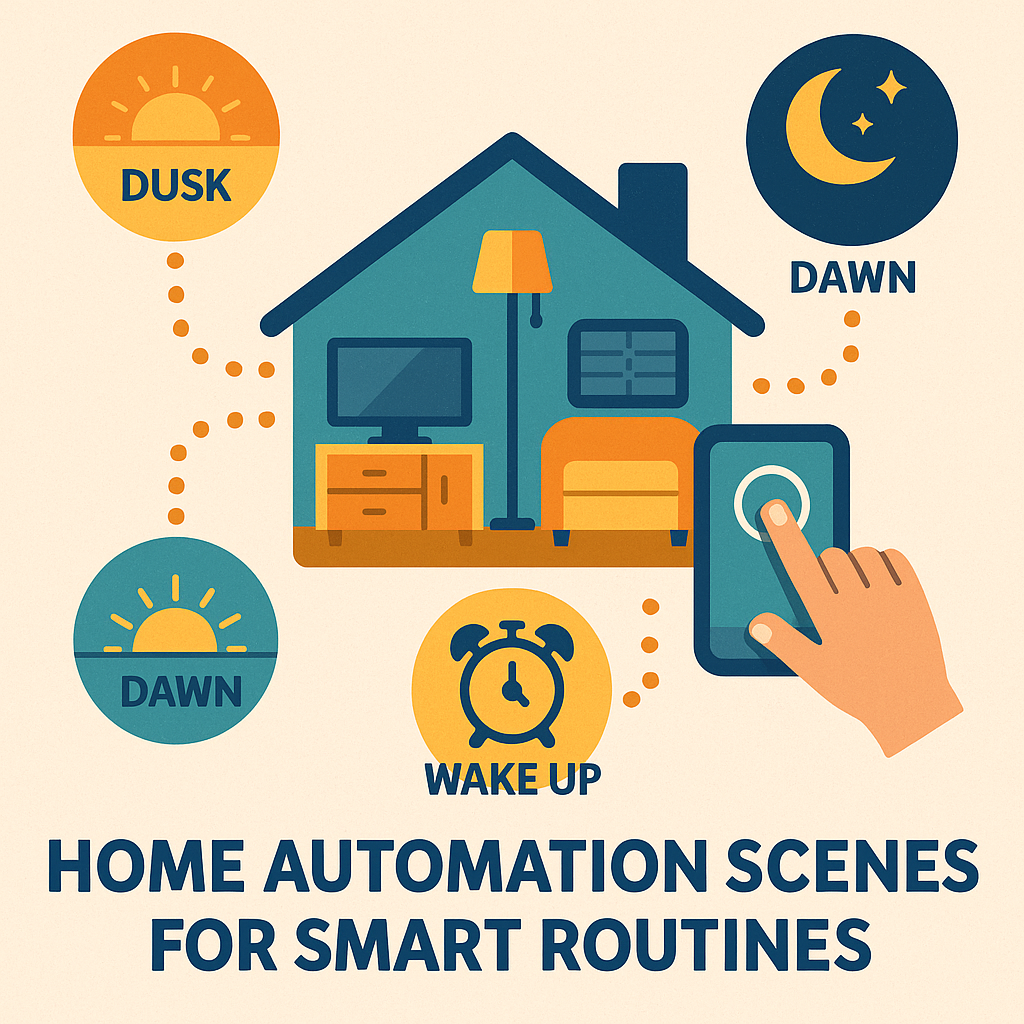
One of the classic concepts in home automation is the scene. A scene is a preset that updates the states of multiple devices at once, saving you from juggling switches and apps.

Think of a theater scene: the television powers on, your speakers adjust to the right volume, the shades close, and the lights dim. One command, everything set.

Scenes are powerful—but designing them takes planning. Here’s how to think about scenes in any other automation platform.

Why Home Automation Scene Planning Is Tricky

Planning automations is one of the hardest parts of a smart home setup. You need to figure out:

  •  The trigger (time, motion, button, or voice)
  • The devices involved
  • The desired states

Home Assistant, like many platforms, makes this a little easier: you can set your devices the way you want them, then capture those states into a scene. Later, you can resume them all with a single action.

It sounds simple, but when you have dozens of lights, locks, and plugs, execution can be complicated.

Everyday Home Automation Scenes Worth Creating

You don’t have to start with complex routines. A few simple scenes can transform your daily life:

  • Dusk – Turn on outside lights, close blinds, and set indoor lighting levels.
  • Dawn – Open blinds, turn off night lights, start the coffee maker.
  • Good Night – Shut off lights, lock the doors, enable security devices.
  • Wake Up – Gradually raise lights, play morning music, and turn on smart plugs.

The real value comes when you think about what you do every single day—and automate that.

My Example: The Good Night Home Automation Scene

Here’s what happens when I activate my Good Night scene:

  • Turn on the noise machine to drown out background noises
  • Turn off bedroom lights
  • Turn off lights in other rooms
  • Check whether the apartment door is locked

Instead of walking through my home flipping switches and checking locks, one tap (or a voice command) takes care of everything.

Home Automation Scenes Make Smart Homes Actually Smart

Scenes aren’t just a convenience—they’re the glue that makes a smart home feel intelligent. By grouping devices into routines like dawn, dusk, and good night, you replace dozens of manual actions with a single one.

Yes, automation planning is personal. Everyone’s home and habits are different. But with a little thought, you can design scenes that fit your life perfectly. And once you do, you’ll wonder how you ever lived without them.


Published on September 25, 2025
Full Post
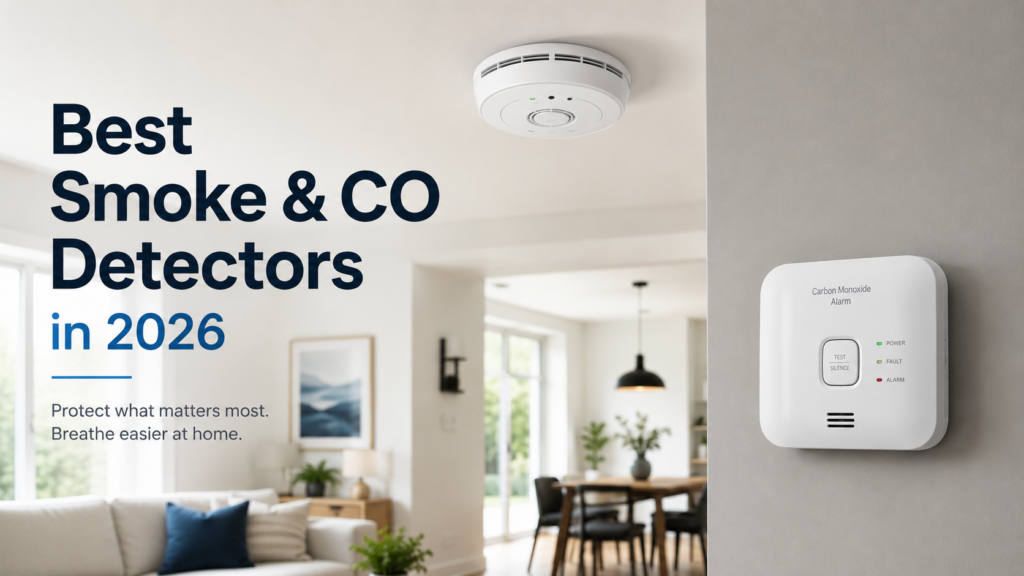
Smoke and carbon monoxide detectors on a ceiling and wall, illustrating the best smoke and CO alarms in 2026
0 Responses

Best Smoke and Carbon Monoxide Detectors in 2026

Updated: May 15 2026

In a previous post, I discussed the decision making process in picking a smoke detector. I wanted to follow up with some more practical recommendations.

If your current alarm won’t stop chirping, it may actually be reaching the end of its 10-year lifespan. Here’s what that means and how to fix it.

Let’s review a few features that need to be considered

  • Type of Smoke Detector
  • Hardwired or Battery
  • Interconnect Capability
  • Alert Type

We mentioned the two types of detectors, photoelectric and ionization previously, batteries, and interconnects. In 2025, while you can still get them, I wouldn’t buy anything that wasn’t up to the new 2024 standard.

Alerts

Pretty much every smoke detector can emit a sharp siren, but some of them can also provide Voice Alerts. Some studies suggest many respond better to Voice alerts than sirens. Some allow only for pre-recorded messages, some allow you to set the names of each detector when interconnected so you can determine the source of a particular alert.

Power

My building was built in the 70s, so it had no hardwired power for smoke detectors. I invested in having mine wired, to make sure a dead battery didn’t cause a disaster. I also live in New York, where smoke detectors have to have a ten year battery life.

Interconnect Capability

The two different types of interconnections are wireless and wired. Newer construction tends to have wired interconnected smoke detectors, but this isn’t a guarantee. While I wired for power, I did not interconnect my detectors.

You can solve the problem of having no wires by having a hardwired smoke detector with a wireless interconnect. Looking at the First Alert website, however, they don’t offer this option with the latest detection technology, nor does Kidde, at least not that I could find. The last model they have that fits those parameters can also bridge wired and wireless interconnects, so I assume eventually they’ll make a new version with up to the modern smoke detection standards.

So, that leaves my previously recommended solution. A device that turns your wired interconnect into a wireless relay in my case the Zooz Z-Wave Relay. This allows the smoke detectors to signal my home monitoring system over the Z-Wave protocol when triggered. The device can also act as a relay to power a light or other option if needed, and it can work as part of a full hardwired interconnect system.

Unfortunately, there seems to be a lack of options in this area. Wireless hardwired interconnected smoke detectors seem rare, but why the manufacturers don’t offer an accessory that takes power off the line and wirelessly takes the place of the interconnect wire? Or some sort of retrofit option from a third party? I’m not sure the certification requirements that might be necessary, but it seems there might be interest.

Options from the Big Manufacturers

Fortunately, while First Alert offers wireless interconnect and hardwired detectors, not with the latest sensors. They do offer it with the hardwired detection option, either the SMI105-AC smoke detector, with 10 year backup battery, or the carbon monoxide variant, the SMICO105-AC. First Alert’s commercial division, BRK, also offers near identical detectors.

The other popular brand is Kidde. which offers the 30CUA10, hardwired, with a 10 year backup, or the Smoke Detector only option, the 20SA10.

Don’t skimp on saving lives

In the end, you should get the best smoke detector you can to protect your home and loved ones. You are probably fine to keep the older models until they need replacement, but when getting new ones why would you wait for failure?

Published on September 15, 2025
Full Post
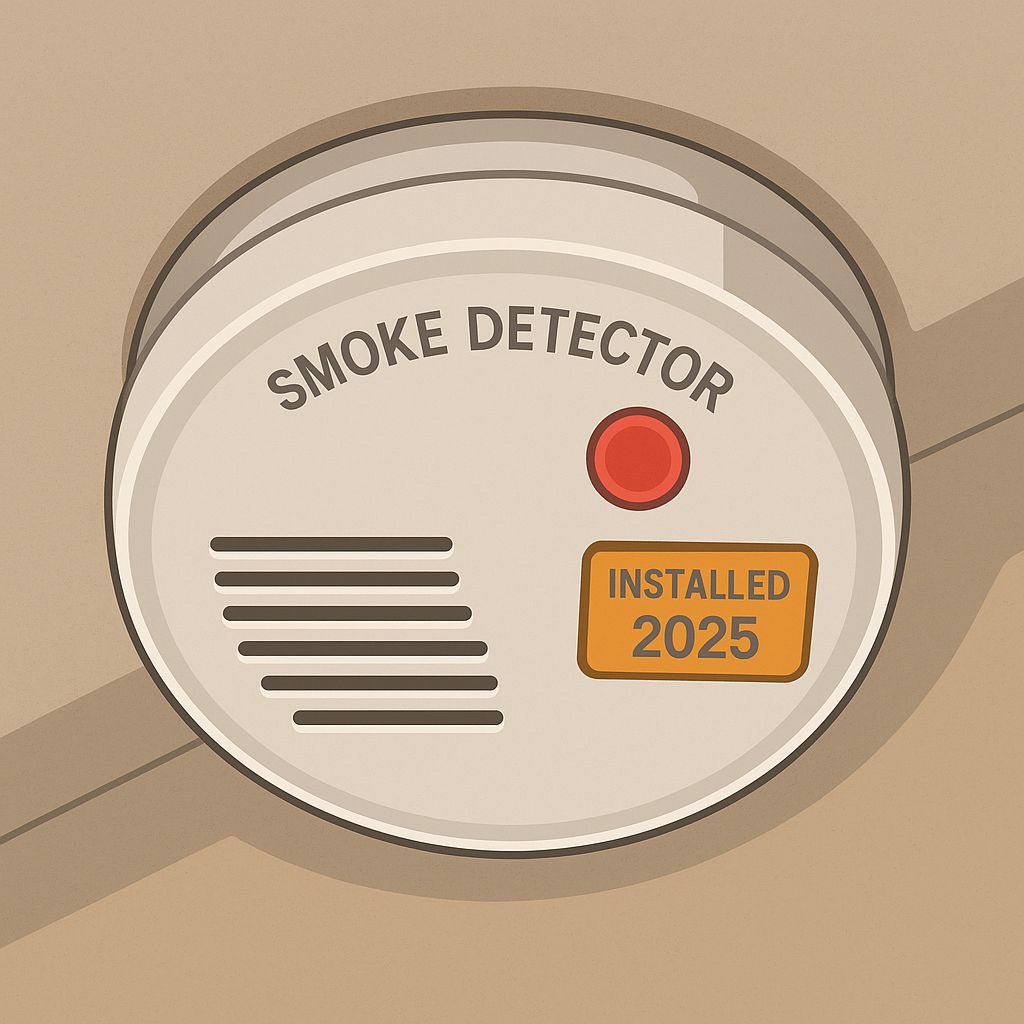
Illustration of a modern smoke detector mounted on a ceiling, with a red LED light and an orange installation label marked Installed 2025
0 Responses

Smart Smoke Detectors in 2025: Safer Batteries, Fewer False Alarms, and Better Placement

At the end of the day, smoke detectors are one of the most essential pieces of home safety technology. But the old mantra—“check your smoke detector batteries when you change the clocks”—no longer applies.

Today’s devices have changed. You can now buy smoke detectors with 10-year sealed batteries that don’t need annual replacement.  If your current alarm won’t stop chirping, it may actually be reaching the end of its 10-year lifespan. Here’s what that means and how to fix it. Many also combine smoke and carbon monoxide detection. When I install a smoke detector, I always write the installation date on it. That way, I know exactly when it will no longer be safe to keep using it, whether it seems to be working or not.

The New Standards and Why They Matter

The detection technology has also improved. In 2024, the latest revision of the U.S. smoke detector standard came into effect.

Nothing is more frustrating than a smoke alarm blaring while you’re cooking. The new standard helps cut down on nuisance alarms in the kitchen.

For context, in 2016 the National Institute of Standards and Technology (NIST) tested 45 alarms against the 2016 requirements—and none of them passed. So it’s a good thing that new battery-operated detectors last a decade. After that, it’s best to replace them entirely.

Types of Smoke Detectors

There are two basic types of smoke detectors:

  • Photoelectric – Detects smoke using light
  • Ionization – Detects smoke when particles interfere with ionized air

Most fire safety experts recommend having both types in your home—or choosing a dual-sensor unit that covers both.

Where to Place Smoke Detectors

Placement is just as important as type. Fire safety guidelines recommend:

  • Inside every bedroom
  • Outside each sleeping area
  • On every level of the home

You can also interconnect your smoke detectors so that when one goes off, they all go off. This is easy to do in new construction but trickier in older homes. Some brands now offer wireless interconnects, even for battery-powered units.

In New York City, where I live, code requires smoke detectors within 15 feet of bedroom entrances, but only newer buildings require them inside bedrooms.

Making Smoke Detectors Smarter

For my renovation, I hardwired a smoke detector and added the Zooz Long Range DC Signal Sensor, which is wired into the interconnect port. This setup can notify me of whenever a detector is triggered. It also lets me extend alerts to my smart speakers, phone, security system, even a siren if needed. It means even though my detectors aren’t smart themselves, I still get smart notifications.

Why Not Wi-Fi Smoke Detectors?

You can buy Wi-Fi–enabled smoke detectors that connect directly to apps, but I’ve always felt there are issues with this.

  • Lock into a particular manufacturer’s system, requiring yet another custom app for each system.
  • Lack of integration operations

I prefer to integrate detection into my existing local control systems. That way, I avoid installing yet another app, and I still get reliable alerts when something happens.

A Safer, Smarter Approach to Fire Safety

Smoke detectors have come a long way in the last decade—from 10-year batteries* and dual-sensor technology to new standards that reduce false alarms. By combining the right hardware with smart integrations, you can make sure your home is both safer and less frustrating to live in.

At the end of the day, your smoke detectors should do one thing well: warn you when it matters most. Taking the time to plan placement, choose the right type, and add smart notifications makes that mission even more reliable.

Published on September 14, 2025
Full Post
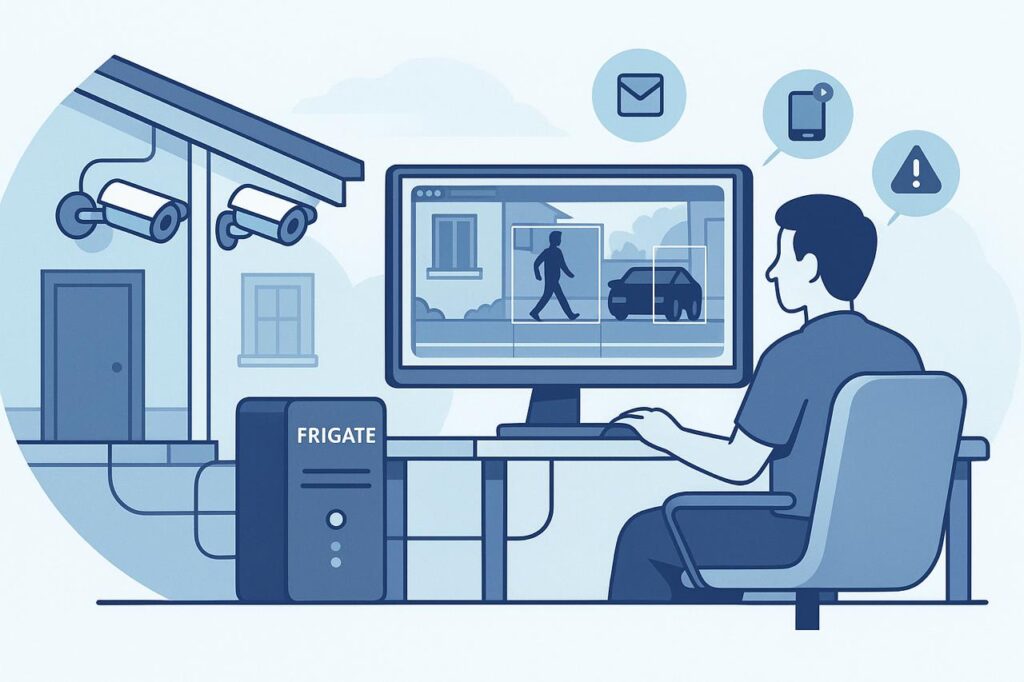
Illustration of a person monitoring POE security cameras using Frigate NVR software on a computer, with outdoor cameras mounted on a house and detection alerts shown on screen.
0 Responses

POE Cameras and Frigate NVR: Why I Switched to Local Home Surveillance

During my recent renovation, I added two additional cameras to my new space, at the two points of ingress. This was something of a departure as these were also the first Power Over Ethernet(POE) cameras I’ve had installed, as I had someone on-site available who could run the cables cleanly.

I’ve tried a variety of ecosystems for cameras, both for myself and others. Many of them push you toward subscription-based cloud services, which features like video history, motion detection, and notifications only work fully if you pay monthly. Some of them barely provide any features without paying, despite the fact you bought the device.  Even when offering local options, this is often storage with a microSD card in the camera, which is clunky, slow, and unreliable.

That is why I decided to go with a network video recorder. A server that takes the feeds from all the cameras and stores the recordings. You can buy commercial NVRs you can purchase and install in your house, including some that integrate with the specific hardware cameras you bought, but I wanted a solution that aligned with my philosophy of self-hosted, privacy first smart home tech.

So I chose Frigate.

Quick Answer: Why Use POE Cameras With Frigate?

POE cameras and Frigate make sense if you want a local home-surveillance system that does not depend on a cloud subscription. Power Over Ethernet cameras are more reliable than Wi-Fi cameras, and Frigate can record video, detect people, cars, animals, and other objects, and let you tune alerts around the parts of your property you actually care about.

Choice Why It Matters
POE cameras More reliable than Wi-Fi cameras and powered through the network cable
Frigate NVR Local recording and object detection without relying on a cloud camera plan
Detection zones Reduce false alerts from sidewalks, streets, neighbors, or passing cars
Self-hosted storage Keeps recordings under your control instead of inside a camera company’s subscription
Frigate+ Optional model improvements without turning the whole system into a traditional cloud lock-in product

Why Frigate?

Frigate is an open-source NVR designed for real-time object detection all running on local hardware. It is deeply customizable and can be tuned to only record what matters to you – people, cars, or animals, depending on what zones and filters you decide.

For example, one of my outdoor cameras flagged every pedestrian across the street, which is well outside of the zone I am concerned about. I can narrow the zone to only my property, to dramatically reduce noise in footage and alerts.

Frigate recently added:

  • facial recognition
  • license plate recognition.
  • View-only user roles for shared access

Everything is processed locally, with no cloud dependency.

Frigate+: Smarter Detection, Optional Subscription

To improve detection, you can also subscribe to Frigate+, a $50/year subscription which offers better trained models for detection. These are trained by other users of Frigate. You can participate by submitting false positives and other information voluntarily. If you cancel, you get to keep the downloaded models, you just stop getting updates.

This helps support the developers and doesn’t lock you into a traditional subscription model.

Frigate Notifications

One gap in the core Frigate setup is the lack of built-in robust multi-platform notifications. That’s where another piece of software, Frigate-Notify, comes in. It offers all of the notification options I might want.

  • Rich notifications
  • Cross-platform delivery including mobile, desktop, and messaging apps
  • Fully customizable

Next Steps For My Frigate NVR

Inspired by how well the new system is performing, I plan to replace more of my older Wi-Fi cameras with wired POE models for improved reliability. Wired cameras streaming directly to my NVR reduces lag, improves reliability, and gives me full control over recording, storage, and alerts—without the cloud.

If you’re tired of cloud lock-in and unreliable Wi-Fi cams, and you want a privacy-respecting, smarter surveillance system, Frigate + POE may be the combo you’ve been looking for.


Published on September 8, 2025
Full Post
0 Responses

Designing a B-Mode: How I’m Building Fail-Safe Smart Home Devices with ESPHome

In a previous post, I discussed migrating to ESPHome for my smart devices. That initial migration was pretty straightforward—flashing firmware, configuring YAML, and getting basic functionality running.

But now I’ve started refining things. ESPHome isn’t just about turning things on and off. It’s about designing smarter devices—devices that don’t just rely on a central hub, but can think for themselves when they need to.

Dawn-Dusk Automation

The first item I built using ESPHome was dawn to dusk lighting control. ESPHome makes this possible with its sun component, which calculates sunrise and sunset time based on provided latitude and longitude.

To make that work, you need a time source. The most popular one is getting it from Home Assistant, but you can also use:

  • An NTP server, for independence from your Home Assistant instance, but still requiring a local or remote time server.
  • RTC Hardware Clocks for full independence

Switches and Manual Overrides

Next, I added a templated switch. These aren’t tied to physical hardware and control logic on the device (e.g. enable/disable the dawn-dusk logic).

This gives me some flexibility. For my style of planning,I want any automations running on device to be something that can be disabled if from Home Assistant, which has more capabilities. Simple logic runs locally, but still is controlled by the larger brain.

Important External States for Smarter On-Device Logic

ESPHome allows you to import the state of external entities into your device. Most commonly, you would sync states from Home Assistant, but there is a more powerful alternative in the packet transport component.

This component lets you import the state of sensors to be shared directly ESPHome device to ESPHome Device without a server in between. Even if a server crashes, the system still works, even if the functionality may be limited.

Designing for Failure: My “B-Mode” Smart Home

Resilence is something I prefer to prioritize. Inspired by Disney theme park ride design, I’ve incorporated what I call “B-Mode”.

In Disney-speak, A-Mode is full, ideal operation. B-Mode is what happens when something breaks—so the show can go on, just in a simplified form.

In my design, B-Mode is:

  • Smart lights that fall back to dawn-dusk mode if Home Assistant is unreachable
  • Ability to enable/disable on-device automations by communicating directly with the device
  • Direct Connections between devices to keep key functions running locally
  • Physical Buttons that Always Work, even if the connection is down

And the key: none of this happens by accident. You have to plan for outages and decide what should keep working in your design. ESPHome gives you the tools.

? Final Thought

Your smart home shouldn’t break just because your server does.

With ESPHome, you can build resilience into every device—whether it’s a light switch, a plug, or a sensor. Start simple. Add layers. Think about what matters when things fail.

That’s what B-Mode is all about.


Published on August 29, 2025
Full Post
0 Responses

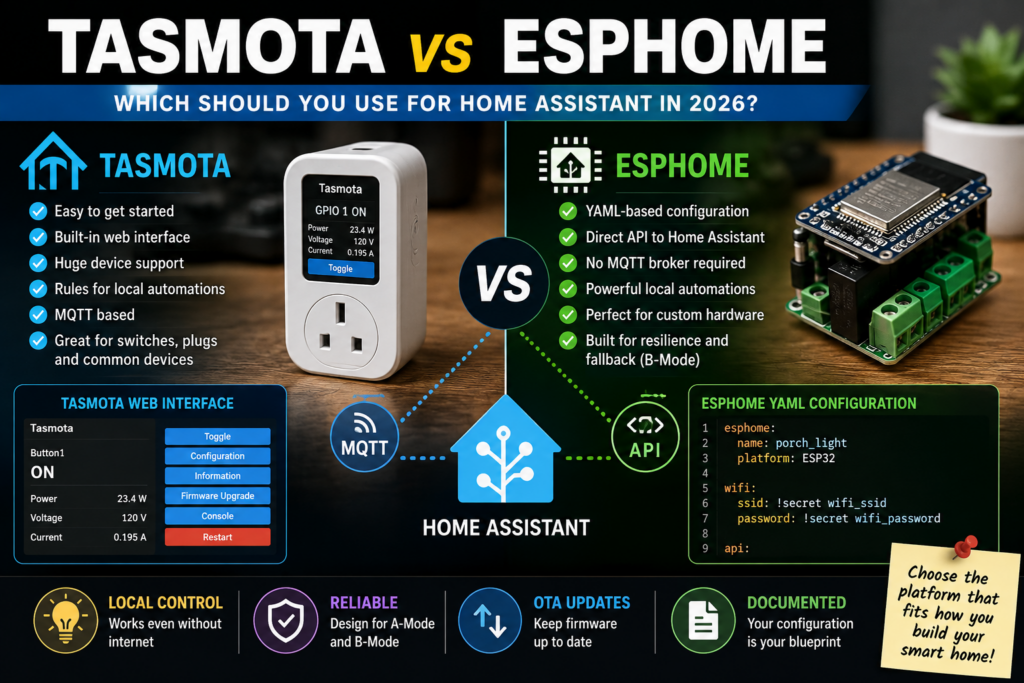
Tasmota vs ESPHome: Why I’m Moving My Smart Home Devices

I have been running smart light switches for a while, and using the Tasmota firmware on them. Let’s be clear, Tasmota is a great piece of software. It’s reliable, open-source, packed with features, and in many cases, works right out of the box.

But over time, I found myself chafing at the limits.

Tasmota, for all its strength, is kind of like a Swiss Army knife. It is not always the most efficient or most effective for your needs. You either need to use its limited syntax, or rely on external systems.

So, recently I’ve been migrating a lot of my lights and plugs over to ESPHome, a platform I was already using for sensors.

Quick Answer: Tasmota vs ESPHome

Tasmota is still a great choice if you want reliable open-source firmware that works quickly, has a web interface, and supports a wide range of devices. ESPHome is better when you want tighter Home Assistant integration, custom YAML configuration, and device-specific logic that runs locally on the device.

Feature Tasmota ESPHome
Best for Quick firmware replacement with lots of built-in features Custom Home Assistant-focused smart home devices
Configuration Web UI, templates, commands, rules YAML files compiled into custom firmware
Local device logic Possible, but more limited Strong for buttons, timers, sensors, and device-specific behavior
Learning curve Easier to start More setup, but more control
My use case Still useful for simple devices Better for my more customized lights, plugs, and sensors

Why I’m Moving to ESPHome

ESPHome is more modular and streamlined than Tasmota. You don’t flash a generic firmware – you compile a custom one. The configuration of the device is set in YAML, a text format, you define exactly what the device needs. What sensors or relays are connected, how buttons behave, what actions they trigger, and more.

  • Want a web interface? That’s a component.
  • Need to calculate sunrise and sunset for dawn/dusk functionality?
  • Need to sync to an NTP time server for that dawn/dusk?
  • Want two ESPHome devices to talk to each other independently?
  • Track bluetooth devices?
  • Communicate over a VPN?

There are components for all of these. I was able to fine-tune the behavior of each smart switch and plug, beyond what I could do in Tasmota. I installed dawn to dusk programs on external lights. I tied a light into a remote motion sensor, also running ESPHome to activate a hallway light. I even built countdown switches that automatically turn off after a set period of time.

Why ESPHome Feels Better For Local Smart Home Control

One of the major advantages of Home Assistant is local control. Both Tasmota and ESPHome allow for some logic on device, but with Tasmota that logic is very limited. You don’t have to rely on Home Assistant or Node Red to create automations.

That said, not all logic belongs on-device. I don’t use ESPHome for high-level automation or multi-device coordination. That’s where Home Assistant or even Node Red still shines. But for device-specific behaviors—like button presses, countdown timers, or dusk/dawn triggers – having that logic on the device itself makes the whole system more resilient. No lag, no missed automations if those systems are offline.

When I’d Still Use Tasmota and When I’d Choose ESPHome

Switching from Tasmota to ESPHome takes time. There’s a learning curve to create the configuration files. But once you get the hang of it, the freedom to define exactly how your smart devices behave is game changing.

If you are looking for something to install on your first switch, Tasmota is still a great place to start. But if you reach the limits of what you can do with it, it might be time to switch over to ESPHome. Some things take effort, but with that effort you can build a smart home where every piece is smart on your terms.

Published on August 20, 2025
Full Post
0 Responses

Smart Apartment Renovation: Wiring Upgrades for a Smarter Home

When it comes to smart home upgrades, wiring is the unsung hero. Without a solid electrical foundation, your smart tech is only as reliable as the weak link in your power or network infrastructure.

Many older structures have poor or insufficient wiring for your modern needs. In my renovation, it was essential I modernized the electrical system and laying the groundwork for smart lighting, fans, Ethernet, and security—all while respecting building codes and future-proofing for the long haul. Bringing an apartment up to modern code starts with safety.

I will be covering each of these in more detail in future posts, and will provide recommendations and thoughts on specific items.

Why Wiring Matters in Old Buildings

The building I live in was constructed in the 1970s, and my new apartment—unlike others in the building—hadn’t been touched since then. That meant it required a ground up redo of the electrical wiring, beginning with GFCI.

Ground Fault Circuit Interrupters (GFCIs) are required in areas with water exposure, like bathrooms, kitchens, and laundry rooms. But they weren’t mandatory when the building went up, and even if a few had been added later, chances are they’re outdated. Today’s Smart Lock GFCIs, required since 2003, provide added safety by locking if the mechanism fails.

Full Outlet Replacement and Smarter Circuit Planning

Every receptacle in the apartment had to be replaced. Over time, as outlets age, plugs will not hold within them.  Outlet placement was uneven and sparse, so I had additional outlets added to ensure consistent spacing across rooms.

More importantly, the electrician found that multiple rooms shared a single breaker—an overload risk waiting to happen. He split the circuits, rewired the panel, and even repositioned the breaker box to make space for slightly larger kitchen cabinets.

Let There Be Light—And Ceiling Fans

Like many older apartments, none of the main rooms had ceiling lights—just switched outlets. That changed. In 2025, LED disc lights have become a preferred option over traditional recessed cans (high hats). Why? They’re easier to install, offer better light distribution, and sit flush with the ceiling. Perfect for smart lighting systems.

We also installed junction boxes in the bedrooms, dining room, and entryway to allow for ceiling fans. In an apartment with baseboard heating and room air conditioners, fans play a key role: improving airflow, enhancing comfort, and even supporting better air quality.

Safety First: Wired Smoke and CO Detectors

Since ceilings were being opened up anyway, I had the electrician wire smoke and carbon monoxide detectors. Hardwired systems are more reliable than battery-powered ones, and ensure that you don’t have to worry about battery failure. In New York, where I live, as of 2019, new and replacement smoke detectors must be either hardwired or powered by a battery with a ten year life. Replacing batteries is no longer an option if you are complying.

Building a Wired Backbone: Ethernet and Network Planning

When the walls are open, there is an opportunity to add not just new outlets, but the electrician also knew how to run ethernet cable. I didn’t go overboard with Ethernet jacks—each room has one drop, which limits placement flexibility, but this setup ensures stable wired connectivity and reduces Wi-Fi dependency. I had him run:

  • Dual Cat 6 cable drops in each bedroom and living room
  • Runs to both entrances for PoE security cameras
  • A ceiling drop in the dining room for a PoE wireless access point
  • A centralized network hub in the old linen closet, with added power and conduit to the provider junction outside

Everything terminates in that closet, giving me a homegrown mini-server closet if needed. I briefly considered a full rack setup… but let’s not get carried away (yet), although if you have the opportunity, get wires placed where you want them and future proof your home.

Modular Design for Marketability

Remember: Everything in this renovation must be removable or acceptable to future tenants.

  • Ethernet jacks are unobtrusive if unused
  • Cameras and access points can be disconnected or left unpowered and the access covered with a plate.
  • Fans can be skipped in favor of pendant lights or left off entirely
  • Network gear can be removed.

What’s Next?

This phase took the electrician about a week, and he returned after painting was finished to install the final fixtures. But with wiring and foundational infrastructure out of the way, the work for me is just beginning.

Subscribe for updates as this smart apartment transformation continues.

Published on July 4, 2025
Full Post
Smart Apartment Renovations Series Image
0 Responses

Smart Apartment Renovation: Upgrading a Wreck to a Connected Home

I haven’t been contributing as much to Gadget Wisdom in recent weeks because of several new developments in my life. But, I decided it was time to write about one of them that is simultaneously exciting and overwhelming. I’m moving.

This was somewhat unexpected, as the space just became available. I’m relocating from my long-term, one-bedroom first-floor apartment to the third floor of the same building—a larger space with more potential and, unfortunately, a lot more problems.

A Time Capsule

The building was constructed in the 70s and has three apartments, one per floor. The third floor recently vacated after decades of occupancy and since the building is owned by relatives, I was offered the chance to take it over before they listed it publicly.

It’s a bigger apartment, which is great. But it’s also a total wreck with poorly maintained original fixtures. The kitchen and bathroom had deteriorating, non-functional drop ceilings. Industrial piping used as safety railings ran along the walls and even cut into door moldings. The kitchen cabinet doors were falling off, the flooring was peeling up, and the balcony wood was rotting. Every window in the unit needed replacing.

And that’s just scratching the surface.

Professional Renovation and Smart Tech Planning

Luckily, much of the renovation is being handled by professionals. While they work, I’m able to plan and integrate smart home upgrades and modern tech enhancements before I move in, and have them add in features in support of that before I implement my work.

The large amount of pre-planning is a huge shift from my current apartment, where I added upgrades piecemeal over time. Not only can I do things right the first time, but I can learn from my previous experience and try to share that experience with others.

Some ground rules apply: Since I’m related to the owners, I have more freedom than a typical tenant—but any upgrades must either be easily removable or acceptable to future occupants.

Extending Home Assistant to Multiple Apartments

I’ve already set up Home Assistant to unify the various devices and control all aspects of my home. It already controls every smart switch, light, and sensor in the rest of the building. So, from its perspective, I have just added a third floor to the building when it thought there were only two.

What would you do with a Blank Slate?

If you had the chance to outfit an empty space into your home with contractors already on-site how would you enhance it? What tech would you install? What infrastructure would you build into the walls, the wiring, the layout?

That’s the question I’m facing now. And over the coming weeks, I’ll be documenting what I ended up with and why: from smart lighting to whole-apartment networking, energy efficiency, security, and more. It isn’t just a smart apartment in the automation sense, it is about making ‘smart’ decisions in outfitting a space.

Follow This

Subscribe via email or follow us on social media to get updates as this project unfolds. Whether you’re rehabbing your own place or just dreaming of the ultimate smart home setup, I hope this series inspires your next tech upgrade.


Published on June 17, 2025
Full Post
0 Responses

Govee Leak Sensors: Simple Water Leak Monitoring for Home or Vacation House

In a recent post, my fellow writer on this site wrote about Govee leak sensor for leak monitoringvacation home temperature monitoring. The focus there was temperature and humidity. But there is a more urgent monitoring need. Leak monitoring. There are a lot of choices for leak sensors in various price points and using various technologies. The sensors my fellow writer used were wifi based and require an app.

Water leak sensors are not exciting smart-home gadgets until the day they save you from a ruined floor, soaked cabinet, or slow leak nobody noticed.

That is especially true if you are monitoring a second home, basement, utility room, or any place where a leak could sit for hours or days before someone finds it.

I wanted something simple enough to install in a bunch of places, cheap enough to use generously, and flexible enough that I was not completely dependent on one company’s app forever. That is what led me to Govee leak sensors.

Quick Answer: Are Govee Leak Sensors Worth It?

Govee leak sensors are worth considering if you want inexpensive, simple water leak monitoring near sinks, toilets, water heaters, appliances, basements, or vacation-home trouble spots. The classic Govee leak sensors are especially interesting because they can work with Govee’s Wi-Fi gateway and can also be detected by some 433 MHz smart-home setups, giving you more flexibility than an app-only sensor.

Question Short Answer
Best use Detecting leaks near plumbing, appliances, basements, and utility areas
Main advantage Cheap enough to place in many spots around the house
Remote alerts Use the Govee Wi-Fi gateway or integrate with a broader smart-home system
Integration angle Classic sensors use 433 MHz, which may be useful for local smart-home setups
Main limitation A sensor only warns you; someone still has to respond to the leak

Why I Chose Govee Leak Sensors

Using an app does not bother me. Having the app be the only option bothers me more.

For leak monitoring, I wanted inexpensive sensors I could scatter around the house without turning every placement decision into a budgeting exercise. I also wanted something that could be integrated into a broader system later.

That pushed me toward the classic Govee Water Leak Sensors. You can buy them by themselves or with a Wi-Fi gateway. The gateway gives you app-based remote alerts, which is the simplest setup. But the sensors also transmit at 433 MHz, which means they can be picked up by some USB dongles and integrated into other smart-home systems.

That matters because leak alerts are more useful when they are not trapped in one app. If I want to notify more than one person, trigger an automation, flash lights, sound a siren, or eventually connect to a water shutoff system, integration gives me more room to build the response I actually want.

Classic Govee Leak Sensors vs. Leak Sensor 2

Govee now sells different leak-sensor options, including newer Leak Sensor 2 models that use LoRa on the 915 MHz band. LoRa can offer longer range and low-power communication, which may be useful in larger houses or harder-to-reach areas.

For my use, the older 433 MHz version still made sense. I can pick up the signal around the house, the sensors are frequently inexpensive, and the integration path matters more to me than the extra range.

Sensor Type Why You Might Choose It Tradeoff
Classic Govee leak sensor Inexpensive, simple, 433 MHz signal, useful for broader integration May need the gateway or separate receiver for remote alerts
Govee Leak Sensor 2 LoRa range may help in larger homes or difficult placements Less appealing if 433 MHz integration is the priority
App-only Wi-Fi sensor Simple setup for people who only want phone alerts More dependent on the vendor’s app and cloud support

Where I Would Put Water Leak Sensors First

A leak sensor is only useful if it is sitting where water is likely to show up. I would not save these for one perfect location. The point is to cover the boring places where leaks start.

  • under bathroom sinks
  • under kitchen sinks
  • behind or near toilets
  • near the water heater
  • near washing machines
  • near dishwashers
  • near refrigerator water lines
  • near HVAC condensate drains
  • near sump pumps
  • in basement trouble spots

If this is for a second home, the stakes are higher because nobody may notice the leak for days. For the broader setup, see my guide to vacation home remote monitoring.

A Leak Alert Still Needs a Response Plan

A sensor does not stop water. It only tells you water is there.

That means the alert should connect to a plan. If you are home, that may be simple. If you are away, you need to know who can get inside: a neighbor, family member, property manager, plumber, or caretaker.

For a more complete setup, a remote water shutoff valve may be worth considering. A leak sensor tells you there is a problem. A shutoff valve can help limit the damage if nobody can get there quickly.

In the end, integration or not, the Govee classic Leak Sensor is frequently on sale, it is reliable, and has alerted to water leaks behind toilets and sinks on numerous occasions. Place one anywhere there is running water. Use the wifi option to be alerted when you are far away.  Consider as well a remote water shut off device that will allow you to shut off your water remotely; perhaps we will discuss one in a future post.

Are Govee Leak Sensors Still My Pick?

For my use, yes. The classic Govee leak sensors are inexpensive, reliable enough to place generously, and flexible enough that I am not limited to one app notification path.

The newer LoRa-based versions may make sense if range is the main problem. But for ordinary leak monitoring around sinks, toilets, water heaters, basements, and utility areas, I still like the older 433 MHz approach.

The important thing is not the brand name. It is having sensors where leaks actually start, remote alerts that reach the right people, and a response plan for what happens when the alert goes off.

Published on January 16, 2025
Full Post

Get New Posts By Email