Gadget Wisdom

Category: Lifestyle

0 Responses

Bye, Bye Google Fi: Choosing My New Cell Phone Service

Google Fi: Value Lost

I have been a Google Fi user for years. When it started, then ‘Project’ Fi was innovative. A flat rate $20 for text and voice, plus $10/gb. You could switch between multiple providers to expand coverage. But that is still what it is for their base plan. They do offer Simply Unlimited($50 a month for a single person), and Unlimited Plus($65 a person). But their unlimited plans only work if you have multiple people. You need 4 or more people to pay $25 a person. They do have a limited time promotion for new customers going on, but I’m only looking at what I’d ultimately end up paying.

Fi used to offer more, even with that plan. The occasional gift, a vending machine at the airport, good deals on hardware. But the deals only seem to be for new customers now. Long standing customers like me got nothing. You had full integration with Google Hangouts…which is An innovative little carrier has stagnated. Fi is also unique in that it has the top level of network prioritization on T-Mobile. It also offers extra data only SIMs on several plans. MVNOs usually, in congested areas, fall behind the provider’s service.

In the end, the price hasn’t gone done, and it is still $10 a GB when everyone else is reducing that cost.

So I started shopping around. I’m not including taxes by default below, so consider that on top of this. Also, unless I mention otherwise, unlimited text and voice and I’m not mentioning hotspotting at this time. For those of you outside the US, I’m only looking for myself. Apologies. For those Americans who travel outside the country, I did factor that in, but I’ll address that in a separate post.


Mint Mobile

Mint is very popular, however, its plans are most economical when bought in annual increments. So, we’re going to look at their annual plans. I’m willing to plop down 100% to start with.

  • $15 a month for 5GB
  • $20 a month for 15GB
  • $25 a month for 20GB
  • $30 a month for unlimited

Ting

I’m not sure I would have looked at Ting if they hadn’t been the first prepaid carrier I switched to when I left my parent’s family share plan. Ting isn’t who it once was. Ting was once the leader in ala carte pricing. Now their plans are more conventional and unimpressive.

  • Set 5 – $25/month for 5GB
  • Set 12 – $35/month for 12GB
  • Unlimited – $45/month for 22GB

After you reach your limit, you’ll be slowed to a crawl. Any unused data carries over to the next month

MobileX

MobileX is the first MVNO I’ve mentioned that is running on Verizon, not T-Mobile. It has top priority on Verizon.

  • Unlimited 10 – $14.88/month for 10GB
  • Unlimited – $24.88 for unlimited

US Mobile

US Mobile offers a discount if you prepay annually. It is a bit more month to month

  • Unlimited Flex – $17.50/month for annual, not available month to month
  • Unlimited Started – $22.50/month for annual, $25 month to month
  • Unlimited Premium – $32.50/month for annual, $35 month to month

The differences are in hotspot data, Starter includes International data, and Premium offers a free smartwatch plan and network transfers(which otherwise cost $2 each). Network transfers are interesting. They offer service on different major networks…without naming them. If you want to switch which one, you pay the $2 to change.

Either way, $210 for a year of unlimited isn’t bad.

Visible

Visible is actually a prepaid carrier owner by Verizon. But don’t call Verizon.

  • Visible – $25/month for unlimited data on 5G/LTE, throttled video.
  • Visible+ $45/month for unlimited at premium speed on their wideband network


Tello Mobile

I ended up giving Tello a chance. Tello offers ala carte plans like Ting once did, as well as unlimited.

  • 1GB – $9/month
  • 2GB – $10/month
  • 5GB – $14/month
  • 10GB – $25/month
  • Unlimited Data(Really 35GB)/Minutes – $25 a month

You also don’t have to do unlimited phone/text, for example, $5/month gets you 1GB of data, and an extra $1 gets you 100 minutes and unlimited texts.

Conclusion

Picking a wireless carrier is extremely hard. There are a lot of good choices. And I only covered the ones that I considered because they fit my needs. I don’t stream video regularly. Since I got more data, I have been streaming music more, but I prefer my own music collection stored locally.

I was paying $20 a month for 2GB just to read and browse on my phone. That used to take less than 1GB…but all these sites are not concerned about data savings anymore. They are embedding autoplay videos, precaching resources, etc. So, without my behavior changing, I was using more data.

Ultimately, Tello won for the fact that I could justify the $25 a month(especially with a promo for 3 months at $15), but I could also switch down to 5GB a month which is still well above what I’m using on average. They made it extremely easy to set up and use an eSIM for a month in parallel with Fi as my phone supports that, then port my number over in 20 minutes. And even if I leave…I can still, thanks to the Pixel 9, try out anything for a month just to see what the experience is during my daily routine.

I did lose international included, but I’ll talk about that separately.


Published on April 8, 2025
Full Post
0 Responses

How To Create Usable Wall Space With Ikea’s SKÅDIS and 3D Printing

Wall space- potentially prime real estate, but, blank, bare and barren, it is limited in its utility. I don’t have that much space in my one bedroom apartment. My bedroom is for sleeping, my kitchen is for cooking, my bathroom…well, you get the point. That leaves my living room for everything else. It is my:

  • Home Office
  • Workshop
  • Homelab
  • Home Theater and Media Consumption location
  • Dining Room
  • 3d Printer Farm
  • Guest Room
  • Etc

That means that organization is a constant struggle, because I always have projects. I built an Ikea hacked 3d printing station, both it and my desk use a restaurant table as their tabletop. In the years I’ve lived here, I have reorganized and reorganized, dumped stuff, acquired new stuff and added complexity, simplified. It’s a struggle.

My most recent organizational attempt was to utilize the wall space. You can line the walls with shelves or bookcases, but again, space constraints…and I do have some of that. Most recently, I decided I wanted to add storage to the wall above my desk. The wall had very little on it. At the top was a photo ledge I have photos on, so this would be the space between the top of the monitor and the photo ledge I need to fill. The other issue is, having a hand crankable standing desk, which I should crank up more often, over the desk, at least, I can’t do shelves of any significant depth for large storage.

That made this a mostly unused space up until now. I could have added some photos, but how many photos can you put on your wall? This made me go with wallboard. And there were a lot of choices.

Pegboard

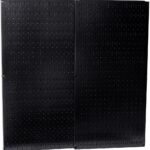
Wall Control is a traditional metal pegboard design and is fairly popular. It comes in a variety of colors. You can visit their store on Amazon here. I had decided I wanted white or black, because I felt anything else looked too much like a workshop you’d have in a garage. I’m not sure why round holes look worse to me than other choices. I wanted something that looked good in a combined living room setting.

You can also get plastic pegboard for less.


IKEA SKÅDIS

utilizing wall space The next option is the SKÅDIS Series at IKEA.

As opposed to the traditional round pegholes, these are slits. The pegboards are made out of acrylic and fiberboard as opposed to metal.This is probably the cheapest material you can buy…but that’s Ikea for you. But not only do they offer this product at a reasonable rate, but they have a variety of accessories, and more importantly for someone with a 3d printer, there are hundreds of accessories you can print yourself. You can even print Skadis compatible boards in different sizes using a 3d printer.


Honeycomb Storage Wall(HSW)

Honeycomb Storage Wall, credit RostaP

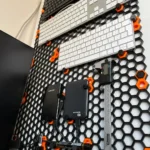
The Honeycomb Storage Wall is one popular 3d printed solution, with a variety of accessories people have designed for it. It was created by user RostaP on Printables. Being honeycomb, it uses less filament to cover a space than trying to print Pegboard or a Skadis equivalent.


Multiboard

Multiboard is another 3d printed solution. Multiboard has some advantages over HSW.

  • It can hold over 18x the weight
  • It has pegboard holes for pegboard accessories as well
  • Threads for a strong fit
  • Multiple mounting options

Multiboard is free, but has a paid model, unlike HSW. The paid model gives you extra support and early access to the creator’s designs, which he ultimately releases for free later on.

Where I Ended Up

I ended up with the Skadis system to fill the wall space above my desk, and extending behind my television, which is not wall mounted. It now takes up an entire section of my wall, opposite my couch, my shelving, the table I eat at, and my couch.

Why Skadis?

I printed a piece of multiboard, and a piece of honeycomb storage wall, and I do have plans for some small installation of that in a different location. But there were several reasons. To cover the same volume of wall with the printer I have, I would have had to print a minimum of 30 panels, which would be days of printing, not to mention the cost of the filament. I had this up in a day, and I’ve spent days just printing accessories.

What Is Up on the Wall Space?

A section is storing canisters, a large portion is reserved for display space of items that would otherwise not be displayed, and that leaves room for some of the miscellaneous on my desk.

Conclusion

Organization is a constant challenge, because you are constantly changing, your things are changing, and having modular and adaptable storage methods is definitely a way to address that. Tomorrow, after spending a week printing accessories, I could teach down the entire setup down to the bare boards and rearrange it. I can try things. I can print different accessories. I can change course. The wall behind my TV is no longer a dead zone, it is now a storage space. And I have more dead zones I can fill. Behind the monitors, which are on desk mounts. Under the desk. and more.

And ultimately, the black panels fit into the room without making it look like a workshop.

Published on January 27, 2025
Full Post
0 Responses

Monitor Ergonomics: Using Taller Monitor Mounts For Better Comfort

In pursuit of the perfect ergonomic desk setup, I’ve added deskmats, tried different keyboards, adjusted many things…and continue to do some. But recently, when I found myself visiting family, I was experiencing some discomfort in my back as I sat at the desk in their guest room and I decided to upgrade the ergonomics of my monitors.

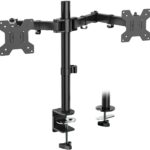
An image of the Wali Dual Monitor Mount
Wali Monitor Mount

I have multiple desks to  configure. Work, home, the guest room at relative’s homes where I sometimes work when I visit. This location is the one I visit the least, so I built a dual monitor setup there out of retired parts from my own desk. Older monitors I’d upgraded but were still good, and a new mount. But it was the mount I sought to replace. It was a standard dual mount monitor mount pole from Wali.

Upgrading Monitor Ergonomics

There are several inexpensive companies that make products I use for this….this one was from Wali. The pole is 16 inches long. That just doesn’t work for a taller individual…and this is not explained by most manufacturers. There is an almost identical one from Vivo.

I mention Vivo as it seems like Vivo and Wali are manufactured by the same factory. Their pole mounts have several features I like in a budget mount. For one, the plate is removable, can be attached to the back of the monitor, then slipped onto the arm and secured with a nut. Many of these arms require you to attach the monitor to the arm, which is definitely more difficult. I previously wrote about the simple Vivo Livestream Device Shelf Mount.

But I found, at my height, I was looking down at the monitor. Ergonomics experts say the top of the screen should be at or slightly below eye level. So, you can get the 32 inch tall version of the Wali. Or in my case, get the pole and reuse the arm. I actually have the 39 inch tall version in my apartment, but I also have more than one thing mounted to the arm, not just the monitor arm.  This height would also allow you to have a second screen on top of, as opposed to next to the first.  You can buy all sorts of accessories from Vivo and Wali…extra arms, laptop mounts for the arms, etc.

People also often use these taller poles to mount monitors in portrait mode…a configuration which has its fans.The idea is that it makes focusing on a part of the screen easier for reading. This is often in a dual monitor system, with one monitor oriented this way. There are also other considerations depending on how large your monitor is. Some have switched from the now ‘quaint’ dual monitor setup to a single ultra wide monitor…where they separate it in a similar way in digital space to the way you handle things when you have separate monitors. And that can also help with ergonomics.

Your monitor is supposed to be about arms length from your eyes, however the larger the viewing area is the farther away you might want to be from the screen. At the same time, your keyboard should be even with your elbows.

In the end, start at the recommended distance and height for your monitors. You may adjust over time as you find what is most comfortable for to get the best ergonomic monitor setup.


Published on December 31, 2024
Full Post
1 Response

Thoughts On Using a Mini PC On the Go

Recently, I was reading an article by Brady Snyder of XDA Developers about using a Mini PC on the go. It happened to match up with something I’d been thinking about. However, Brady’s premise involved the use of a battery pack. So…turning a Mini PC into a fully portable computer, instead of my goal…a computer I could set up anywhere. I’m thinking about this a lot right now because I just spent two weeks in a hotel for work, where I’d want more than I’d take on a short trip.

Dual portable monitors are coming down in price, but so are portable USB-C/HDMI single monitors that have good quality, and fit in a bag. I calculated that a USB-C to barrel connector could power everything off a USB-C PD charger. A 60-65% keyboard, portable mouse, and even a second monitor if needed can complete something that fits in a bag.

I stopped using laptops at home ages ago…because staring down at one started to hurt my neck. I could dock my laptop, but I found I rarely used the screen and mostly had it in the dock, so why not save money on the screen and get a better processor?

Over the years, I’ve tried many combinations of mobile setups. Different small keyboards. Different portable monitors. Etc. I’ve already decided on my next experiment, and will be putting out some notes about how different configurations work out. This includes:

  • Improved 60 or 65% keyboard options
  • Different portable monitors
  • Keeping the wiring simple.
  • Converting mini-PCs to USB-C PD using adapters
  • Travel micetrackballs
  • Storage devices

Curious what others thinl.

Published on March 1, 2024
Full Post
2 Responses

Finding the Right Outdoor Air Quality Monitor

In 2023, there were wildfires in Canada which blanketed the Northeastern United States with smoke. This marked a change in what parts of North America had to deal with this problem. This marked an overall increase in interest in air quality sensors.  I had looked into air quality sensors over the last few years, and there are a lot of options for indoor air quality sensors, but not quite so many for outdoor. Will talk a bit more about indoor air quality and how air quality is evaluated in a separate post.

My requirements were not achieved easily by most of the commercial options I explored. After failing to find one I liked, I built my own outdoor air quality sensor. It failed. So I rebuilt it…and it failed again…this time due to condensation somehow getting into the assembly. You can’t fully enclose the sensor because it needs air to flow over it, so there is this risk. So, after wasting two perfectly good sensors, I decided to fall back to something made by someone else as clearly I’m not that level of builder.

Requirements

  • Local access to the data as opposed to having to get data from my own network from a remote API. I feed everything into Weewx, so anything with local data can be fed that way.
  • User replaceable parts
  • More than just a PM2.5 sensor.


The Other Options

That initially took me to the Purpleair line of products. Purpleair offers a several sensors plus a community of enthusiasts and their devices can be polled directly. At the time I last looked, they had what they now call the Classic…which did not her user replaceable sensors…being as the PM5003 sensors they use only have a few years of lifespan, it meant replacing the entire unit at that point. Their new Flex and Zen models allow replacement of the sensors without having to replace the whole unit, but you have to get parts from them. And the unit is are just under $300 each.

I looked at Ecowitt as well. Ecowitt sensors are sold under several names in multiple countries. They have 3 air quality sensors, only one is rated for outdoor use, and is battery operated. I tried it, but on battery it has an update time of ten minutes…which created a variety of problems in my receiver missing the update. The indoor ones allow for USB power which increases the frequency of updates.

What I Picked

I explored a few additional choices and finally found something to try. A company in Thaland called AirGradient. AirGradient is an open-source platform with a strong community behind it. They launched their first outdoor design in December of 2022.

Pros

  • They design long lasting air quality monitors that are open source and open hardware…perfect for my philosophy on the matter.
  • The prices are reasonable, and if you don’t like them, you could in theory build it yourself.
  • They provide kits to various organizations.

Cons

  • 1-3 Weeks to Ship, and 2-3 weeks once shipped to most destinations

Their outdoor unit can be purchased as a DIY kit with all the parts or as a preassembled and tested unit. It consists of:

  • Dual PMS5003T air quality sensors. The T variation includes temperature and humidity sensors.
  • Based on an ESP32 C3 chip, which means you can install Esphome…the software platform I used for my homebrew sensors
  • A sensor slot for a third sensor, they offer a TVOC/NOx board for this, an SGP40
  • While the two PMS5003T sensors are for redundancy, one could be replaced by an CO2 sensor which they sell.

The fully assembled version includes either the SGP40 or the SGP40 plus a NDIR CO2 sensor included, as well as full testing of the unit with a report.

So, I’ve ordered one of these kits for $95 with all the parts. If it works, I may order more of their products. But, even if I never order from them again, I can get PMS5003 replacement sensors from a variety of vendors and keep the one I have going indefinitely. But, if it is as advertised, I feel another weeks long order coming on.

Their indoor sensor is equally impressive, and even includes an RGB LED system to act as an air quality ‘traffic light’, but will talk about that in future.


Published on January 2, 2024
Full Post
0 Responses

Secure Your Vacation Home with Remote Monitoring

Are you worried about the security of your vacation home while you’re away? With remote monitoring, you can have peace of mind knowing that your property is safe and secure. Let’s explore the benefits of remote surveillance for your vacation home and how it can help you protect your investment.

Why Remote Monitoring is Essential for Your Vacation Home

Protect Your Property from Burglars and Vandalism

Vacation home securityby Daniel Chen (https://unsplash.com/@dchestudio)

Vacation homes are often targets for burglars and vandals, especially during the off-season when they are left unoccupied. With remote monitoring, you can keep an eye on your property from anywhere in the world. This means you can quickly respond to any suspicious activity and alert the authorities if necessary.

Monitor for Fire and Water Damage

Aside from theft and vandalism, vacation homes are also at risk for fire and water damage. With remote monitoring, you can receive alerts if there is a fire or water leak in your home. This allows you to take immediate action and prevent further damage to your property.

Keep an Eye on Your Property Management Team

If you rent out your vacation home, you may have a property management team that takes care of the property while you’re away.

Remote monitoring allows you to oversee their actions and guarantee suitable maintenance of your property.

This can also help you identify any potential issues or concerns with your property management team.

How Remote Monitoring Works

Remote monitoring involves the use of cameras and sensors to keep an eye on your property. These devices are connected to a central monitoring system, which can be accessed through a mobile app or a web portal. This allows you to view live footage of your property and receive alerts if there is any suspicious activity.

Types of Remote Monitoring Devices

There are various types of devices that can be used for remote monitoring, including:

  • Security cameras: These can be placed both indoors and outdoors to capture footage of your property.
  • Motion sensors: These can detect movement and trigger an alert if there is any activity on your property.
  • Door and window sensors: These can alert you if there is any unauthorized entry into your vacation home.

Choosing the Right Remote Monitoring System

When choosing a remote monitoring system for your vacation home, there are a few factors to consider:

  • Coverage: Make sure the system covers all areas of your property that you want to monitor.
  • Connectivity: The system should have a reliable internet connection to ensure that you can access it from anywhere.
  • Mobile app or web portal: Decide which option is more convenient for you to access the system.
  • Cost: Consider the upfront cost of the system as well as any ongoing fees for monitoring services.

Benefits of Remote Monitoring for Your Vacation Home

Peace of Mind

Remote monitoring appby Annie Spratt (https://unsplash.com/@anniespratt)

The biggest benefit of remote monitoring for your vacation home is the peace of mind it provides. You can relax and enjoy your vacation knowing that your property is being monitored and any issues will be addressed immediately.

Cost Savings

Investing in a remote monitoring system can also save you money in the long run. By preventing theft, vandalism, and damage to your property, you can avoid costly repairs and replacements.

Insurance Discounts

Many insurance companies offer discounts for homes with remote monitoring systems. This is because these systems can help prevent and mitigate potential damage to your property, reducing the risk for insurance companies.

Remote Access

With remote monitoring, you can access your vacation home from anywhere in the world. This means you can check in on your property at any time and receive alerts if there is any suspicious activity.

How to Set Up Remote Monitoring for Your Vacation Home

Step 1: Choose a Remote Monitoring System

The first step is to choose a remote monitoring system that meets your needs and budget. Do your research and read reviews to find the best option for your vacation home.

Step 2: Install the Devices

Once you have your system, you can install the devices in and around your vacation home. Make sure to follow the manufacturer’s instructions for proper installation.

Step 3: Connect to the Monitoring System

Next, you’ll need to connect your devices to the central monitoring system. This may involve downloading a mobile app or setting up a web portal account.

Step 4: Test the System

Before leaving your vacation home, make sure to test the system to ensure that it is working properly. This will give you peace of mind knowing that your property is being monitored while you’re away.

Real-World Examples of Remote Monitoring for Vacation Homes

Example 1: The Smith Family

The Smith family owns a vacation home in a remote area. They were concerned about the security of their property while they were away, so they invested in a remote monitoring system. One day, they received an alert on their phone that there was motion detected on their property. They were able to quickly access the live footage and saw that there were two individuals attempting to break into their home. The Smiths immediately called the authorities, and the burglars were caught in the act.

Example 2: The Johnson Family

The Johnson family rents out their vacation home during the off-season. They wanted to keep an eye on their property and ensure that their guests were following the rules. With remote monitoring, they were able to monitor their property management team and ensure that their guests were not causing any damage to their home. This helped them maintain the value of their property and avoid any potential issues with their guests.

Conclusion

Remote monitoring is an essential tool for securing your vacation home. With the ability to monitor your property from anywhere in the world, you can have peace of mind knowing that your investment is safe and secure. By choosing the right system and setting it up properly, you can enjoy your vacation without worrying about the security of your vacation home.

Published on December 27, 2023
Full Post
1 Response

Home Automation Obsession: The Home Assistant Green

Years ago, as part of this series, I started to discuss why my preferred home automation platform is Home Assistant. The fact that it merges multiple different platforms together into a seamless whole means you don’t have to pick a side, per se. The most popular platform people run Home Assistant on is a Raspberry Pi. I’ve always had issues, much as I love the Pi, with the fact that it uses a microSD card for storing the operating system and data….as those cards would regularly fail on me.

But, despite the process of installation therefore was, insert microSD card into computer, write to it, and then insert in Pi…that was still a higher level than many people were willing to go. So, the Home Assistant team tried a few different iterations of hardware before they got to one meant for someone who just wants to plug and play. The Home Assistant Green. It is $99 MSRP, and you can add a USB dongle to support Zigbee, Z-Wave, or Thread radios. It has built in storage for the operating system, It does not have built-in wifi though, but your home automation hub is probably more reliable wired.

After you plug it in, you can configure it with a web browser or a mobile app. And since it can be easily upgraded with the latest version of Home Assistant, you’ll continue to get new integrations with various platforms and technology on your network.

Published on December 24, 2023
Full Post
0 Responses

Peace of Mind Anywhere: Setting Up Remote Monitoring for Your Vacation Home

Owning a vacation home is a dream come true, but ensuring its safety and well-being while you’re away requires strategic planning. Thanks to modern technology, remote monitoring systems allow you to keep a watchful eye on your property from anywhere in the world. In this blog post, we’ll guide you through the process of setting up remote monitoring for your vacation home, providing you with the peace of mind you deserve.

Assess Your Monitoring Needs: Tailoring the Solution

Start by assessing your specific monitoring needs. Identify areas of concern, such as security, environmental conditions, or potential maintenance issues. This will help you choose the right combination of devices and services to create a comprehensive remote monitoring solution.

Choose a Security System: Guarding Your Sanctuary

Investing in a reliable security system is the cornerstone of remote monitoring. Opt for a system with features like motion detection, door/window sensors, and surveillance cameras. Many modern security systems offer remote access through dedicated apps, enabling you to receive real-time alerts and view live footage from your vacation home.

Smart Environmental Sensors: Protecting Against the Elements

Environmental sensors add an extra layer of protection by monitoring conditions like temperature, humidity, and water leaks. These sensors can help prevent potential damage from issues like frozen pipes or leaks, allowing you to address problems promptly, even when you’re miles away.

Smart Locks: Secure Access Control

Upgrade your vacation home’s security with smart locks. These devices enable you to control access remotely, providing temporary digital keys for guests or maintenance personnel. Smart locks also allow you to monitor when doors are opened or closed, enhancing security and control.

Wi-Fi Cameras: Eyes on Every Corner

Strategically place Wi-Fi cameras in key areas to visually monitor your vacation home. Modern cameras offer high-resolution footage, night vision, and two-way communication. Choose weather-resistant options for outdoor use, ensuring comprehensive coverage of your property.

Smart Lighting: Deterrence through Automation

Use smart lighting to create the illusion of an occupied home, deterring potential intruders. Timed or remotely controlled lights can mimic your regular usage patterns, adding an extra layer of security.

Remote Monitoring Apps: Centralized Control

Select a remote monitoring app or platform that integrates with your chosen devices. Many security systems and smart home devices offer dedicated apps that provide a centralized hub for monitoring and controlling your vacation home. Ensure compatibility and ease of use to streamline the monitoring process.

Internet Connectivity: Robust and Reliable

A stable internet connection is crucial for effective remote monitoring. Ensure that your vacation home has reliable internet connectivity, and consider backup solutions like cellular-based routers or Wi-Fi extenders to maintain connectivity in case of outages.

Power Backup Solutions: Uninterrupted Monitoring

Incorporate power backup solutions to ensure continuous monitoring, especially in areas prone to power outages. Battery backups or generators can keep your remote monitoring devices operational, providing uninterrupted protection for your vacation home.

Periodic Testing: Confirming Reliability

Regularly test your remote monitoring system to confirm its reliability. Check sensors, cameras, and connectivity to address any issues promptly. Periodic testing ensures that your monitoring system is always ready to deliver the protection and peace of mind you expect.

A Watchful Eye, Anytime, Anywhere

Setting up remote monitoring for your vacation home empowers you with the ability to protect and monitor your property, regardless of your physical location. By combining security systems, environmental sensors, and smart devices with reliable connectivity, you create a comprehensive solution that ensures the safety and well-being of your vacation haven. Embrace the convenience and peace of mind that remote monitoring provides, and enjoy your time away, knowing that your vacation home is in good hands—even when those hands are miles away

Published on December 12, 2023
Full Post
0 Responses

Setting up RTL_433 to Monitor Sensors

RTL_433 is an open source project hosted on GitHub. While the name implies it only handles devices on the 433MHz band, it also supports devices on 868 MHz, 315 MHz, 345 MHz, and 915 MHz bands. Not only are there presets to decode popular devices, there are instructions to write decoding profiles for unsupported devices.

Once installed, you can customize your /etc/rtl_433.conf to output to MQTT by adding:

output mqtt://localhost:1883,user=user,pass=password,retain=0

Customizing the hostname, port, username, and password for your MQTT broker. RTL_433 outputs event json and state json. So…you can monitor events as they happen or the state of individual devices.

I was surprised at how many devices I was able to pick up that weren’t mine, and ultimately filtered out devices by removing protocols from the rtl_433.conf file. I’m picking up not only my Acurite weather sensor, but other people’s temperature sensors, TPMS(tire pressure monitoring sensors), and more. I can feed my sensors(not the ones I accidentally pick up), into WeeWX(my weather system), and Home Assistant(my home automation system).


Published on December 8, 2023
Full Post
0 Responses

Updating the Sensors

The last time I added to this series was a few years ago. But a new writer wrote something on WeeWX on the site, and the technology has changed, so I decided to update what I had done. I moved from WeeWX-sdr over to WeeWX-MQTTSubscribe. MQTTSubscribe is actively developed by Rich Bell, and he is very responsive to issues. The extension can act as a driver or a service…so either as your primary source of weather data, or to add additional weather data.

The other advantage is that RTL_433 can run as a standalone service and now supports publishing to MQTT. So, it can decode my weather sensors as well as my 433MHz leak sensors. Oddly enough, I also seem to be picking up someone’s tire pressure sensors as well.

Elsewhere, I assembled custom sensors to get additional readings, running ESPhome, also sending their data via MQTT and being integrated by the same extension to WeeWX. This includes barometric pressure and particulates.

This means my WeeWX installation is much more robust, and modular. This is mirrored in my Home Assistant installation, where I’ve increasingly divided off some subsystems to act more independently.


Published on December 6, 2023
Full Post

Get New Posts By Email