Gadget Wisdom

Category: Going Green

0 Responses

Switching to Induction Cooking

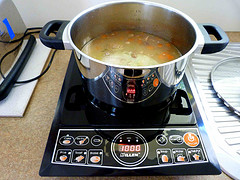
Induction cooking
Induction cooking (Photo credit: Sandy Austin)

Induction cooking is the wave of the future. We say this jokingly. Patents on the idea date back a century, and demonstration models were shown to the public as early as 1950, however, the idea has never quite caught on.

In recent years, however, there has been a slight increase in interest in this technology. A traditional electric burner heats a coil, on which a cooking vessel is placed. An induction cooktop also uses electricity, but it runs current through an electric coil, creating a magnetic field. When the cookware is brought close to it, it induces an electric current in the pot, which dissipates as heat.

Like some newer electric stoves, the top of an  induction burner is a glass-ceramic top. Because of the design, they are often safer than other cooktops. There are no open flames or explosive substances, as in gas. And the surface can be touched shortly after the cookware is removed, as it is much more energy efficient than other cooking methos..

There are limitations though. As induction works on the cookware, you need compatible cookware…specifically magnetic. We checked our existing cookware using a refrigerator magnet. If it doesn’t stick, or does so weakly, it is not sufficient. Stainless steel and iron cookware is ideal, aluminum and copper will not work. Being as your results will vary, you can get cookware that is labelled as induction ready. For example, we found a lot at Ikea at a reasonable price.

Covering that, the cooking properties of induction are most similar to gas. When you change the temperature, it happens immediately. There isn’t a gradual rise as there is in traditional electric cooking. It is why many chefs and cooking enthusiasts love it.

Standing at an induction range, even great cooks must rethink their basic moves. The heat comes on so fast that anyone used to pouring oil in a pan and chopping the last of the onions while it heats is making a big mistake. Learning to control heat levels with numbered dials is like trying to master a new language.”

It makes it hard to make an omelette, and a learning curve. But we are slowly getting there.

If you are interested, a single plug-in burner can be had for between $50 and $100, like the one below.

[asa]B0045QEPY[/asa]


Published on February 25, 2012
Full Post
0 Responses

The Future is Brighter with LED Light Bulbs

We’ve been gradually, as the prices dropped, been converting our home to LED lightbulbs.

A few years ago, we jumped on the CFL bandwagon. It was one of our earliest stories on this blog, back in 2006. And we went hunting for dimmable CFLS.

We were convinced at the time, that CFLs would continue to improve, as would the dimmable type. However, dimmable CFLs burn out, and don’t quite have the dimming we’d like.

The common complaint about many CFLs is that they do not come up at full brightness, and the color output doesn’t quite match incandescents.

LEDs, however, have none of these shortcomings, although they can be highly directional light. They use less energy, they are typical dimmable, their color performance is more like an incandescent bulb and they last longer. The last longer part is relative, however.

Early models haven’t lived up to their longevity, by most reports. We haven’t had the decade to test them out, but Gadget Wisdom Headquarters is now 90% LED powered. The holdouts had been PAR20 and PAR30 bulbs, which were still $30 a piece. But the local Costco is selling 75 watt equivalent PAR30s for only $15. We got two to test, and will be expanding.

We also have a fixture that uses bulbs with a E12/candelabra base, and it is harder to find 40-60 watt equivalents with this base. They will come, we’re certain. They are hard to find in CFLs as well.

In several rooms, we’ve installed LED strip lighting from Ikea. They offer two models, the more economical Ledberg, and the more flexible Dioder. The Ledberg is one long strip, the Dioder can be installed as four separate strips, and other configurations. It is perfect for display areas, bias lighting, and undercabinet needs.

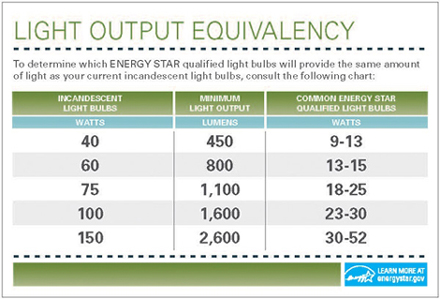
One of the biggest problems we’ve had was solved recently, trying to understand lumens to traditional watt ratings. The above diagram was shown to us, which has been very useful.

If you are reluctant to spend a lot, you may be able to justified a few strategically placed $10 LED bulbs in certain fixtures, which is the way we started. Either way, it is where we are all going eventually

Published on February 25, 2012
Full Post
0 Responses

Back to the Toilet Technology – Part 3

Nearly two years ago, we took a special trip to the Gadget Wisdom bathroom to discuss dual flush conversion. We came back a few months later to review the MJSI Dual Flush Converter.

At the time we commented, “The nice thing about this design is that it does not require removal of the toilet tank to install. If you have to go as far as to remove the toilet tank, you might as well buy a new toilet with integrated dual flush, which we recommend if you have a really old toilet.

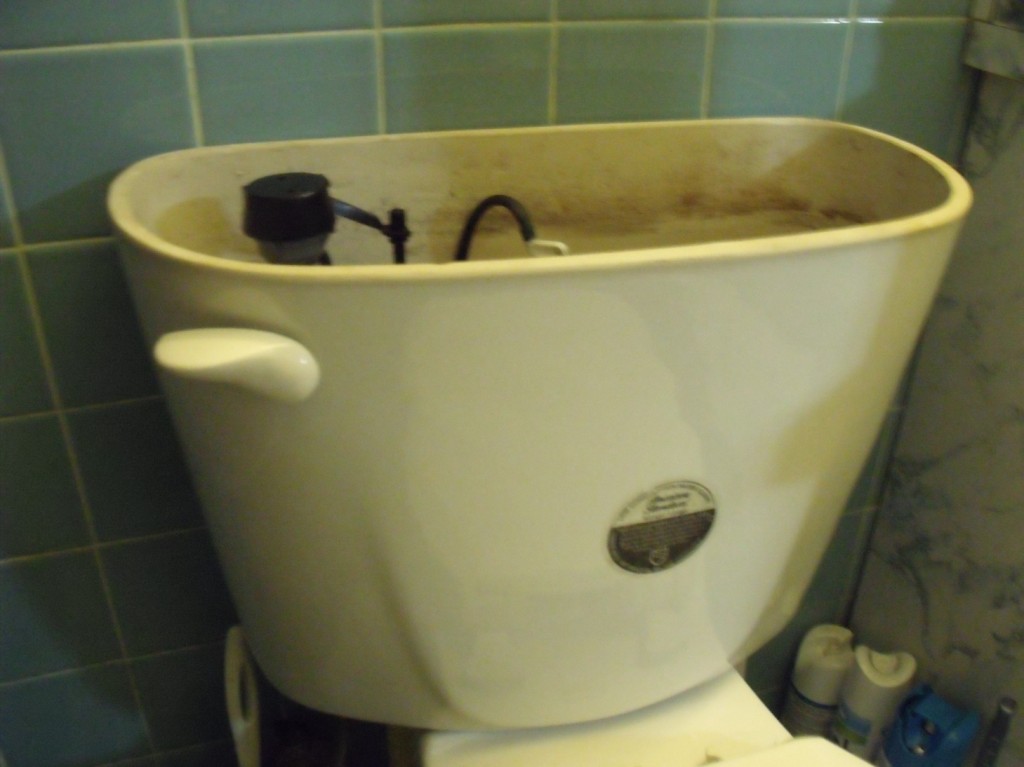
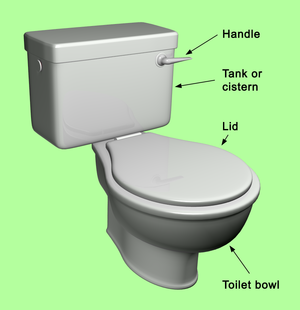
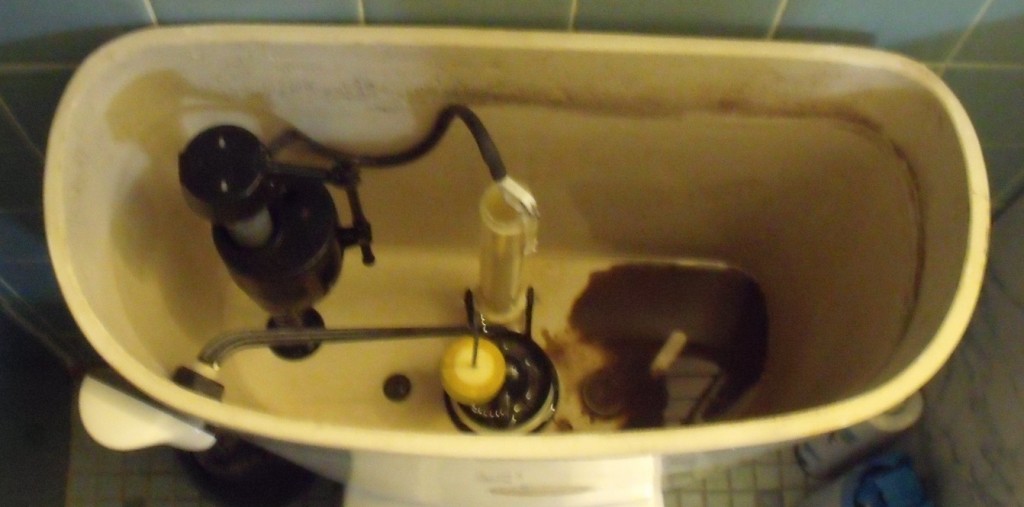
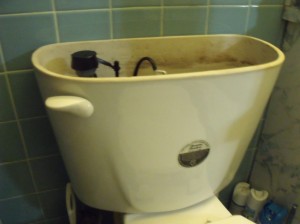
Flush with our previous successes, despite not being professional plumbers, when our toilet tank started dripping, we decided it was time to dive in again. While there are one piece toilets, most toilets are two piece, the bowl and the tank. The tank is attached to the bowl using bolts and rubber washers that secure the two together, along with a gasket. When these start to fail, they can be replaced.

The replacement parts cost us seven dollars at the local hardware store. But as we had to dismantle the toilet tank anyway, we decided it was time to replace the MJSI Hydroright Drop-In Dual Flush converter.

[asa]B002NKRR7Y[/asa]

The product served us well for two years, but did have two design flaws we knew from the beginning. One, the item attaches around the overflow tube with a plastic zip tie. This did not stay on, and that created problems. There were common complaints about the quality of the gasket. We also had issues with the toilet running, forcing us to press the button a few times, similar to jiggling the handle of a conventional toilet.

So, because of these two design issues, the item’s usefulness degraded over time, to the point it started to waste water, defeating the purpose. So we opened up our browser to look for a new item.

We looked at several items, and decided to give the products at Being Water a chance. Being Water is a small plumbing company based on California. They do make a drop-in converter, similar to the HydroRight. However, it contains several design improvements. Instead of zip tie, it uses a removable base that attaches to the overflow tube with a wing nut. then the unit twists and locks into the base.

[asa]B006N35R8S[/asa]

The older your toilet is, the more likely it is in need of new internals. We had discussed another MJSI product, the HydroClean fill water saving valve. This allows better adjustment of the amount of water your tank fills up with initially, as well as offering a sprayer that sits at the bottom of the tank and keeps dirt and debris from accumulating. We’ve had no issue with this product since we installed it.

[asa]B000L87RKC[/asa]

Back to Being Water, if, in our case, you have to remove your toilet tank anyway, you might as well go for the tank removal style dual flush kit. This replaces your flush valve and overflow tube. The new flush valve has the locking mechanism built in to accommodate the Being Water dual flush converter. Toilet bowl cleaners may, over time, degrade the plastic of these valves, so you may be better off with manual cleaning and the HydroClean valve we installed. Your toilet won’t have blue water though, if that is something you like.

The tank removal style is thus better in the long term. Being Water provides videos demonstrating the step by step installation, and detailed PDFs explaining the procedure. When you purchase the item, in the interest of not wasting material, there is a minimum in the box.

[asa]B002IYNBH0[/asa]

The company sells a complete kit that includes their dual flush converter, a replacement water saving fill valve, and a set of replacement bolts and gasket..everything you need. We just ordered the converter, but it included a bowl fill adjustment which allows you to adjust the water usage even more. We got our bolts at the local hardware store. Their kit includes a handle. Left for full flush, right for half flush, which is an improvement over the button of the HydroRight. you can get a button style from Being Water if you wish.

In the end, we’re very happy with the Being Water unit. We did have to call in someone to help, but that was due to an issue with the way our toilet bolts were originally installed. the installation process was very easy.


Published on February 25, 2012
Full Post
0 Responses

Review: Home Water Filtration

3 Baskets of Bottled Water - Starbucks
3 Baskets of Bottled Water - Starbucks (Photo credit: djwaldow)

Time after time, we start research all sorts of gadgets, from technology to productivity tools to…well, home tech.

This week, we are talking about water filtration filters. Many people buy bottled water. We’re not sure why they do this. Some bottled water is actually tap water. Tap water is actually more regulated than bottled water.

Bottled water isn’t a good value. The cost per bottle is significantly higher than a that of tap water. Bottled water actually has a higher per gallon markup than gasoline, and takes substantially fewer resources to produce. And it must be stored in bottles. which are estimated to total 1.5 million tons of plastic waste each year.

If you don’t like the taste of the local water supply, that is what filtering is for. If you are concerned about contaminants, that is what water filtration is for. Assuming you get water from your municipal water service, this water is already treated to a degree, but filtering in the house can give you a better experience.

Home water filtration began to become popular with the pitcher filter. The quality levels of these can vary, but a single pitcher is usually not enough water for a whole family. We migrated from this to the faucet filter. In edition to not being aesthetically pleasing, these filters can slow water flow significantly.

We chose to go with the under-sink filtration option. The first problem with these filters is that they require, if not a plumber, someone who feels comfortable with plumbing. You can either filter the cold water running through your faucet, or add a dedicated spigot, which may require drilling a hole. Our sink already had a cutout, so we went for the spigot option.

In reading review after review of these types of systems, the most common issues stem from installation. The systems leak, sometimes because of improper installation and because many manufacturers include cheaper plastic parts instead of heavier duty fittings and piping. For this reason, we brought in a plumber to do the job, and empowered and encouraged him to replace all parts in the box with more secure fittings, and to add an extra shutoff valve in the event there was a leak. This may be overkill, but the last time we had a leak under our sink, it turned into a mold issue.

This is probably the best lesson we can give about these filters. Go to your local hardware store and buy better quality fittings than any of these filters supply. The price shouldn’t add much to the bottom line. And add an extra shutoff valve, which will assist when you replace your filters, if nothing else. The cost of a valve is minimal.

There are two other types of filters we didn’t mention. A whole-house filter can remove some basic contaminants, such as sediment and rust, and are probably better if you have a more serious issue with these contaminants. Reverse osmosis filters use a tank under the sink as well as filters, and are the only type that can remove arsenic. However, they are slow, take up a lot of space and waste a lot of water.

We opted for a lesser known brand, but well thought of brand, based on a combination of reviews and research.

[asa]B002XISS2Y[/asa]

The above is a three-stage filter. The price was reasonable compared to most two-stage filters, and the mail-order price for a years supply of filters was reasonable. It contains no electronic filter change reminder, so we added a recurring reminder to Google Calendar.

The same company does offer a 1 and 2 stage filter as well, but with the installation effort being equal, we opted for the best decision long-term. You will probably be served reasonably well by filters from a variety of different companies, but do your research.

[asa]B0018MXH04[/asa]

[asa]B0018MVZJE[/asa]


Published on February 15, 2012
Full Post
1 Response

A Few Quick Thoughts on Thermostats

Energy StarWhen we started reading about the issue of thermostats, someone commented to us that programmable thermostats were impossible to use.We can’t seem to get this right ourselves. So, let’s check in with the experts.

We started with Energystar:

For heat, the presets are:

  • Wake and evening: less than or equal to 70 degrees
  • Day and Sleep: Setback at least 8 degrees

Keep your thermostat set at energy saving points for long periods of time(at least 8 hours). This should include during the day when no one is home, and throughout the night after bedtime. You use more energy if you constantly override the pre-programmed settings. Cranking your thermostats up or down will not heat or cool your house any faster.

Energysavers, also a government site, recommends setting your thermostat back 10-15 degrees, setting it to 68 when you are awake.

It is not an easy thing. We’ve covered what the government recommends for programmable thermostats, but what else is there? Do you want a touchscreen thermostat? Do you even need a programmable, despite what is recommended?

And let’s go the ultimate in control…a wi-fi enabled thermostat. You can control your thermostat from anywhere in the world. But, unless you are in frequent need to change your settings on the go, this seems unnecessary. The new NEST thermostat is actually a wi-fi enabled learning thermostat that learns from your habits and from weather forecasts to make adjustments.

But, as nice as NEST is, it doesn’t seem like something we’d get. We are upgrading our thermostat after this reading, for a different reason. Programmable thermostats come in a few varieties. 7-day programmable, 5-2, 5-1-1, etc, based on the complexity of the program. We are replacing ours to go from a 5-2 to a 5-1-1 with a special vacation mode for when we go away, to override the normal program. And that upgrade cost us less than $40.

What are your thoughts? Do you have trouble setting your thermostat? Did you give up on even trying?


Published on January 18, 2012
Full Post
0 Responses

Back to the Toilet Technology

toilet wc
Image via Wikipedia

In June, we reviewed the MJSI HydroRight Dual Flush converter, and discussed the principles of toilet technology. Amazon has some good deals on two pieces of MJSI technology. One is, of course, the Dual Flush Converter. The other is the HydroClean Water-Saving toilet Fill Valve.

[asa]B000L87RKC[/asa]

So, we already know that the HydroRight Dual Flush converter is a drop-in converter to turn your toilet into a water-saving dual flush. Of course, you need a concentric-float toilet fill valve, and that is where the HydroClean valve comes in as a perfect pair to the HydroRight.

The water-saving advantages of the HyroClean are that it is adjustable, and allows you to not waste water in your flush, so even if you are reluctant to go Dual Flush, this will limit wasted water per flush. It even has a cleaning tube to clean the gunk off the bottom of your tank.

[asa]B002NKRR7Y[/asa]

We’re thinking of pairing this with our HydroRight in order to improve water efficiency, as we still think we are wasting water on our toilet. Best of all, it is not an expensive improvement.

And it is now legal in New York City, as we discovered it wasn’t when we originally installed it.

Published on November 28, 2010
Full Post
0 Responses

LED Bulbs Coming into their Own?

100-240V 2W (15W equivalent) E27 Osram LED Lig...
Image via Wikipedia

We bought our first LED light bulb a few months ago and put it into our desk lamp. The suspicious yet understandable issue with LED lightbulbs is lumens.

We aren’t used to lumens. We’re used to watts. Even though they aren’t accurate. CFL lightbulbs are labeled with lumens, which indicate light output, but they also note the equivalent in a traditional incandescent bulb because that is what we understand. Those notes are suspiciously missing from the LED packaging we see.

Even CNET’s Green Tech, and its editor, Martin LaMonica agrees with us.  But, he advises that is changing. He tried some samples from Lighting Science Group, which manufactures many of the LED bulbs for Home Depot‘s Ecosmart line. The bulbs are available on the Home Depot website, and should be in stores sometime this month.

But these bulbs which are getting brighter and more capable of what we demand of them are not cheap. Twenty to thirty-five dollars for a single light bulb is a bit much. The savings over time are a consideration, but the price will have to drop before it becomes a mainstream option.

The Department of Energy is set to unveil a program to help shoppers understand these new options. They will have a new label called Lighting Facts. It certainly will help if all bulbs use the same designations. We guess it is time to internalize the lumens system.

In the meantime, we have added some Sylvania ACCENT LED bulbs to a bathroom. Three produce enough to shine in this small room. But we knew that going in that they weren’t incredibly bright. We compared the lumens to the package of CFLs next to them at the store.

The concern is that the information isn’t getting to us. The New York Times reports that the Federal Trade Commission is suing Lights of America for misrepresenting the light output and life expectancy of their LED lightbulbs. For example, the company claimed one of its bulbs could replace a 40-watt incandescent, which typically puts out 400 lumens. They found the bulb in question only produced 74 lumens. In addition, they claimed another bulb would last 30,000 hours, but lost 80% of its light output after only 1,000 hours.

The company responded by stating that the bulbs that are the focus of the suit were introduced before formal standards were established for LED’s. Furthermore, they advise that they already responded by removing the equivalency claims from its packaging…which explains why the useful comparison of equivalency is omitted from LED packaging.

In the end, we’ll continue to experiment with these bulbs. Why? Because they last longer, use less electricity, and like the CFLs of a few years ago, will continue to improve. Why? Because the government and the public demands it.

Published on September 15, 2010
Full Post
0 Responses

Review: MJSI Hydroright Dual Flush Converter

After writing about a dual flush retrofit kit, we became enthused about the idea of installing one of these ourselves. We don’t have a plumber on staff, so our intrepid editor was forced to play with his own toilet. Please excuse if our terminology falls short as we try to explain basic toilet technology.

Our toilet is a 1.6 Gallon model installed around 2000. A traditional toilet uses a simple system. The ballcock floats on top of the water. when the tank is emptied, the ballcock lowers, thus activating the fill valve until the ballcock is lifted up to the off position by the water. The fill valve on this toilet was replaced with a newer, more reliable design, the concentric-float fill valve, and thus there is no ballcock. The concentric design is required for this retrofit kit.

The model is the MJSI HYR270 HydroRight Drop-In Dual Flush Converter, purchased at a local Home Depot. The nice thing about this design is that it does not require removal of the toilet tank to install. If you have to go as far as to remove the toilet tank, you might as well buy a new toilet with integrated dual flush, which we recommend if you have a really old toilet.

If you need to replace your fill valve with a concentric float one, which as mentioned is required, MJSI makes an adjustable one that can also help you save water, and sometimes it is better to get components from the same manufacturer, as you can be reasonably certain they work together.

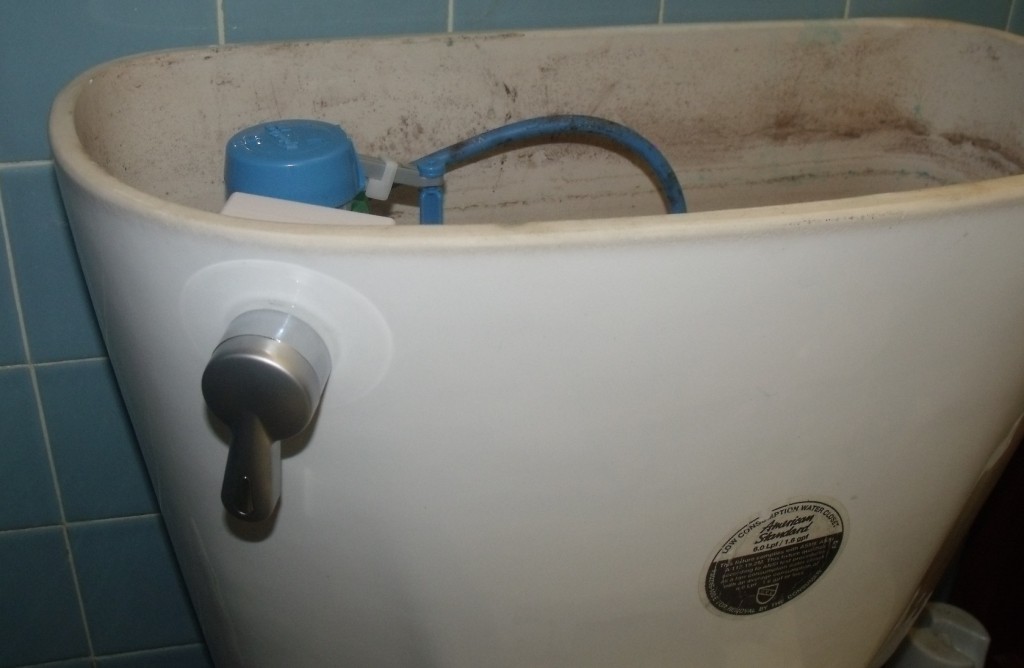
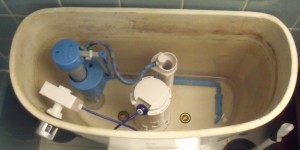
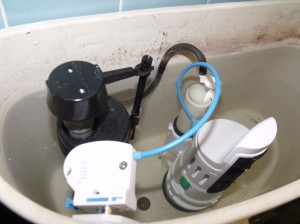
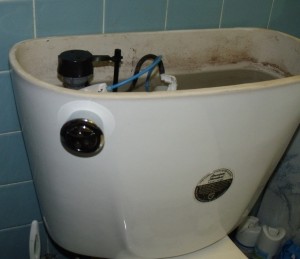
As you can see in the image, this toilet has a typical flapper. The flapper is a rubber stopper that is connected to the handle by a chain. When you press the handle, it pulls up, allowing water to empty from tank to bowl. For this retrofit, we will be replacing the flapper with the retrofit unit.

Installation was surprisingly easy. First we shut off the water and drained the tank. Then we removed the handle and the flapper and set them inside in case the mechanism did not work. The retrofit mechanism slips in place of the flapper and is a tall unit, so you need sufficient clearance. It is then secured with a zip tie in the back to the overflow tube. The overflow tube is next to the drain(where the flapper is normally inserted), and serves the purpose of preventing the tank from overflowing.

A button is then inserted into the hole where the handle once was, and attached to the control box, which is connected to the retrofit unit by a blue cable(as pictured)

Then, after following some calibration tests, your toilet is ready to be more water efficient. Fun, huh? The actual installation only took about twenty minutes, and we’re sure it would be faster the second time. We’ve given some time to test and the toilet is running without problem. The button mechanism has a low flush for liquid waste and a high flush for solid waste.

The only problem is making sure guest know how to properly use the new mechanism, but that is fairly easy to explain. So, for less than thirty dollars, we’ve committed to water savings, efficiency…and it makes for an interesting conversation piece.

Any questions?

[asa]B002NKRR7Y[/asa]

Published on June 2, 2010
Full Post
0 Responses

LED Lightbulbs That Don’t Stink Coming Soon

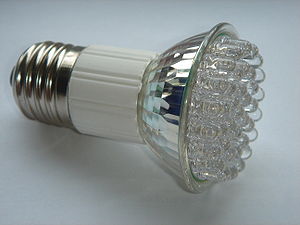
LED lamp with E27 Edison screw.
Image via Wikipedia

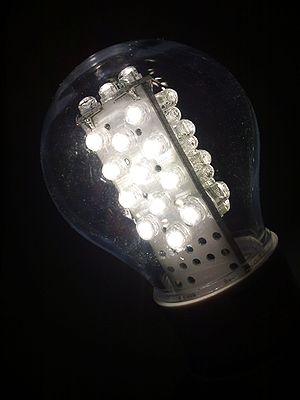
We love the idea of LED lightbulbs. Like so many technologies, CFLs just started to get good, and adopted by the mainstream when the latest thing comes. LED lightbulbs last over ten times longer, use less electricity, and…are dim. Very very dim.

We can’t even find equivalency on most LED bulb packages we’ve seen. We’re used to CFLs being categorized as the equivalent of a specific watt incandescent. Those stats are suspiciously missing from LED packaging. They use the more accurate lumens…but how many people have a sense of what a lumen is?

We checked the lumens on a  CFL and compared them to the LED and found it…again. DIM.

The New York Times reports that Osram Sylvania’s  Ultra bulb, available in August, and Philips’s EnduraLED, which will be in stores in the fourth quarter, will use just 12 watts of power to equal the light output of a 60-watt bulb. The 60-watt bulb is the standard of light bulbs.

The prices for these bulbs will be $30-$60…and hopefully in 2 or 3 years, down to $20, which is more expensive than a CFL bulb…but it does last ten times longer, uses less electricity, and doesn’t have some of the CFL issues, such as mercury usage.

Perhaps we’re skeptical, but we’ll believe it when we see it. We’ll gladly be early adopters, and hope LED bulbs get to where we’d invest.

Published on May 17, 2010
Full Post
0 Responses

Turning Off Your Lights Part II – Night Lights and Light Sensors

Image showing both a fluorescent and an incand...
Image via Wikipedia

Last time, we discussed the simple and easy to implement technologies of Occupancy Sensors and Countdown Timers to control lights. After we posted it, we missed one simple and overlooked item we use. Nightlights.

We’re not talking about lights that are kept on so small children are not afraid of the dark. We use nightlights to avoid tripping over something or falling down the stairs in the middle of the night. The simplest is a dim light embedded in the light switch, so it can be seen in the middle of the night. So, how can we save power by keeping lights on?

It is a matter of tendency. We know many people who leave their hall lights on all night. Nightlights are also the most popular use of the currently most energy efficient bulbs, the LED. They aren’t quite ready for primetime, due to their high cost in these forms, but they have come into their own for functions like undercabinet lighting and nightlights.

The second part of the equation is the light sensor. Like the motion sensor we motioned earlier, the light sensor turns on the light when the room, or the outside is dark. This is often used for outside lighting, and for nightlights, but you can, in theory, hook it up to any light.

By putting these sensors together with the countdown timers and occupancy sensors, you can start planning a setup for your home. Next time, we’ll begin talking about advanced light control systems and home automation. Admittedly, such systems are not cheap. Occupancy sesnsors and such are less expensive, but still require investment for a whole home plan.

Writing this post has inspired us to add more of these simple technologies to our own residence. We have been experimenting with home automation for years, but there are definitely issues, especially the cost. We’ll address this more in the next part of our series.

Published on April 26, 2010
Full Post

Get New Posts By Email